

A well-organized navigation menu is essential for a user-friendly website.
It helps visitors find the content they are looking for, improving overall user experience and encouraging them to stay longer on your site.
In this guide, I will walk beginners through creating and managing a navigation menu using the WordPress block editor.
By the end of the post, you will have a functional and aesthetically pleasing menu that enhances your site’s usability.
Prerequisites
Before we create the navigation menu, ensure you have the necessary pages set up.
Common pages to include in your menu are:
- Home: The main landing page of your website.
- About Us: A page that provides information about you or your business.
- Contact: A page with your contact details and a form for visitors to reach out to you.
Having these pages ready will make building your menu smoother and more efficient.
Creating Pages for Your Menu
To create a navigation menu, you must have the pages you want to include ready. Follow these steps to create new pages in WordPress:
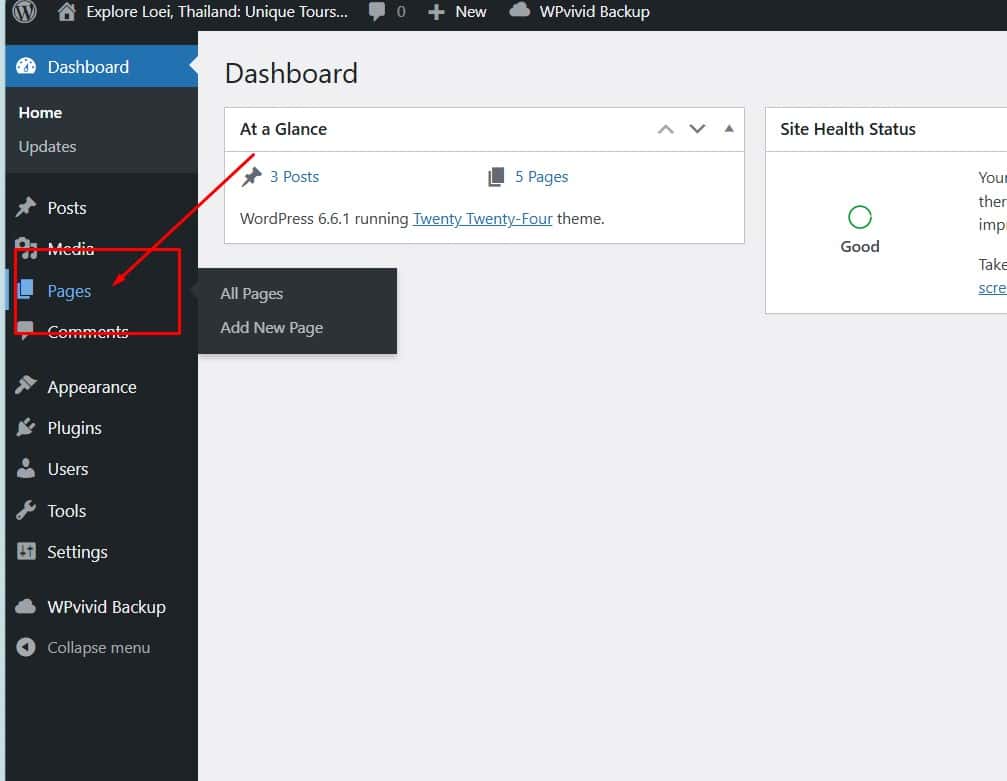
Access the Pages Section
Log in to your WordPress admin area.
In the left-hand menu, click on Pages.
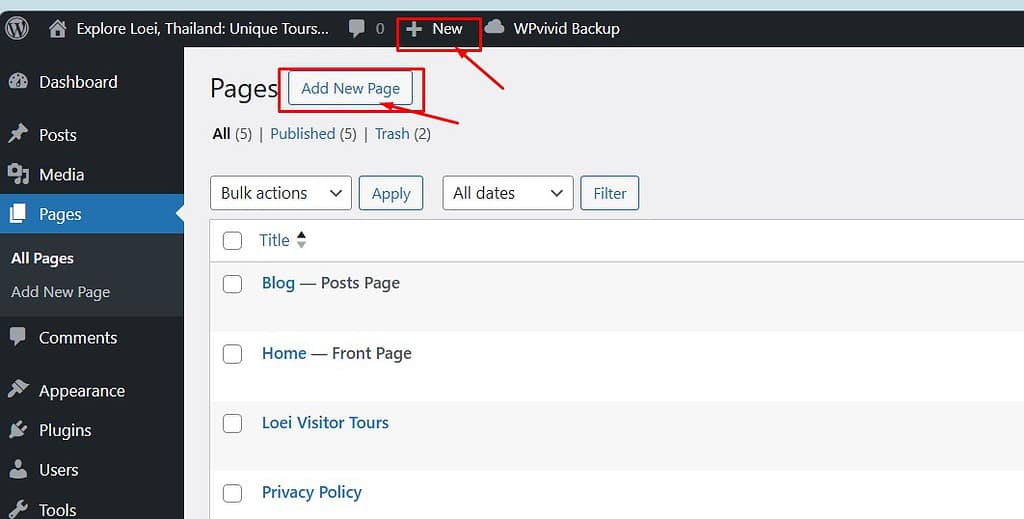
Add a New Page
Click the Add New Post button at the top or the New icon in the toolbar.
Enter Page Details
This will open the page editor.
Enter the title of your new page, such as “Home,” “About Us,” or “Contact.”
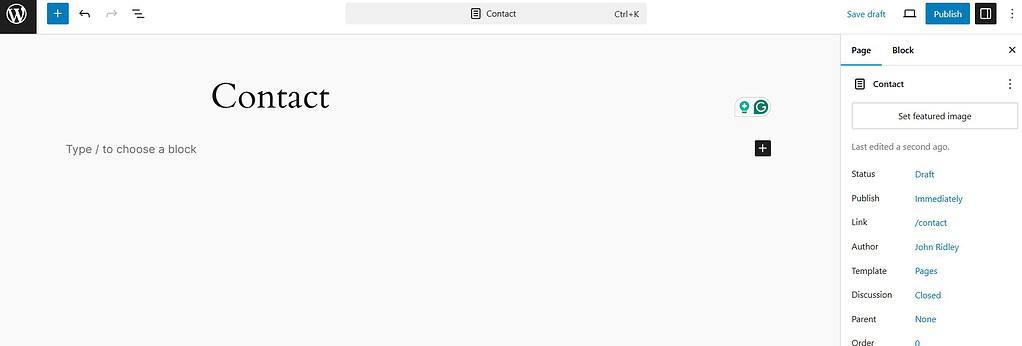
Add any desired content using the Gutenberg blocks.
For simplicity, you can start with just the title and basic information.
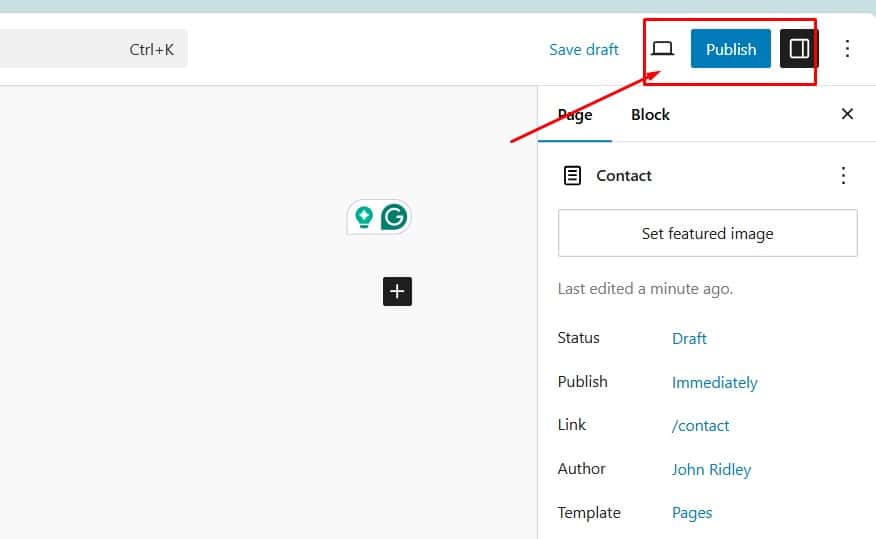
Publish the Page
Once you’ve added your content, click the Publish button in the top right corner to make the page live.
Repeat
Repeat these steps for each page you want to include in your menu.
Having these pages set up streamlines building your navigation menu.
Accessing the Site Editor
With your pages created, the next step is to access the Site Editor where you can set up your navigation menu.
Here is how:
Navigate to the Site Editor
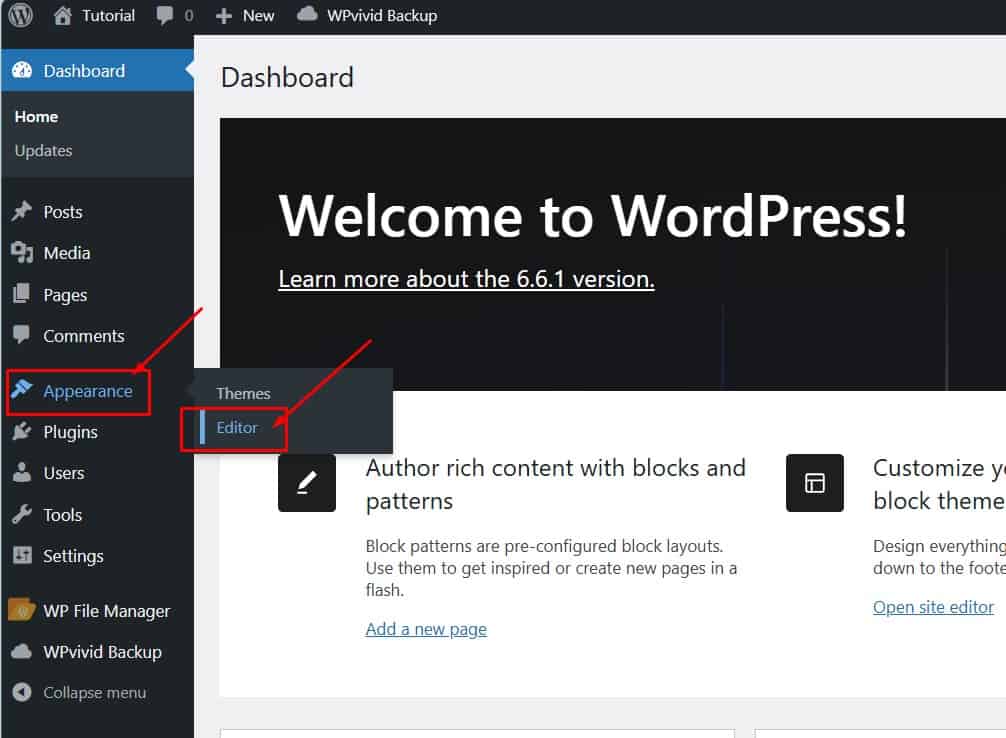
From your WordPress dashboard, hover over Appearance in the left-hand menu.
Click on Editor. This will open the Site Editor, where you can manage your site’s design and layout.
In the Site Editor, you’ll have the tools to create and customize your navigation menu, ensuring your site is user-friendly and visually appealing.
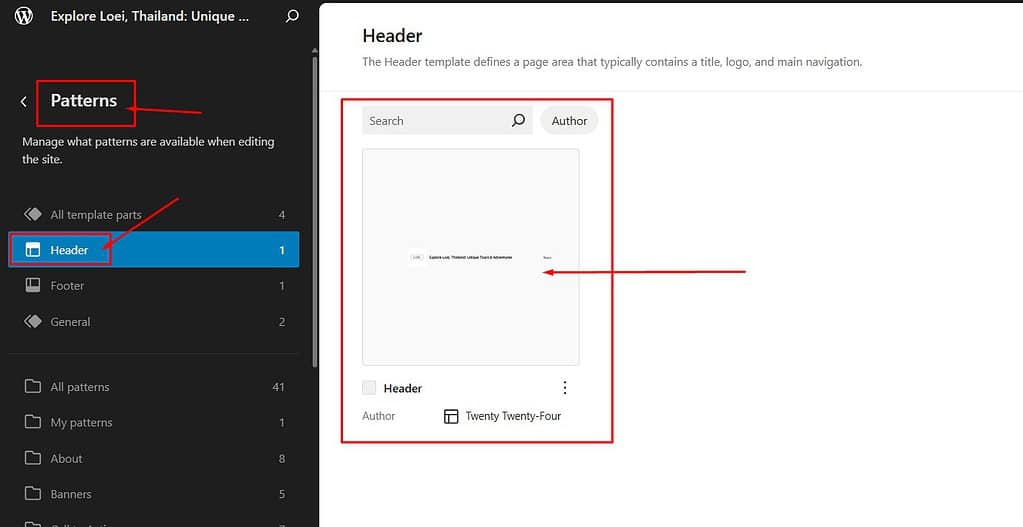
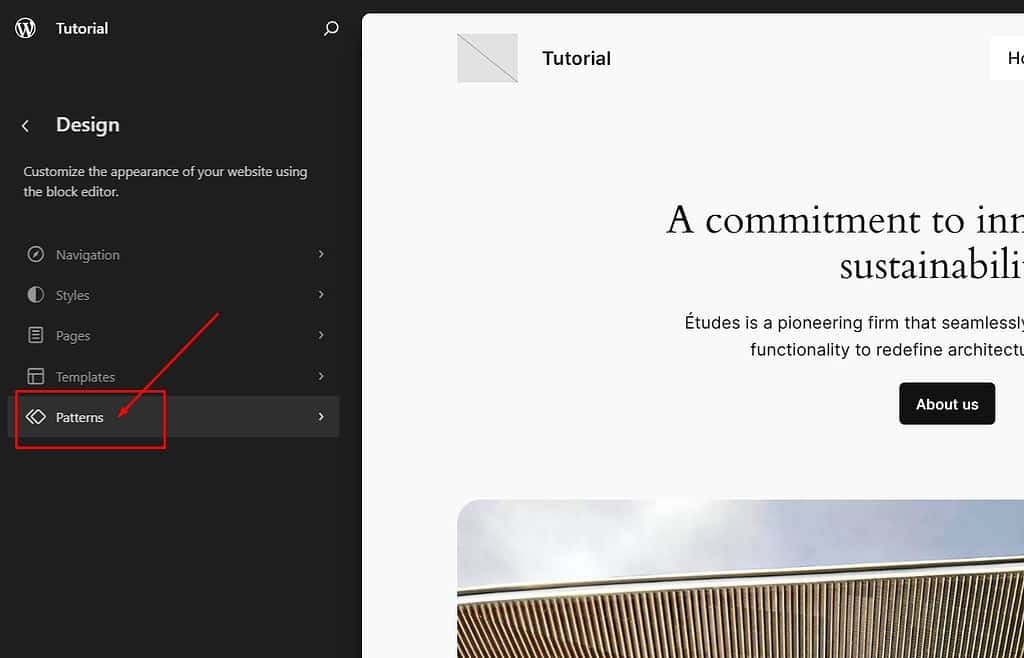
From the menu on the left, select Patterns and then Header.
Finally, click the Header icon.
Adding the Navigation Block
Now that you’re in the Site Editor, let us add a navigation block to your header.
This block will serve as your menu, allowing visitors to navigate your site easily.
Add Navigation Block to Header
If your header does not already have a navigation block, click the + button within the header area.
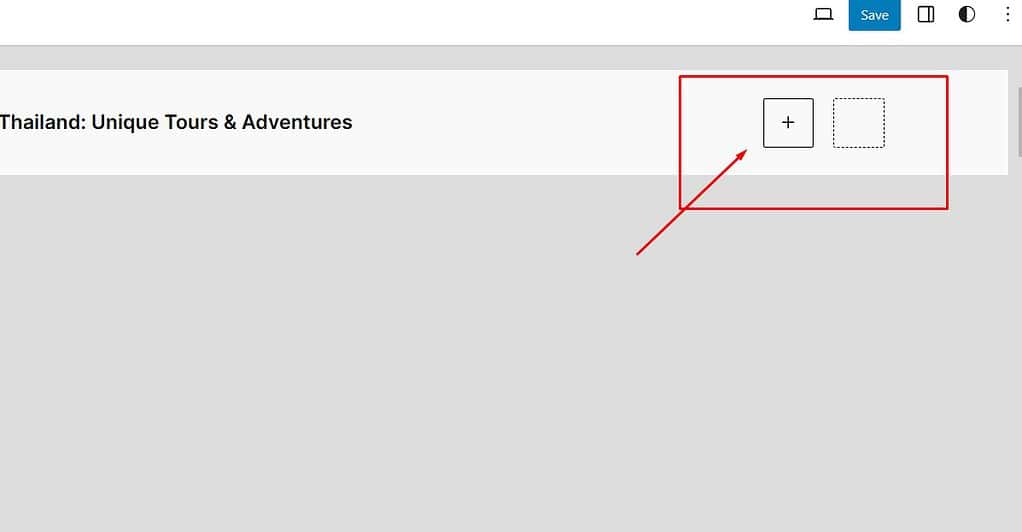
Search for and select the Navigation block to add it to your header.
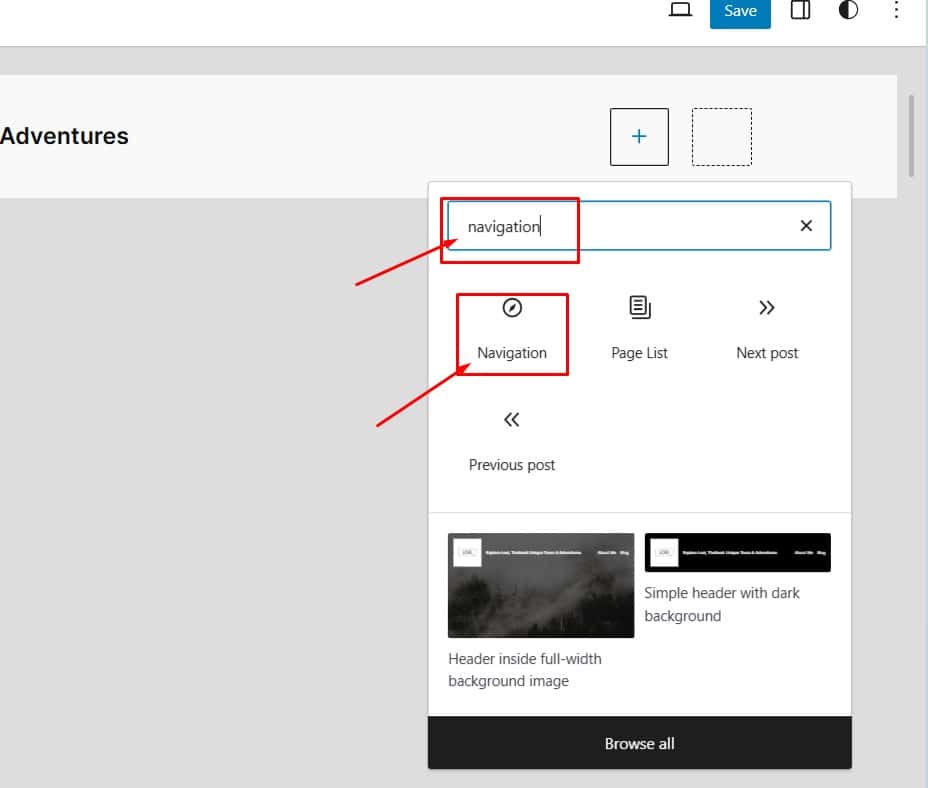
Adding this block sets the foundation for your menu.
Next, you’ll add the actual menu items.
Adding Menu Items
With the Navigation block in place, it’s time to populate it with links to your site’s important pages, posts, and other content types.
Add Items to the Navigation Block
Click on the + button within the Navigation block.
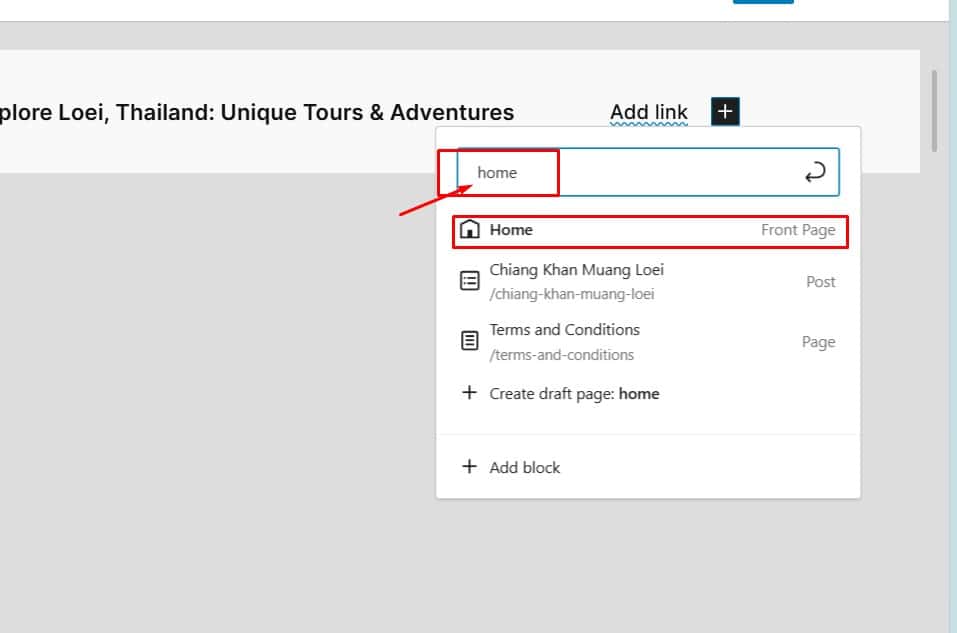
Add Pages and Posts
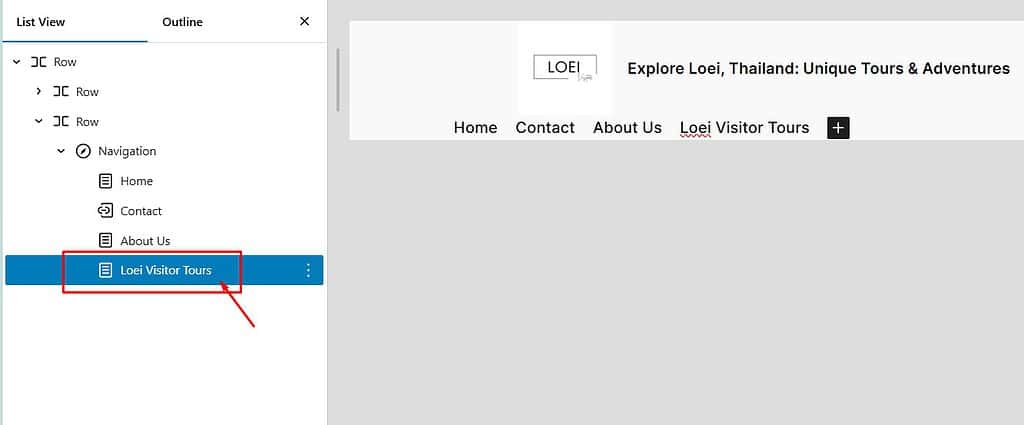
Start typing the name of the page or post you want to add.
WordPress will suggest matching items; click on the desired page or post to add it to the menu.
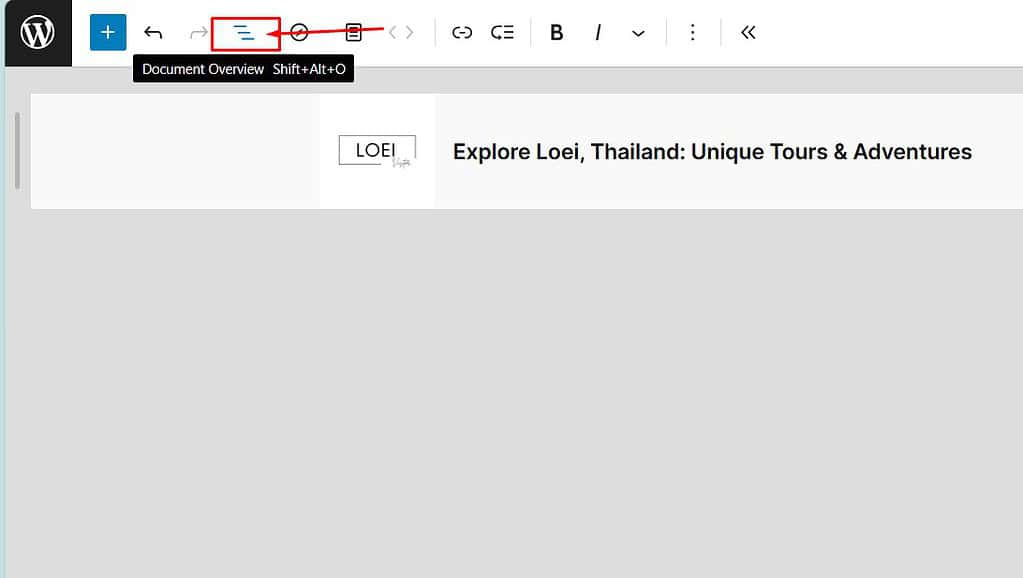
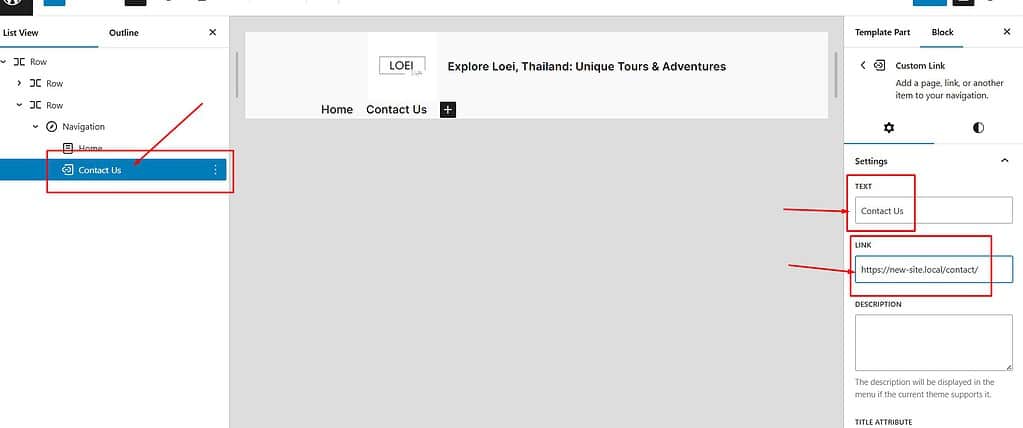
Add Custom Links
Open the Document Overview tab.
Click Navigation and then the + button within the block option sidebar.
Select Custom Link.
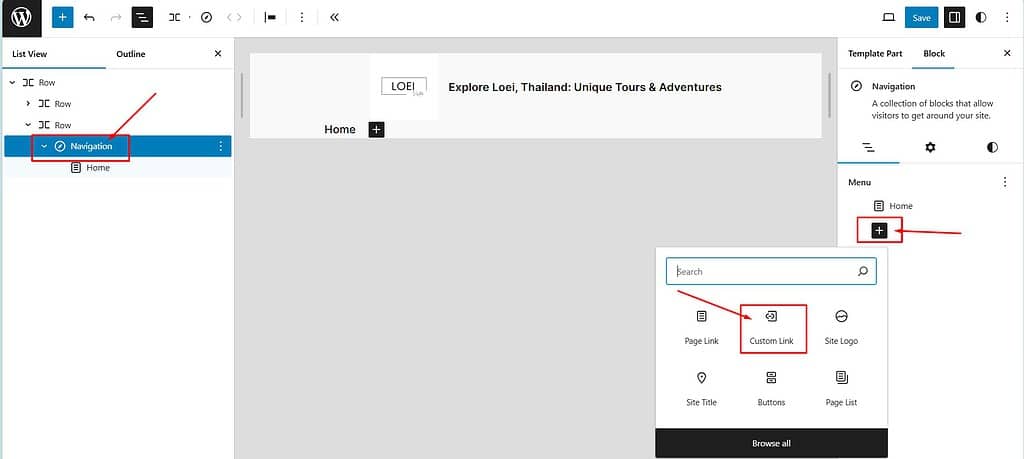
Enter the URL and the link text you want to display in the menu.
You can continue adding items until your menu includes all the necessary links.
This step ensures that your visitors can easily find and navigate to the key areas of your website.
Organizing Menu Items
After adding all your desired menu items, the next step is to organize them.
A well-structured menu improves user experience by making navigation intuitive and efficient.
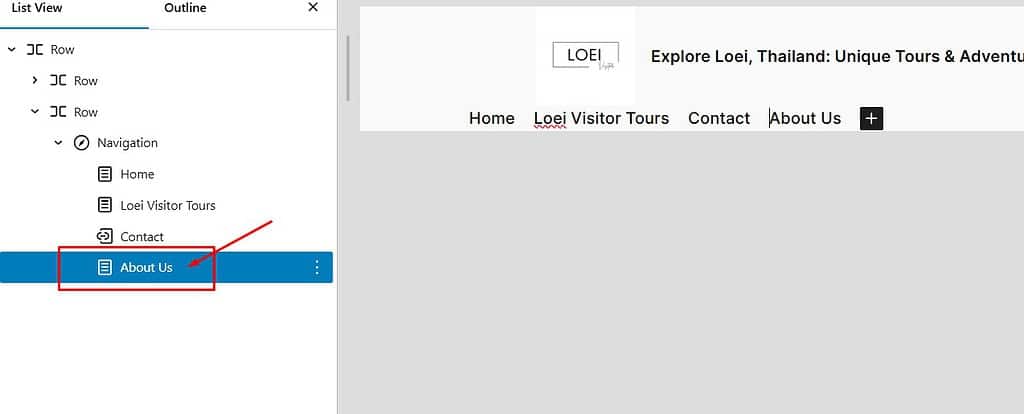
Reordering Menu Items
Click and hold on to the item you want to move.
Drag it to the desired position and release it.
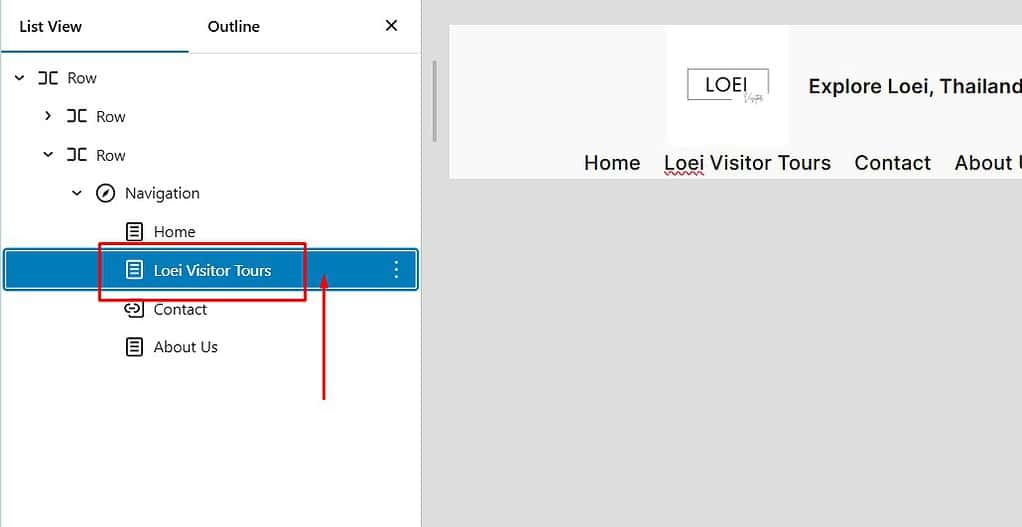
This allows you to change the order in which the items appear in the menu.
Creating Submenus
To create a submenu, click and hold the item you want to nest under another.
Drag it to the menu item you want it to nest under and release it.
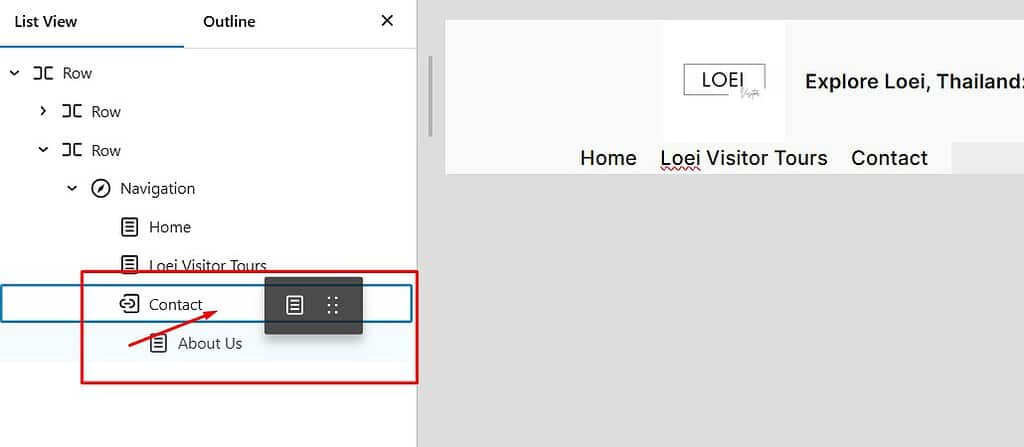
This will create a dropdown effect in your menu.
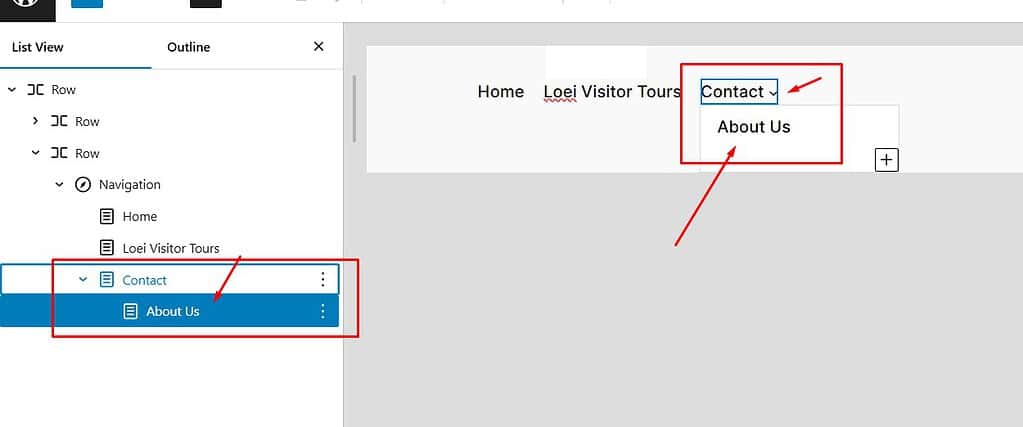
Submenus are for grouping related pages under a single parent menu item, making your navigation cleaner and more organized.
Customizing the Menu
Customizing the appearance of your navigation menu helps it blend seamlessly with your site’s design.
The WordPress block editor provides several customization options to tailor the look and feel of your menu.
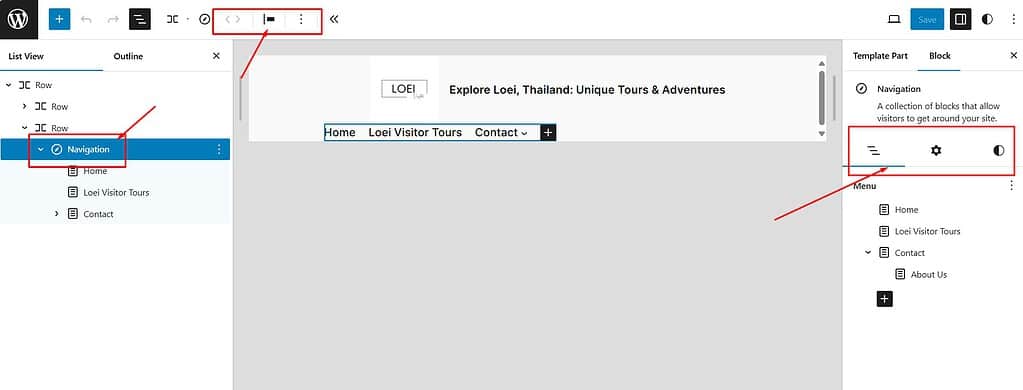
Open the Block Settings Panel
Select the Navigation block.
The block settings panel will appear on the right side of the editor.
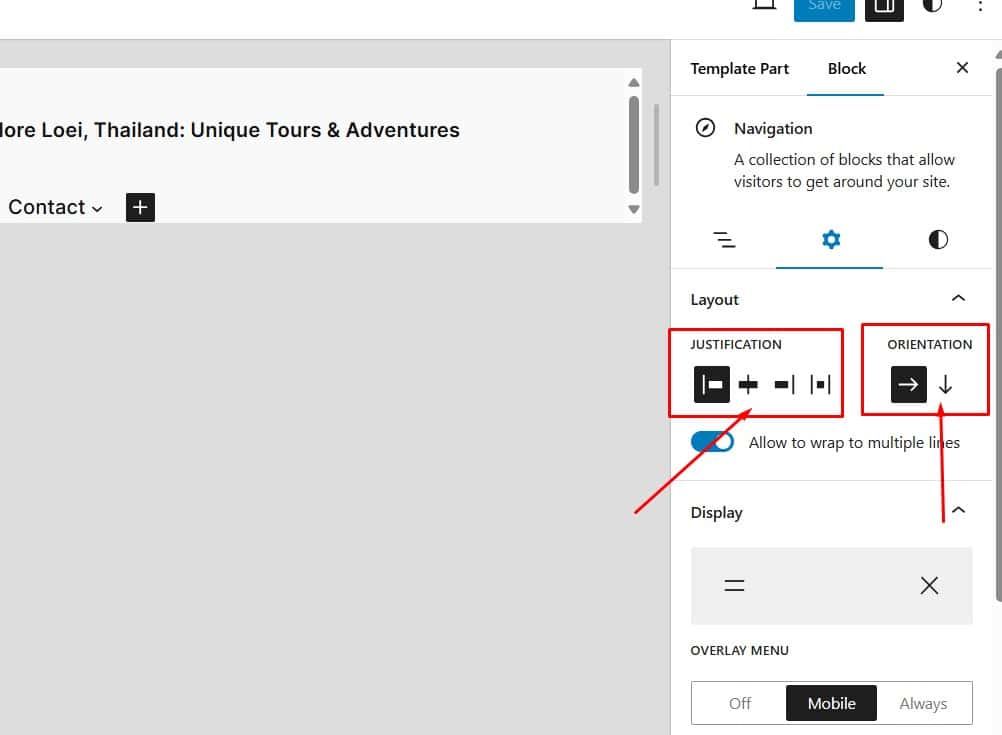
Adjust Alignment and Orientation
In the block settings panel, you can align your menu items to the left, center, or right.
You can also set the orientation to horizontal or vertical.
Customize Colors and Typography
Use the color settings to change the text and background colors of your menu items.
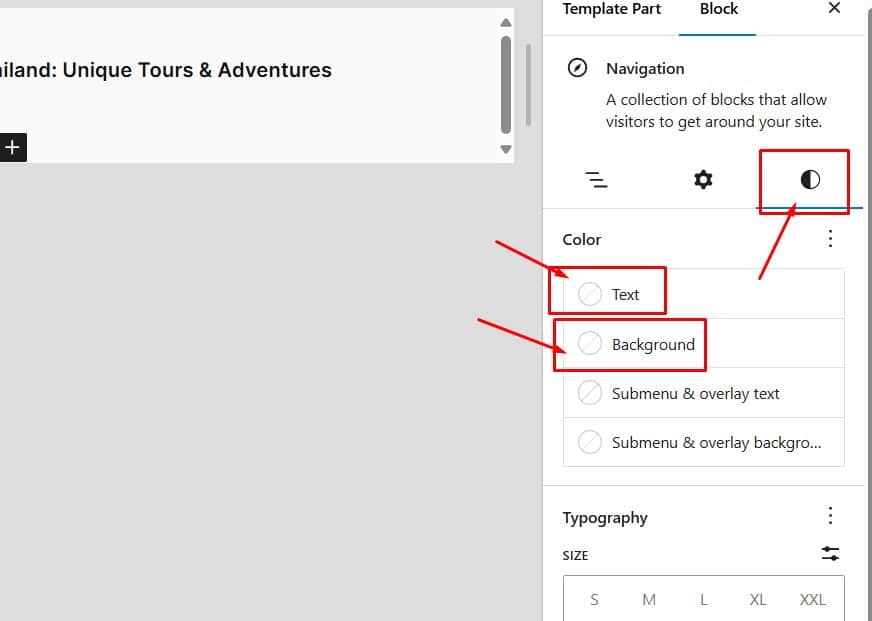
Adjust the typography settings to match your site’s font style and size.
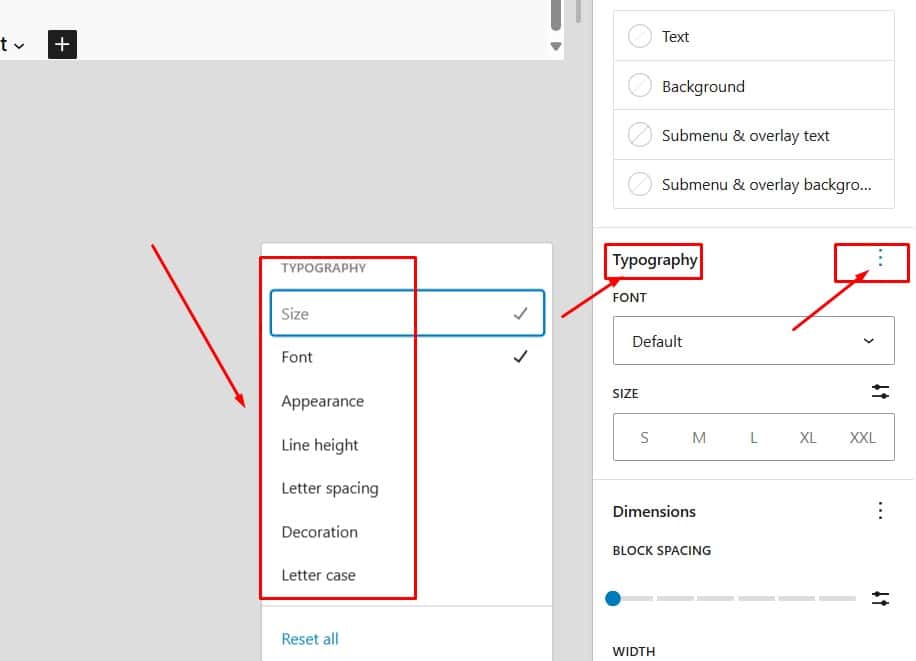
This ensures consistency with the rest of your website’s design.
Customizing these elements helps create a cohesive look, making your site more visually appealing.
Saving Changes
Once you are satisfied with your navigation menu’s structure and appearance, save your changes to make them live on your site.
Save Your Menu
Click on the Save button located in the top right corner of the Site Editor.
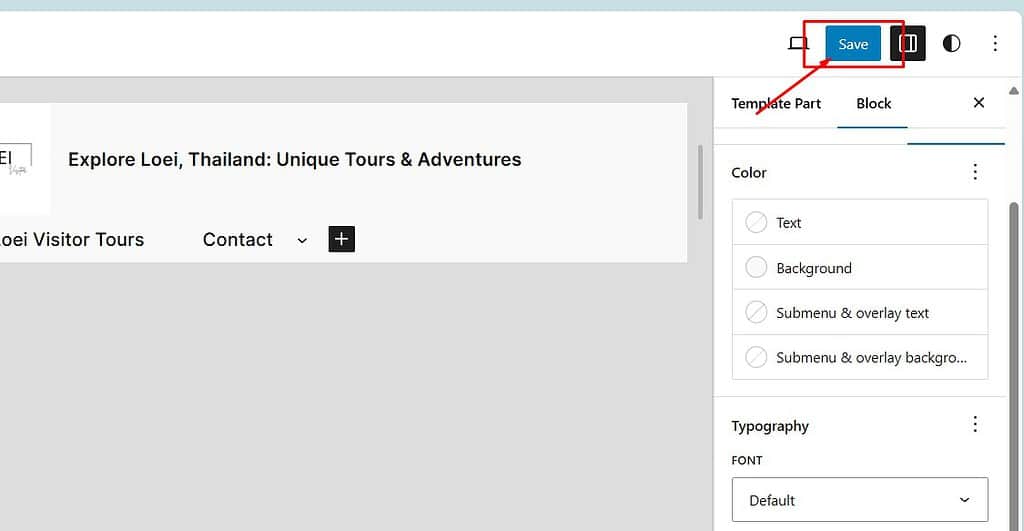
This will apply all your changes, ensuring your new navigation menu is visible to visitors.
With these steps, you can create a well-organized, customized navigation menu that enhances user experience and aligns with your site’s design.
Creating Additional Menus
Creating additional menus for different sections of your site, such as a footer menu, can improve user navigation and provide quick access to important pages.
Here is how you can create and manage multiple menus using the WordPress block editor:
Access the Site Editor
From your WordPress dashboard, navigate to Appearance > Editor.
This opens the Site Editor where you can manage your site’s design and layout.
Add a New Navigation Block
Select Patterns from the menu.
Choose Header or Footer and click the icon on the right.
Select the area where you want to add a new menu.
Click on the + Block Inserter icon and search for the Navigation block.
Add the Navigation block to the selected area.
Create Menu Items
In the new Navigation block, click the + button to start adding items.
You can add pages, posts, categories, custom links, or other content types similar to how you added items to the main menu.
For custom links, enter the URL and link text.
Organize and Customize
Organize the menu items by dragging and dropping them into the desired order.
Use the submenu icon to create nested items if needed.
Customize the appearance of this menu using the block settings panel to match your site’s design.
Save Your Changes
Click on the Save button in the top right corner to apply the new menu to your site.
With multiple menus, you can provide more structured and accessible navigation options for your visitors.
Video Tutorial
Conclusion
In this tutorial, we’ve covered the essential steps to create and manage a navigation menu using the WordPress block editor:
- Creating Pages for Your Menu: Set up the necessary pages to include in your menu.
- Accessing the Site Editor: Navigate to the Site Editor from the WordPress dashboard.
- Adding the Navigation Block: Insert a navigation block into your header or any other section.
- Adding Menu Items: Populate your menu with pages, posts, categories, and custom links.
- Organizing Menu Items: Rearrange and create submenus to organize your navigation.
- Customizing the Menu: Adjust the appearance of your menu to match your site’s design.
- Saving Changes: Save your changes to make your menu live.
- Creating Additional Menus: Set up and manage multiple menus for different sections of your site.
Experiment with your menus to find the best structure for your website. A well-organized navigation menu significantly improves user experience and accessibility.
If you found this tutorial helpful, please leave a comment.
Your support helps us create more valuable content.
In addition to creating a stunning menu for your WordPress site, ensuring your content is safe and secure is crucial.
That’s why I highly recommend checking out my latest post, “Backup and Restore Your WordPress Website Quickly with WPVivid.“
In this post, you’ll discover essential tips on backing up your website and restoring it when needed.
Protecting your hard work is just as important as designing it. With WPVivid, you can do it quickly and efficiently.
Don’t wait until it’s too late—click here to learn how to safeguard your WordPress site today!
Starting a website or blog can be overwhelming, especially with the many decisions and technical details involved.
That’s where I come in—let me handle the setup, optimization, and ongoing support to ensure your online success.
About NewBlogr
At NewBlogr, I am passionate about helping individuals and small businesses launch and grow their online presence.
I specialize in creating custom WordPress websites, offering domain and hosting setup, essential SEO, and continuous support to help you achieve your goals.
My dedication to excellence comes from a desire to see my clients succeed.
I focus exclusively on website creation and support, providing you with a seamless and stress-free experience from start to finish.
Let me help you build and maintain a professional online presence that attracts and engages your audience.
Want to See How a Professional Website Can Help You?
Key Benefits of Our Service
Effortless Setup
I take care of everything from domain registration to website launch, ensuring a smooth and hassle-free process.
Custom Design
My tailored designs ensure your website stands out and reflects your unique brand identity.
Continuous Support
I offer ongoing assistance and updates, ensuring your website remains optimized and effective.
Getting Started with NewBlogr
1. Contact Us
Reach out through my contact page to discuss your needs and goals. I’ll provide a free initial consultation to understand how I can help.
2. Website Planning and Proposal
I’ll review your requirements and present a tailored plan to create and optimize your website.
3. Implementation and Support
Once you approve the plan, I will develop your website and provide ongoing support to ensure sustained growth and engagement.
What We Offer to Elevate Your Online Presence
- Custom WordPress Website Creation
Develop a high-converting, user-friendly website tailored to your needs. - Domain & Hosting Setup
Assist with selecting and setting up your domain and hosting services. - SEO Optimization
Enhance your site’s visibility and drive organic traffic. - Performance Monitoring
Regularly review and optimize your website’s performance.
- Ongoing Updates
Keep your website up-to-date and functioning optimally. - Resources
Provide tutorials and support to help you manage and grow your website. - Customer Support
Offer continuous support to address any issues or updates. - Tailored Strategies
Customize our services to meet your specific goals and needs.
Leave a Reply