

Today, we are diving into a fundamental yet impactful change you can make to your WordPress site—updating your permalink structure.
Permalinks are the permanent URLs of your blog posts and pages.
They are crucial in how both users and search engines navigate your site.
Updating your permalink structure can improve the user experience by making URLs cleaner and more descriptive.
This update makes your site more user-friendly and boosts your SEO (Search Engine Optimization).
Search engines prefer URLs that are easy to read and include relevant keywords.
By optimizing your permalinks, you are making your site more attractive to search engines, which can improve your rankings and visibility.
This guide is perfect for beginners new to WordPress who want to optimize their site’s URLs.
Whether you are setting up your WordPress site for the first time or looking to improve your existing setup, this step-by-step tutorial will help you create user-friendly and SEO-optimized URLs.
Let us get started on enhancing your WordPress site!
What are Permalinks?
Permalinks, short for “permanent links,” are the URLs assigned to your blog posts, pages, and other content on your WordPress site.
These links remain consistent over time, ensuring that the same URL will always point to the same content.
Permalinks are crucial because they provide a permanent address for your content, making it easy for visitors to find and share your posts.
In WordPress, permalinks are more than just addresses; they are the backbone of your site’s navigation and structure.
They determine how your URLs look and are vital in user experience and search engine optimization (SEO).
A well-structured permalink is clean, descriptive, and easy to understand, which can significantly improve how users interact with your site and how search engines index your content.
Benefits of Customizing Permalinks
Customizing your permalinks offers several advantages that can enhance your WordPress site:
Improved Readability
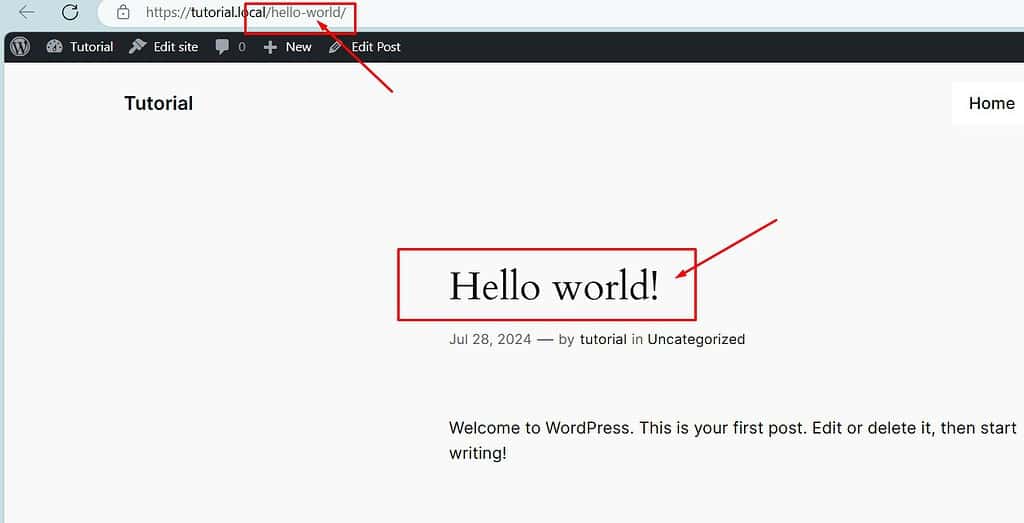
Custom permalinks make your URLs more readable and understandable for users.
For instance, a URL like yourwebsite.com/2024/07/03/how-to-change-permalink-structure is much clearer than a default URL like yourwebsite.com/?p=123.
Readable URLs help visitors quickly grasp the page’s content, making it more likely they will click on and share your links.
SEO Benefits
Search engines favor URLs that include relevant keywords and provide context about the content.
By customizing your permalinks to include keywords, you can improve your site’s SEO.
For example, a permalink like yourwebsite.com/seo-tips-for-beginners is more likely to rank well in search engine results than a generic URL.
Enhanced User Experience
A well-structured permalink enhances the overall user experience by making your site easier to navigate.
Users can often determine the content of a page just by looking at the URL, which can help them decide whether to click on the link.
Additionally, clean and descriptive URLs are more likely to be shared on social media and other platforms, increasing your site’s visibility.
By understanding permalinks and the benefits of customizing them, you can take a significant step towards optimizing your WordPress site for users and search engines.
Default Permalink Structure
When you first install WordPress, the platform automatically sets your permalinks to a default structure like this: http://yourwebsite.com/?p=123.
This format uses a query string with a unique identifier (such as a post ID) to link to your content.
The default permalink structure works out of the box without any additional configuration.
Limitations of Default Structure
While the default permalink structure is straightforward and functional, it comes with several significant limitations that can impact both SEO and user experience:
Lack of Readability
URLs in the default structure are not user-friendly.
They do not provide any information about the page’s content, making it difficult for users to remember or recognize the URL.
A link like http://yourwebsite.com/?p=123 doesn’t give any indication of what the page is about, which can be confusing for visitors.
Poor SEO Performance
Search engines prefer URLs that are descriptive and include relevant keywords.
The default permalink structure does not contain any keywords related to the post or page content, which can hinder your site’s search engine rankings.
Descriptive URLs help search engines understand the page context, making it more likely to appear in relevant search results.
Reduced Click-Through Rates
Because the default permalinks are not descriptive, they can reduce click-through rates from search engines and social media.
Users are more likely to click on a URL that gives them an idea of what to expect.
For example, http://yourwebsite.com/?p=123 is less appealing than http://yourwebsite.com/how-to-change-permalink-structure.
Difficulty in Link Sharing
When users share links to your content, a readable and descriptive URL is more likely to be clicked on and trusted.
The default permalink structure doesn’t provide meaningful information, making shared links less attractive and hard to promote.
By understanding the limitations of the default permalink structure, you can see why customizing your permalinks is an essential step in optimizing your WordPress site for better SEO and user experience.
Pre-Change Checklist
Backup Your Site
Before making any changes to your permalink structure, it is crucial to back up your site.
This step ensures you have a copy of your current setup, allowing you to restore your site if something goes wrong.
Backing up your site includes saving your database, files, and settings.
Many WordPress plugins, such as UpdraftPlus, WPVivid, and BackupBuddy, can automate this process for you.
Check for Existing Permalinks
Understanding your current permalink structure is essential before making any changes.
Review how your URLs are currently formatted and note any custom structures you have already implemented.
This step helps avoid unexpected issues, such as broken links or navigation problems, from changing your URL format.
Plan Your New Structure
Decide on the new permalink structure that suits your needs. WordPress offers several formats, including:
- Plain: http://yourwebsite.com/?p=123
- Day and Name: http://yourwebsite.com/2024/07/03/sample-post/
- Month and Name: http://yourwebsite.com/2024/07/sample-post/
- Numeric: http://yourwebsite.com/archives/123
- Post Name: http://yourwebsite.com/sample-post/
I recommend the ‘Post Name’ structure for its simplicity, readability, and SEO benefits.
It incorporates the title of your post in the URL, making it more informative and easy for users and search engines to understand.
If your site has a specific need, you can also create a custom structure that includes categories or other variables relevant to your content.
By carefully planning your new permalink structure, ensure you optimize your URLs for user experience and search engine performance.
Changing the Permalink Structure in WordPress
Step-by-Step Guide
Step 1: Log into WordPress Admin
First, log into your WordPress admin dashboard.
You can do this by navigating to http://yourwebsite.com/wp-admin and entering your username and password.
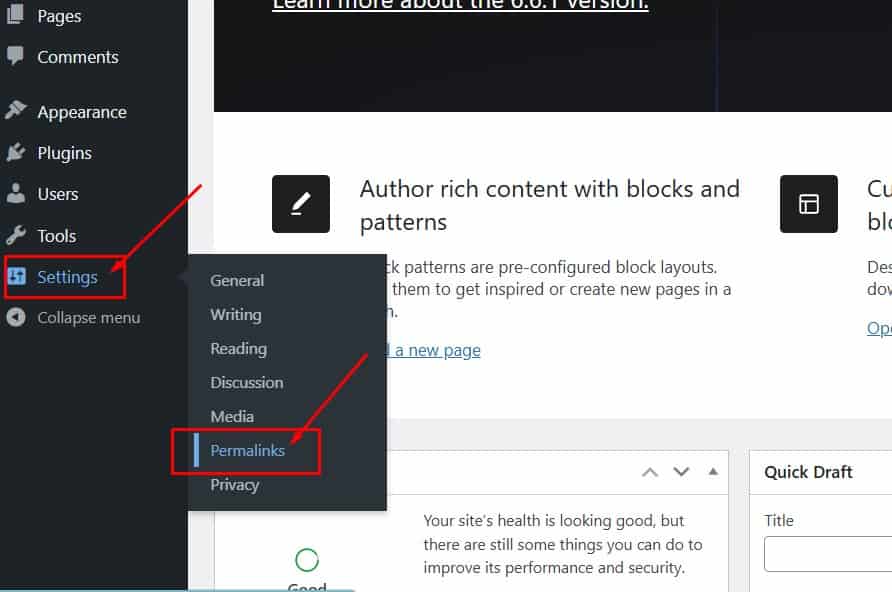
Step 2: Go to Settings > Permalinks
Once logged in, hover over the “Settings” menu in the sidebar on the left.
Click on “Permalinks” to access the permalink settings page.
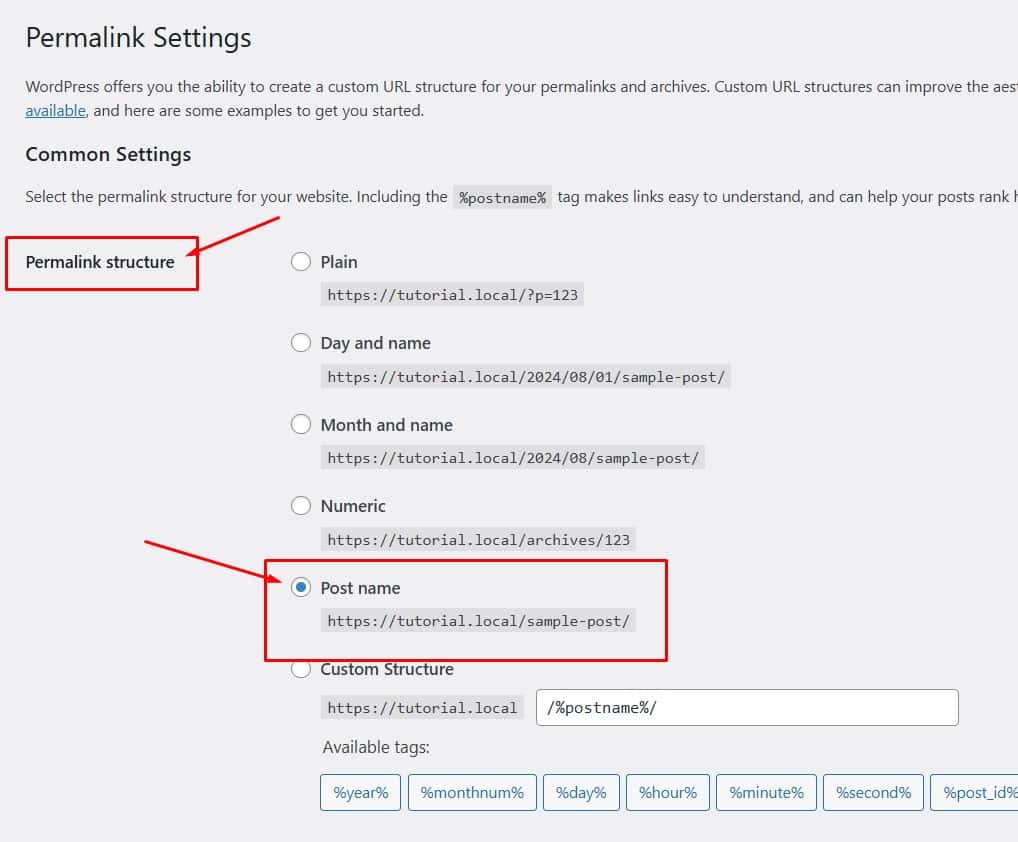
Step 3: Select a New Structure
On the Permalinks settings page, you’ll see several options for URL structures.
These include Plain, Day and Name, Month and Name, Numeric, and Post Name.
I recommend using the “Post Name” option because it is simple and SEO-friendly.
If you need a custom structure, you can create one by selecting “Custom Structure” and using the available tags (e.g., %category%/%postname%/).
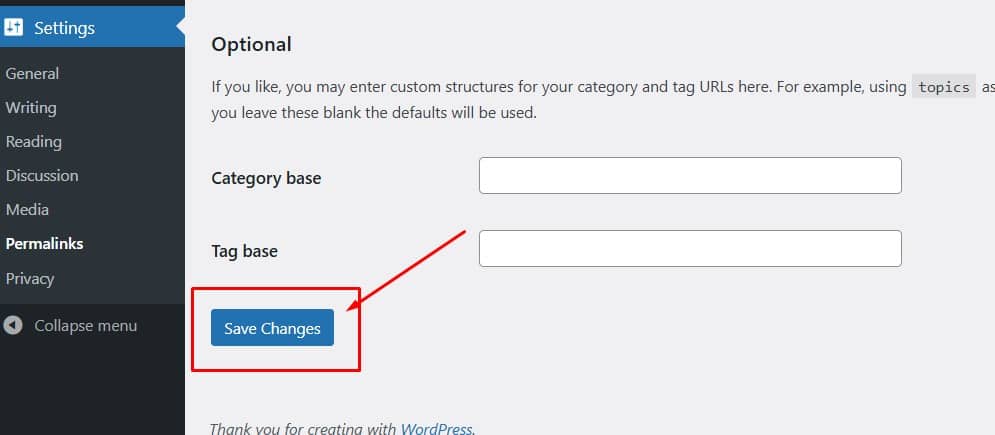
Step 4: Save Changes
After selecting your desired permalink structure, scroll down to the bottom of the page and click the “Save Changes” button.
This action will update the permalink settings across your site.
Step 5: Verify Changes
Finally, verify that the new permalink structure works correctly.
Visit various pages and posts on your site to ensure the URLs function as expected.
If you encounter issues, such as broken links or 404 errors, you may need to troubleshoot or set up redirects from the old URLs to the new ones to maintain proper navigation and SEO.
By following these steps, you can successfully change the permalink structure of your WordPress site, making your URLs more user-friendly and optimized for search engines.
Video Tutorial
Creating Custom Permalinks for Individual Posts
Sometimes, you may want to create custom permalinks for specific posts to make them more descriptive or keyword-rich.
Custom permalinks can help with SEO and make URLs more user-friendly.
Step-by-Step Guide
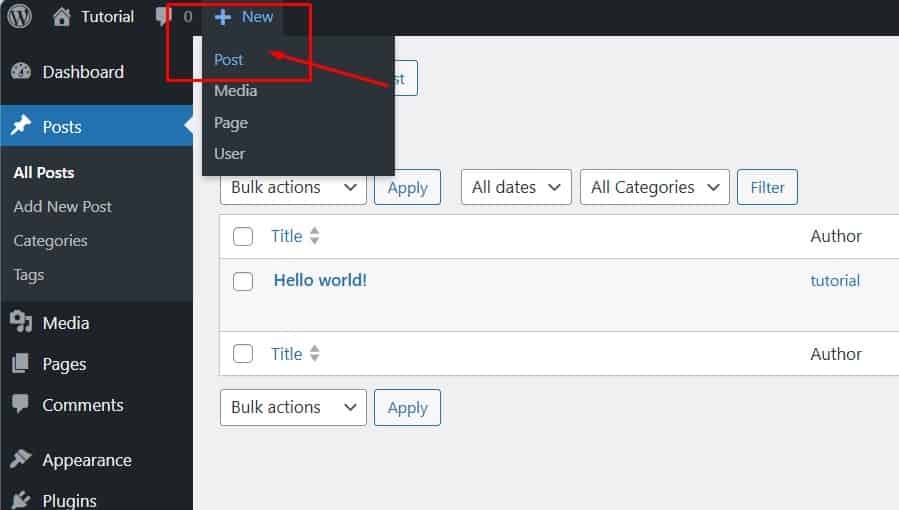
Step 1: Create a New Post or Edit an Existing One
To start, create a new post by navigating to Posts > Add New or edit an existing post by going to Posts > All Posts and selecting the post you want to edit.
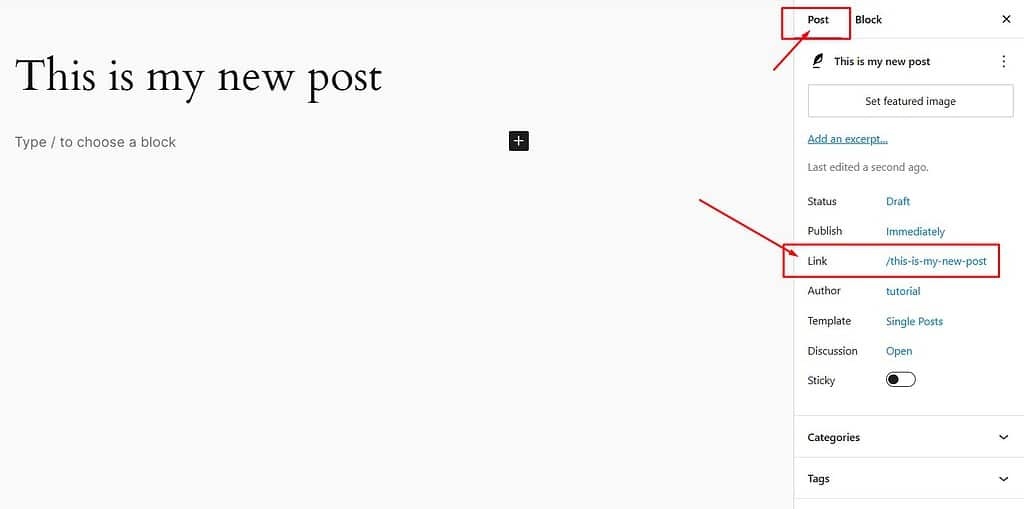
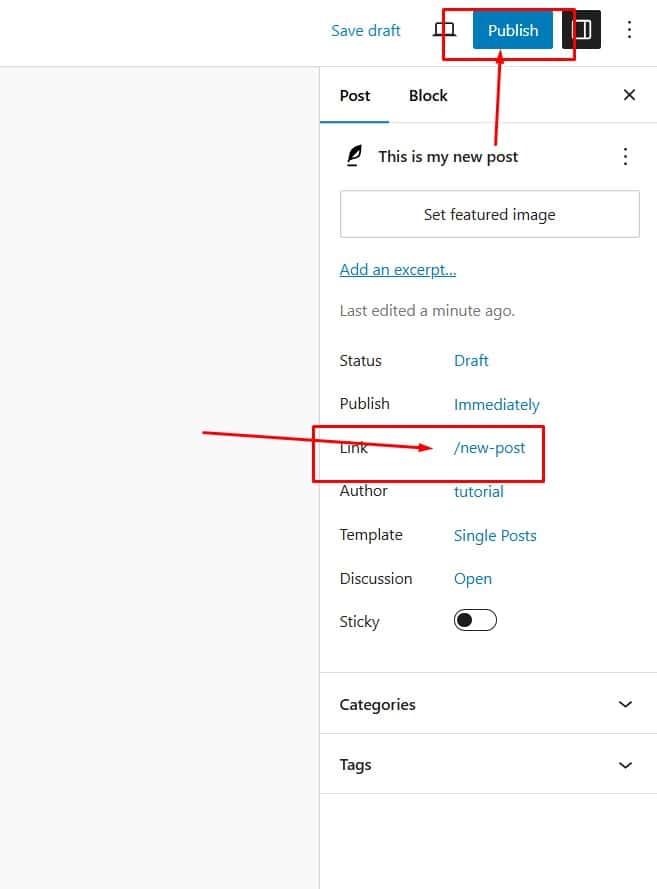
Step 2: Find the ‘Permalink’ Option in the Sidebar
Once in the post editor, look for the ‘link’ option in the settings sidebar.
In the Classic Editor, you can find it directly below the title field.
In the Gutenberg Block Editor, you might need to click the ‘Post’ tab in the sidebar to see the permalink settings.
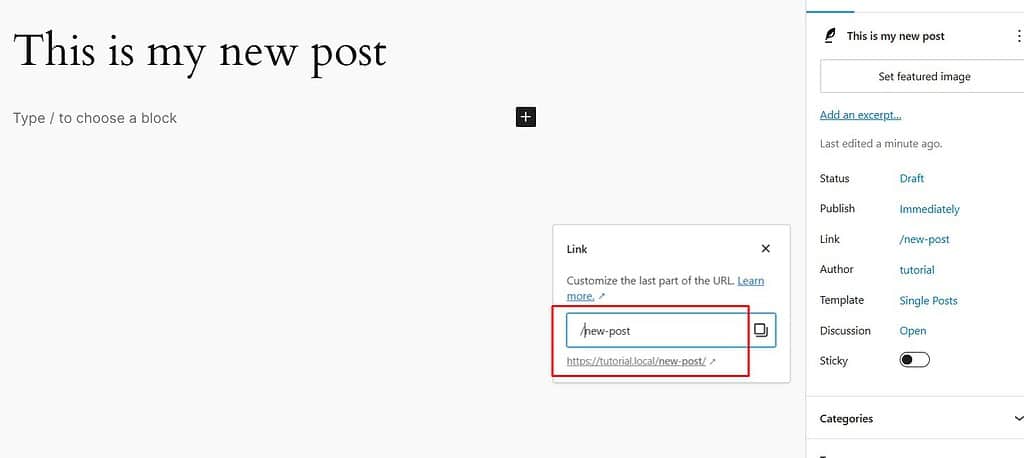
Step 3: Edit the Post Slug to Your Preferred URL
Click on the current permalink or slug to edit it.
You can type in a new slug that is short, descriptive, and relevant to your content.
Make sure to use hyphens to separate words and avoid using special characters.
Step 4: Save the Changes
After editing the slug, click anywhere on the page to save the new slug.
Finally, ensure to update or publish the post to apply the changes.
This action will update the post’s URL to the custom permalink you have set.
Creating custom permalinks for individual posts allows for better control over your site’s structure, and you can significantly improve your site’s SEO and user experience.
Video Tutorial
Setting Up Redirects for Old URLs
When you change your permalink structure, set up redirects from the old URLs to the new ones.
Redirects ensure visitors who access your site through old links go to the correct new URLs.
This practice helps maintain your SEO value by preventing broken links and preserving the ranking and authority of your content in search engines.
Using a Plugin
One of the easiest ways to set up redirects is to use a WordPress plugin.
Here is how you can do it:
Step 1: Install a Redirection Plugin
- Navigate to Plugins > Add New in your WordPress admin dashboard.
- Search for a redirection plugin, such as ‘Redirection’ by John Godley.
- Click Install Now and then Activate.
Step 2: Set Up Redirects
- After activation, go to Tools > Redirection.
- Follow the setup wizard if it appears.
- Once setup is complete, you will see the Redirection interface. Click on the Add New button to create a new redirect.
- In the Source URL field, enter the old URL you want to redirect from.
- In the Target URL field, enter the new URL you want to redirect to.
- Click Add Redirect.
Using .htaccess File
For those comfortable handling server files, you can set up redirects manually by editing your .htaccess file.
This method is commonly used on Apache servers.
Step 1: Access Your .htaccess File
- Connect to your site via FTP or access the file manager in your hosting control panel.
- Locate the .htaccess file in your WordPress root directory. If you do not see it, ensure that hidden files are visible.
Step 2: Edit the .htaccess File
Open the .htaccess file in a text editor.
Add the following lines of code for each URL you want to redirect:

Replace /old-url/ with the path of your old URL and https://www.yourwebsite.com/new-url/ with the full new URL.
Step 3: Save Changes
- Save the file and upload it back to your server if you are using an FTP client.
- Check your site to ensure that the redirects are working correctly.
Setting up redirects is a vital step when changing permalink structures.
It helps maintain your site’s SEO integrity and ensures a seamless user experience by guiding visitors from outdated URLs to the correct pages.
Troubleshooting Common Issues
Changing your permalink structure can sometimes lead to unexpected issues.
Here are some common problems and how to solve them:
404 Errors (Page Not Found)
- Cause: Changing the URL structure without setting up proper redirects.
- Fix: Ensure you have set up 301 redirects from your old URLs to the new ones. Use a plugin like Redirection or manually edit your .htaccess file to add the necessary redirect rules.
Broken Internal Links
- Cause: Internal links within your site that point to old URLs.
- Fix: Use a plugin like Velvet Blues Update URLs to update all internal links to match the new permalink structure. This update ensures all links within your content are updated correctly.
Loss of Traffic
- Cause: Search engines need time to recognize and index the new URLs.
- Fix: Submit a new sitemap to Google Search Console and other search engines to expedite indexing. Monitor your traffic using Google Analytics to track changes and ensure traffic stabilizes.
Plugins or Themes Not Functioning Properly
- Cause: Some plugins or themes may rely on the old permalink structure.
- Fix: Check for updates to your plugins and themes. Ensure they are compatible with the new permalink structure. If issues persist, contact the plugin or theme developer for support.
Permalink Settings Not Saving
- Cause: Server or file permission issues.
- Fix: Ensure your .htaccess file is writable. If using an Apache server, check that the file permissions allow WordPress to write to it. You can manually edit the .htaccess file if necessary.
Support and Resources
If you encounter problems after changing your permalinks, there are several resources available to help:
WordPress Support Forums
- A place to ask questions and find solutions from the WordPress community. WordPress.org Support
Official WordPress Documentation
- Comprehensive guides and documentation on various WordPress topics, including permalinks and troubleshooting. WordPress Codex
Plugin Support
- If you use a specific plugin for redirects or permalink management, check the plugin’s support page on the WordPress plugin repository. Developers often provide FAQs and support forums. WordPress Plugin Directory
Professional Help
- If you can not resolve your issues, consider hiring a WordPress developer or consultant. Many experts offer services to help with complex site changes and troubleshooting.
By anticipating common issues and knowing where to find help, you can confidently manage your permalink structure and maintain a smooth, user-friendly experience.
Summary
Changing your WordPress permalink structure is a straightforward process that can significantly enhance your SEO and user experience.
Here is a quick recap of the steps:
What are Permalinks?
Understand the purpose and benefits of permalinks.
Default Permalink Structure
Recognize the limitations of the default structure.
Pre-Change Checklist
Backup your site.
Review existing permalinks.
Plan your new structure.
Changing the Permalink Structure in WordPress
Log into WordPress Admin.
Navigate to Settings > Permalinks.
Select a new structure.
Save changes.
Verify the changes.
Creating Custom Permalinks for Individual Posts
Edit the permalink for specific posts as needed.
Setting Up Redirects for Old URLs
Set up 301 redirects to maintain SEO value and avoid broken links.
Troubleshooting Common Issues
Address common problems and find support if needed.
Regularly reviewing and optimizing your permalink structure is crucial for maintaining an effective and user-friendly WordPress site.
Consider these final tips:
- Consistency: Keep your permalink structure consistent across your site for better SEO and user experience.
- Descriptiveness: Use descriptive keywords in your permalinks to enhance readability and search engine rankings.
- Updates: Regularly check for and apply updates to your plugins and themes to ensure compatibility with your permalink structure.
Conclusion
Now that you have mastered changing your WordPress permalink structure, explore additional tutorials and resources on our website or YouTube channel to improve your WordPress skills.
Continuous learning will help you make the most of your site’s potential.
If you found this guide helpful, please leave a comment. Y
our support helps me create more valuable content. Thank you for reading.
If you found my guide on changing the permalink structure helpful, you will also want to check out my latest post on how to change your site icon in WordPress block themes.
This small but impactful customization can improve your site’s branding and visibility.
Don’t miss out on these valuable insights!
Starting a website or blog can be overwhelming, especially with the many decisions and technical details involved.
That’s where I come in—let me handle the setup, optimization, and ongoing support to ensure your online success.
About NewBlogr
At NewBlogr, I am passionate about helping individuals and small businesses launch and grow their online presence.
I specialize in creating custom WordPress websites, offering domain and hosting setup, essential SEO, and continuous support to help you achieve your goals.
My dedication to excellence comes from a desire to see my clients succeed.
I focus exclusively on website creation and support, providing you with a seamless and stress-free experience from start to finish.
Let me help you build and maintain a professional online presence that attracts and engages your audience.
Want to See How a Professional Website Can Help You?
Key Benefits of Our Service
Effortless Setup
I take care of everything from domain registration to website launch, ensuring a smooth and hassle-free process.
Custom Design
My tailored designs ensure your website stands out and reflects your unique brand identity.
Continuous Support
I offer ongoing assistance and updates, ensuring your website remains optimized and effective.
Getting Started with NewBlogr
1. Contact Us
Reach out through my contact page to discuss your needs and goals. I’ll provide a free initial consultation to understand how I can help.
2. Website Planning and Proposal
I’ll review your requirements and present a tailored plan to create and optimize your website.
3. Implementation and Support
Once you approve the plan, I will develop your website and provide ongoing support to ensure sustained growth and engagement.
What We Offer to Elevate Your Online Presence
- Custom WordPress Website Creation
Develop a high-converting, user-friendly website tailored to your needs. - Domain & Hosting Setup
Assist with selecting and setting up your domain and hosting services. - SEO Optimization
Enhance your site’s visibility and drive organic traffic. - Performance Monitoring
Regularly review and optimize your website’s performance.
- Ongoing Updates
Keep your website up-to-date and functioning optimally. - Resources
Provide tutorials and support to help you manage and grow your website. - Customer Support
Offer continuous support to address any issues or updates. - Tailored Strategies
Customize our services to meet your specific goals and needs.
Leave a Reply