

Today, we’re exploring a fantastic way to make your website stand out: adding custom fonts to your WordPress site using the FSE Block Editor.
Custom fonts are more than just a stylistic choice—they are crucial for establishing your website’s unique identity and branding.
A well-chosen font can enhance readability, convey your brand’s personality, and make your content more engaging for visitors.
In this tutorial, we’ll guide you through adding custom fonts to your WordPress site.
This guide will cover everything you need to know, from accessing the theme editor to applying your new fonts.
Let’s get started and give your website that extra touch of uniqueness and professionalism!
Accessing the Theme Editor
First, you have to access the Theme Editor to add custom fonts to your WordPress site. Follow these simple steps to get started:
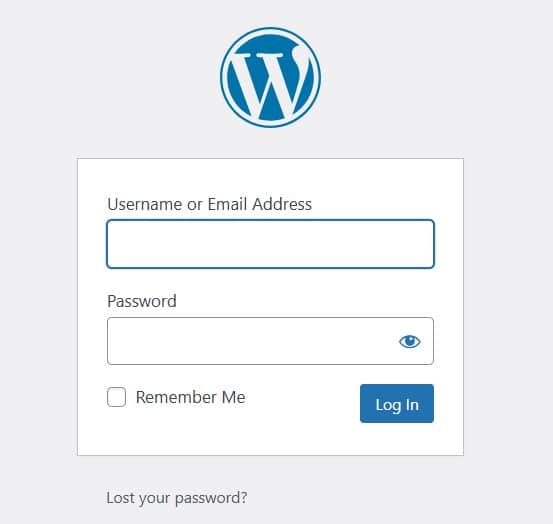
Step 1: Log into the WordPress Admin Area
Open your web browser and go to your WordPress login page.
This is at yourwebsite.com/wp-admin.
Enter your username and password and click the “Log In” button to access your WordPress dashboard.
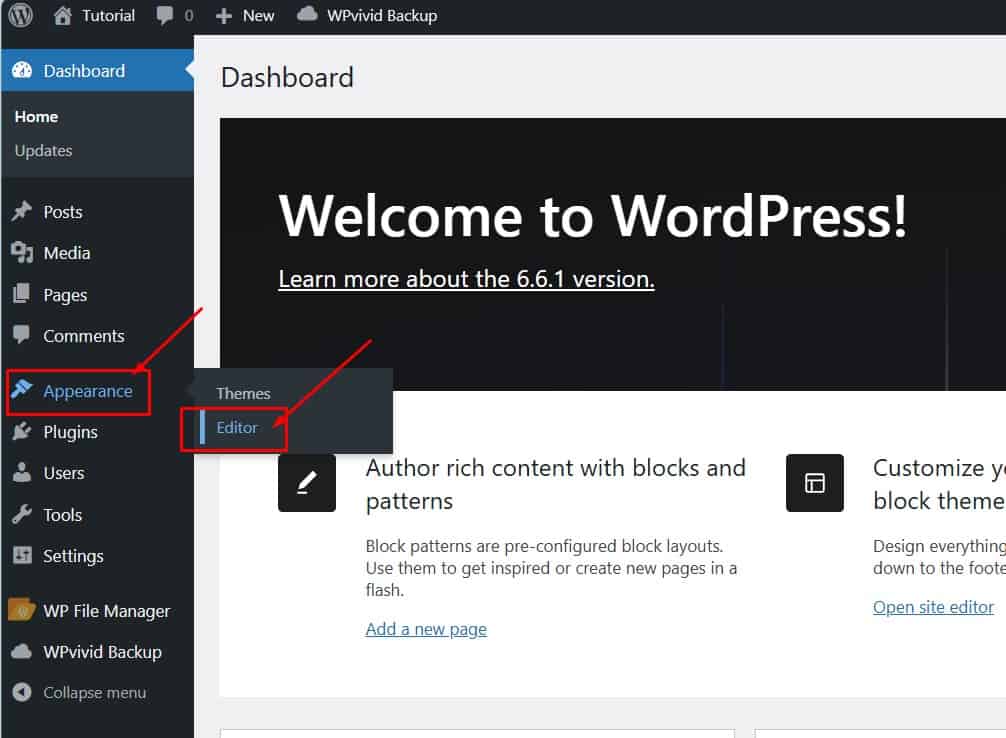
Step 2: Navigate to the Theme Editor
Once logged in, look at the menu on the left-hand side of the dashboard.
Hover over the “Appearance” menu item. A submenu will appear.
Click on “Editor”. This will take you to the Theme Editor page, where you can edit your WordPress theme.
Now that you have accessed the Theme Editor, you can customize your site’s fonts.
Activating the Editor
After you have accessed the Theme Editor, the next step is to activate the editor to enable editing options:
Once you’re on the Theme Editor page, move your cursor to the right-hand side of the screen.
Click anywhere in this area to activate the editor.
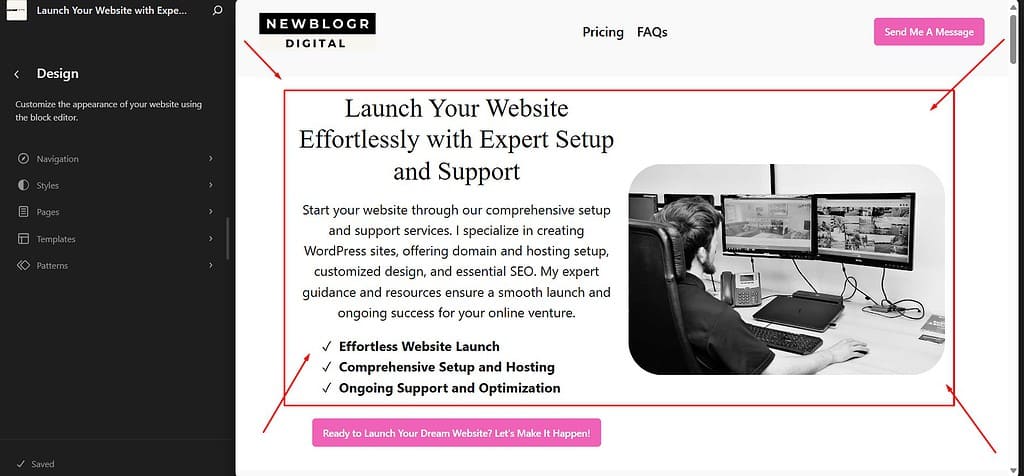
This will enable the editing options, allowing you to edit your theme.
Opening Global Styles
You must access the Global Styles settings to customize your site’s fonts.
Here is how you can do it:
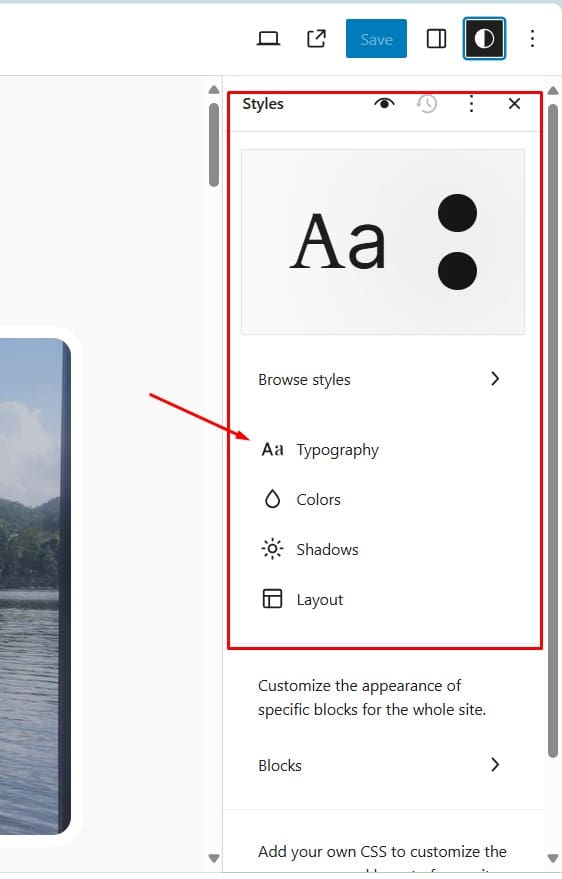
In the top right corner of the Theme Editor, you will see a small icon that looks like a circle.
This is the Global Styles icon.
Click on this icon to open the Global Styles panel.
The panel will slide out, presenting several options that you can use to customize your site’s appearance, including typography settings.
You are now ready to manage and customize the fonts on your WordPress site to reflect your brand identity better and enhance your site’s uniqueness.
Typography Settings
Uploading or Installing Fonts
To add custom fonts to your WordPress site, you can either upload a custom font from your computer or install a font from Google Fonts.
Here is how you can do both:
Uploading a Custom Font
Click the typography icon to open the typography settings.
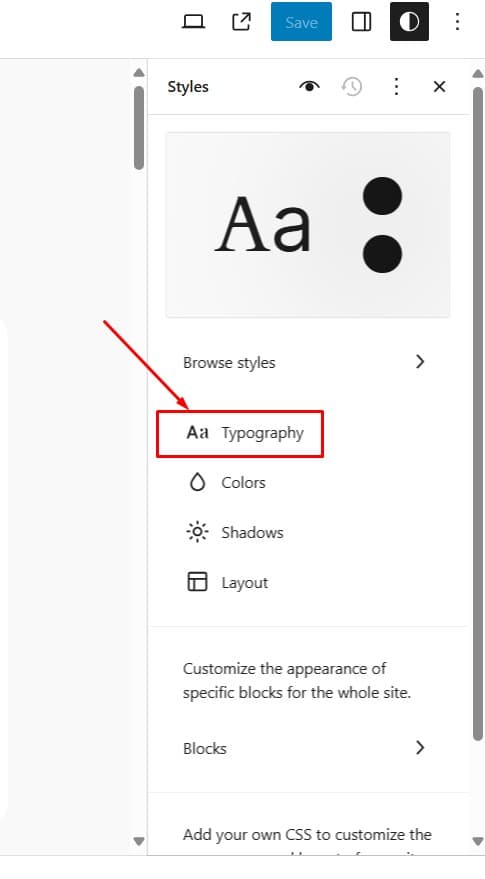
Then, click the “Manage Fonts” icon to open a new window.
Upload Font:
Click “Upload.”

Then “Upload Font” to open a file selector.
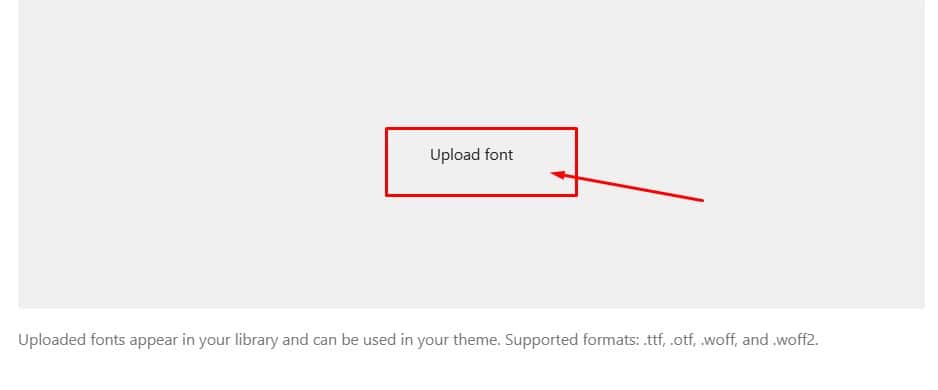
Navigate to the location on your computer where your font file is stored, select the file, and click “Open.”
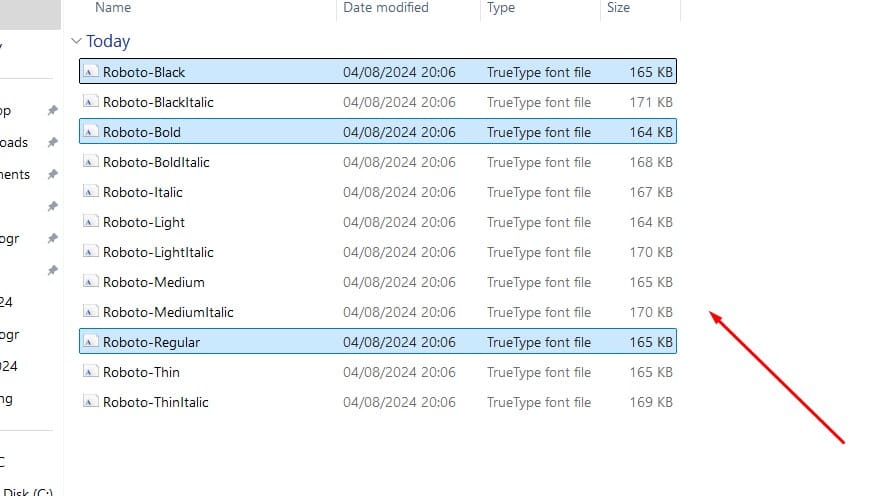
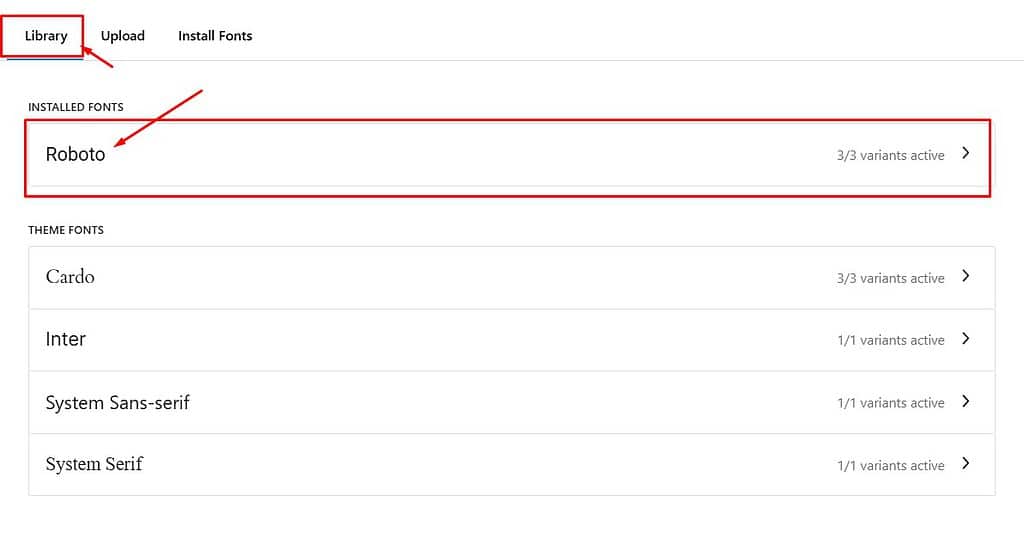
Select and Upload:
Once selected, the font uploads to your WordPress theme. You will see it appear in the list of available fonts.
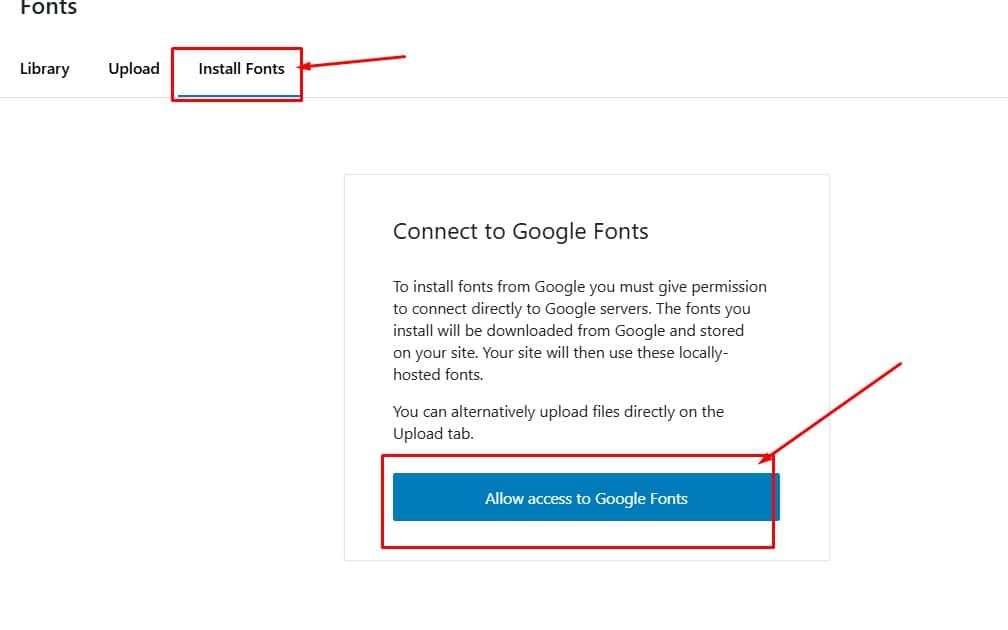
Installing a Font from Google Fonts
Browse Fonts:
In the Manage Fonts window, click “Install Fonts” to browse the available fonts on Google Fonts.
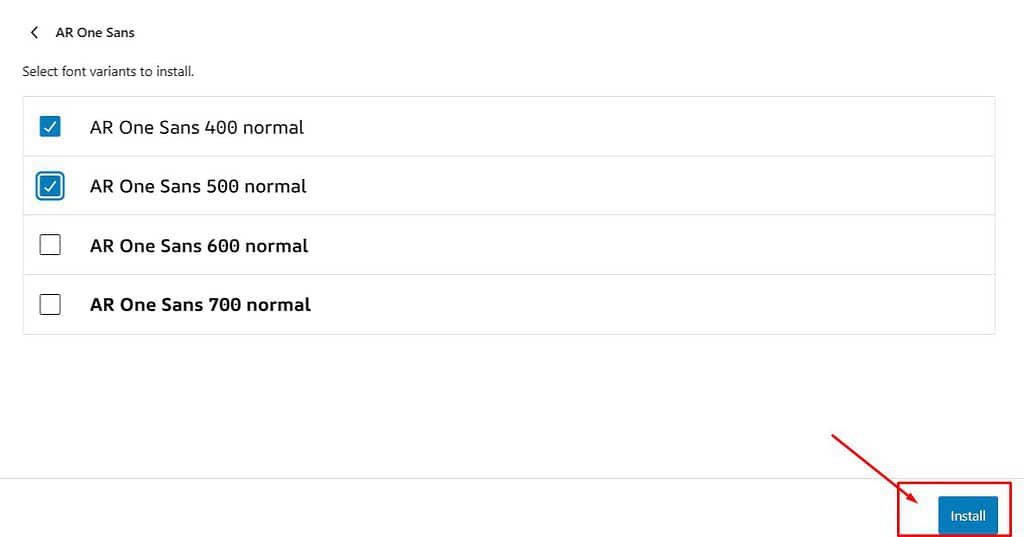
Select a Font:
Scroll through the list or use the search function to find the font you want to install. Click on the font to select it.

Install Font:
After selecting the desired font, click “Install.” The font is added to your WordPress theme and is available for use.
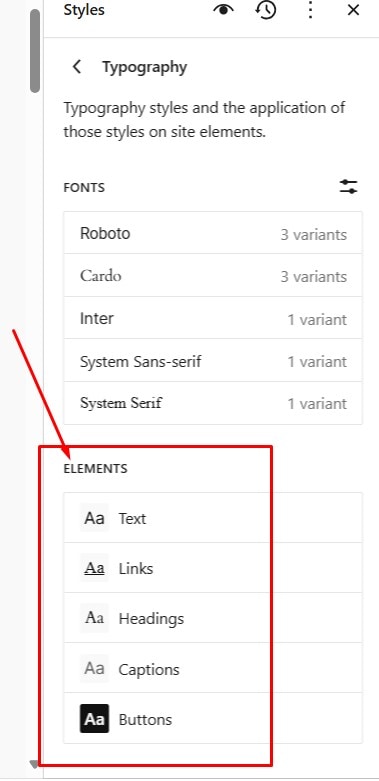
Applying the Font to an Element
Once you’ve uploaded or installed your custom font, the next step is to apply it to specific elements on your website:
Choose the element you want to style, such as headings, text, or any other typographic element.
Click on the typography icon for the selected element to open the typography settings.
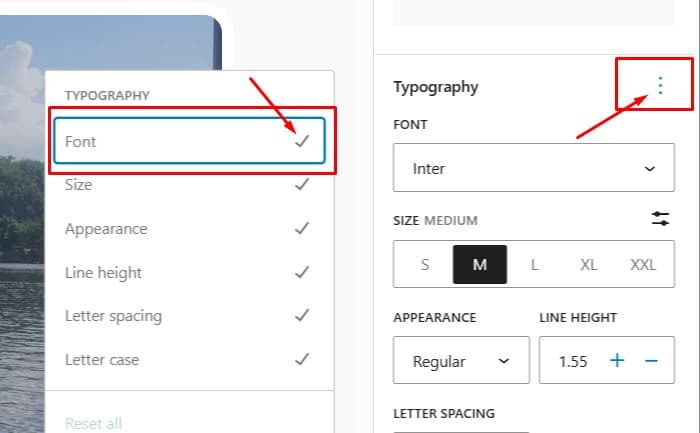
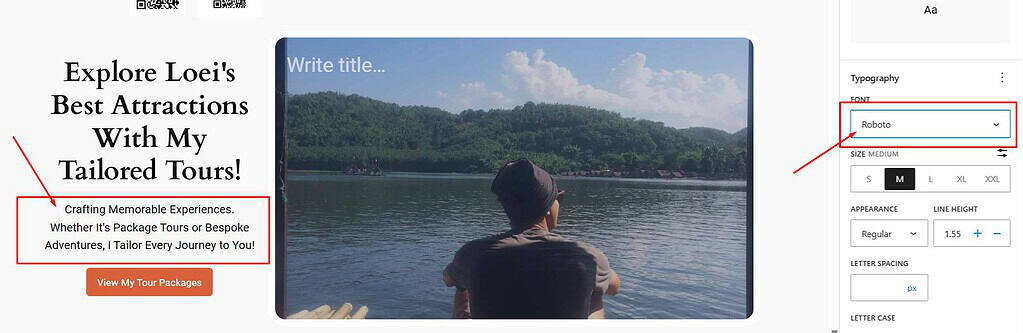
In the typography settings, find the font drop-down menu. Click on it and select your newly installed font from the list.
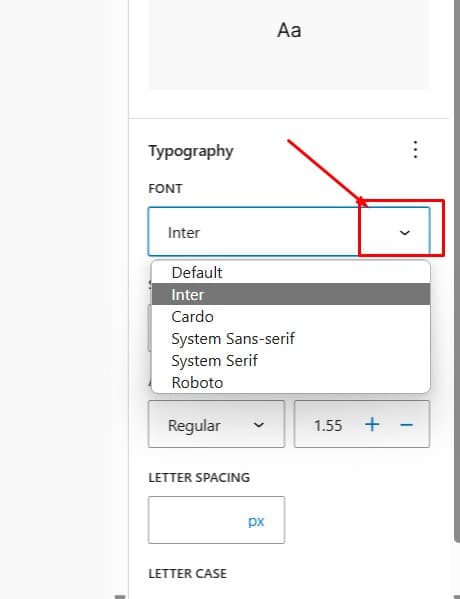
The font will be applied to the element in the display window on the left, allowing you to see a live preview of your changes.
Saving Changes
To ensure your new custom fonts are live on your website, follow these steps:
Once satisfied with your font customizations, click the “Save” button to apply the changes.
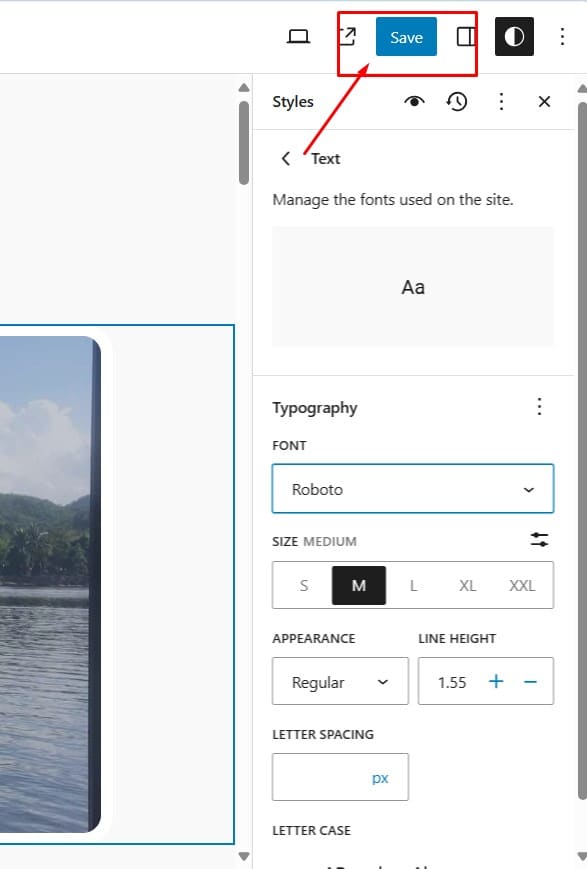
Refresh your website or visit it in a new tab to see the custom fonts in action.
Your changes should now be live, enhancing your site’s typography and overall appearance.
Removing an Installed Google Font
If you decide to remove a Google font from your WordPress site, follow these steps:
Go to the Global Styles panel by clicking the Global Styles icon.
Then select the typography icon.
Click the Google font you want to remove and click the “Delete” button.
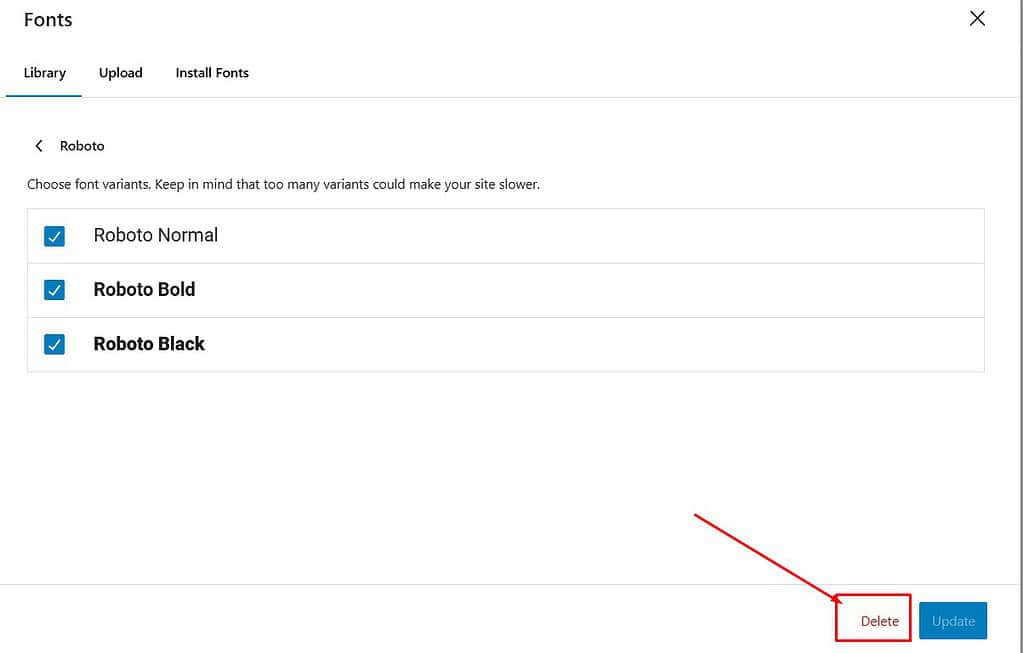
This will remove the font from your theme and will no longer be available.
Video Tutorial
Conclusion
In this tutorial, we covered adding custom fonts to your WordPress site using the Theme Editor and how to remove Google Fonts.
Here is a quick recap:
- Accessing the Theme Editor: Log into your WordPress admin area and navigate to the Theme Editor via the Appearance menu.
- Activating the Editor: Click on the right-hand side of the screen to enable editing options.
- Opening Global Styles: Click the Global Styles icon to access typography settings.
- Uploading or Installing Fonts: Upload custom fonts from your computer or install fonts from Google Fonts.
- Applying the Font to an Element: Select and apply your new font to various elements like headings and text.
- Saving Changes: Save your changes to make the custom fonts live on your website.
- Removing an Installed Google Font: Access typography settings, click the font, and select and delete the font.
Experiment with different fonts to find the perfect look for your website.
Custom fonts can significantly enhance your site’s uniqueness and branding.
To further improve your WordPress site, consider exploring how to create a navigation menu.
This feature will enable you to organize your site’s pages efficiently, improving user navigation and experience.
Check out our detailed guide on how to create a menu in a WordPress block theme and discover the benefits of a well-structured menu.
Starting a website or blog can be overwhelming, especially with the many decisions and technical details involved.
That’s where I come in—let me handle the setup, optimization, and ongoing support to ensure your online success.
About NewBlogr
At NewBlogr, I am passionate about helping individuals and small businesses launch and grow their online presence.
I specialize in creating custom WordPress websites, offering domain and hosting setup, essential SEO, and continuous support to help you achieve your goals.
My dedication to excellence comes from a desire to see my clients succeed.
I focus exclusively on website creation and support, providing you with a seamless and stress-free experience from start to finish.
Let me help you build and maintain a professional online presence that attracts and engages your audience.
Want to See How a Professional Website Can Help You?
Key Benefits of Our Service
Effortless Setup
I take care of everything from domain registration to website launch, ensuring a smooth and hassle-free process.
Custom Design
My tailored designs ensure your website stands out and reflects your unique brand identity.
Continuous Support
I offer ongoing assistance and updates, ensuring your website remains optimized and effective.
Getting Started with NewBlogr
1. Contact Us
Reach out through my contact page to discuss your needs and goals. I’ll provide a free initial consultation to understand how I can help.
2. Website Planning and Proposal
I’ll review your requirements and present a tailored plan to create and optimize your website.
3. Implementation and Support
Once you approve the plan, I will develop your website and provide ongoing support to ensure sustained growth and engagement.
What We Offer to Elevate Your Online Presence
- Custom WordPress Website Creation
Develop a high-converting, user-friendly website tailored to your needs. - Domain & Hosting Setup
Assist with selecting and setting up your domain and hosting services. - SEO Optimization
Enhance your site’s visibility and drive organic traffic. - Performance Monitoring
Regularly review and optimize your website’s performance.
- Ongoing Updates
Keep your website up-to-date and functioning optimally. - Resources
Provide tutorials and support to help you manage and grow your website. - Customer Support
Offer continuous support to address any issues or updates. - Tailored Strategies
Customize our services to meet your specific goals and needs.
Are You Ready To Get Started?
Starting a website or blog can be overwhelming, especially with the many decisions and technical details involved.
That’s where I come in—let me handle the setup, optimization, and ongoing support to ensure your online success.
About NewBlogr
At NewBlogr, I am passionate about helping individuals and small businesses launch and grow their online presence.
I specialize in creating custom WordPress websites, offering domain and hosting setup, essential SEO, and continuous support to help you achieve your goals.
My dedication to excellence comes from a desire to see my clients succeed.
I focus exclusively on website creation and support, providing you with a seamless and stress-free experience from start to finish.
Let me help you build and maintain a professional online presence that attracts and engages your audience.
Want to See How a Professional Website Can Help You?
Key Benefits of Our Service
Effortless Setup
I take care of everything from domain registration to website launch, ensuring a smooth and hassle-free process.
Custom Design
My tailored designs ensure your website stands out and reflects your unique brand identity.
Continuous Support
I offer ongoing assistance and updates, ensuring your website remains optimized and effective.
Getting Started with NewBlogr
1. Contact Us
Reach out through my contact page to discuss your needs and goals. I’ll provide a free initial consultation to understand how I can help.
2. Website Planning and Proposal
I’ll review your requirements and present a tailored plan to create and optimize your website.
3. Implementation and Support
Once you approve the plan, I will develop your website and provide ongoing support to ensure sustained growth and engagement.
What We Offer to Elevate Your Online Presence
- Custom WordPress Website Creation
Develop a high-converting, user-friendly website tailored to your needs. - Domain & Hosting Setup
Assist with selecting and setting up your domain and hosting services. - SEO Optimization
Enhance your site’s visibility and drive organic traffic. - Performance Monitoring
Regularly review and optimize your website’s performance.
- Ongoing Updates
Keep your website up-to-date and functioning optimally. - Resources
Provide tutorials and support to help you manage and grow your website. - Customer Support
Offer continuous support to address any issues or updates. - Tailored Strategies
Customize our services to meet your specific goals and needs.
Leave a Reply