
In this tutorial, I will walk you through the methods for installing plugins on your WordPress site.
Plugins are essential tools in the WordPress ecosystem.
They enhance the functionality of your website, allowing you to add features and capabilities without needing to write a single line of code.
Whether you want to improve your site’s SEO, add contact forms, integrate social media, or create an online store, plugins make it all possible.
By learning how to install and manage plugins, you will unlock the full potential of your WordPress site, making it more dynamic, interactive, and user-friendly.
This guide is perfect for beginners who are new to WordPress.
If you are starting your journey with WordPress and want to learn how to extend the functionality of your site, you are in the right place.
I will cover everything you need to know in a straightforward, step-by-step manner.
So, let us get started and turn your WordPress site into a powerhouse of features!
This post contains affiliate links. That means I get paid a commission when you purchase at no extra cost to you. I thank you for your support.
What are WordPress Plugins?
WordPress plugins are powerful tools designed to extend the functionality of your WordPress site.
Think of them as apps for your website.
Just as apps on your smartphone add new features and capabilities, plugins do the same for your WordPress site.
They allow you to add functionalities without needing any code.
For example, you can use plugins to:
- Enhance your site’s SEO to attract more visitors.
- Create beautiful contact forms to engage with your audience.
- Add e-commerce capabilities to start selling products online.
- Integrate social media feeds to keep your content dynamic and engaging.
Plugins empower you to customize your site precisely to meet your needs, making it more versatile and user-friendly.
Types of Plugins
The WordPress plugin ecosystem offers solutions for almost any functionality you can imagine.
Here are the main types of plugins available:
Free Plugins
These plugins are available at no cost in the WordPress Plugin Repository.
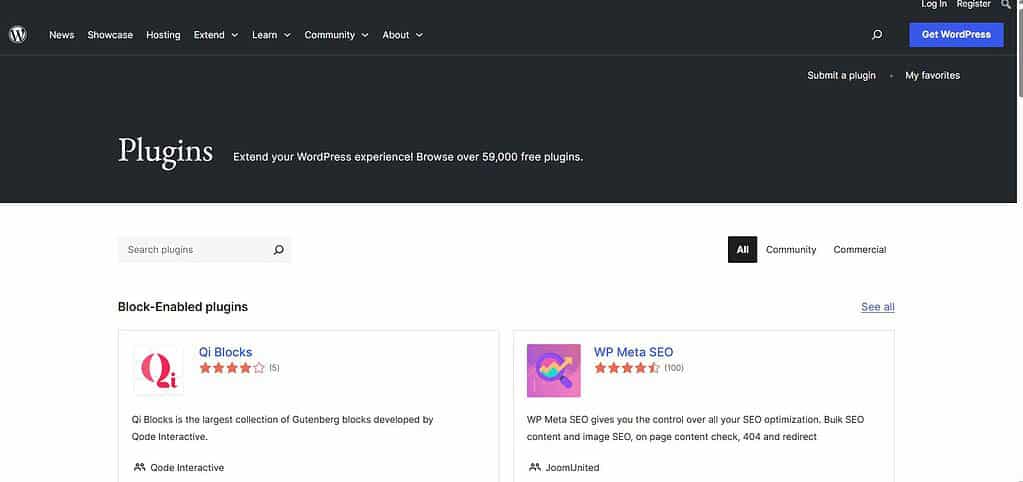
Examples: Popular free plugins include Yoast SEO for search engine optimization, Contact Form 7 for creating forms, and WooCommerce for setting up an online store.
Benefits: They are accessible to all users, allowing you to enhance your site without any financial investment.
Premium Plugins
Premium-paid plugins typically offer more advanced features, dedicated support, and regular updates.

Examples: Some well-known premium plugins are WP Rocket for website caching and speed optimization, Gravity Forms for advanced form building, and MemberPress for creating membership sites.
Benefits: Premium plugins often provide higher quality features, better support, and more frequent updates, ensuring your site remains secure and functional.
Custom Plugins
These plugins are developed for your site, and tailored to meet your unique needs.
Examples: A custom plugin might integrate your site with a specific third-party service or add a unique feature unavailable in existing plugins.
Benefits: Custom plugins offer the highest level of customization, ensuring your site has precisely the features you need without any unnecessary extras.
Understanding these different plugins helps you make informed decisions about which ones to use, ensuring your WordPress site is as effective and efficient as possible.
Pre-Installation Checklist
Backup Your Site
Before installing new plugins, it is crucial to back up your site.
This ensures you have a copy of your website to restore if anything goes wrong during the plugin installation.
Backing up your site involves saving all your files, databases, and configurations.
Why It is Important
Plugins are useful, but can sometimes conflict with your theme or other plugins, causing your site to crash or malfunction.
A backup allows you to quickly revert to the previous working version of your site without losing any data.
How to Backup
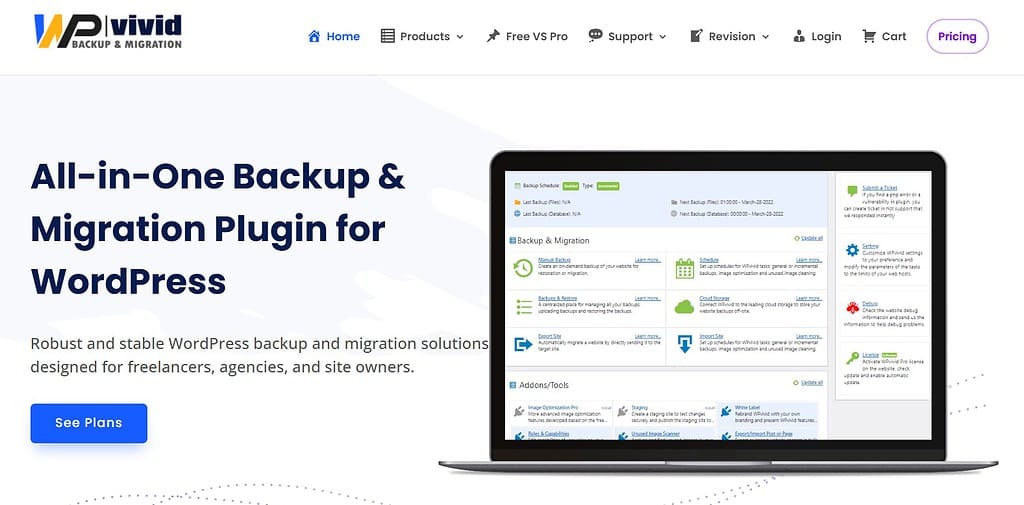
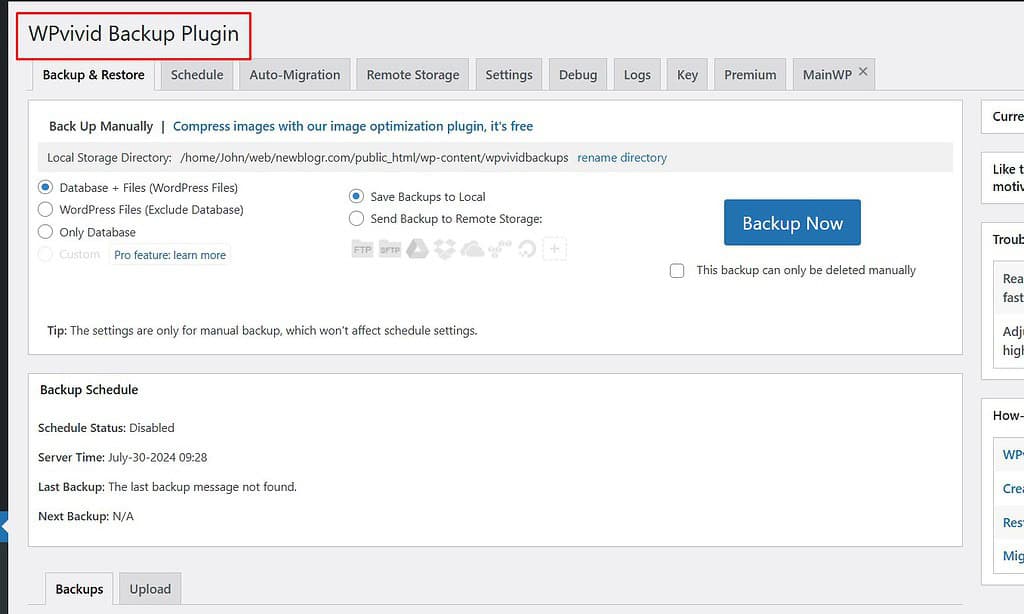
You can use backup plugins like UpdraftPlus, WPVivid, or BackupBuddy, which offer easy and automated backup solutions.
Alternatively, many hosting providers offer backup services as part of their hosting packages.
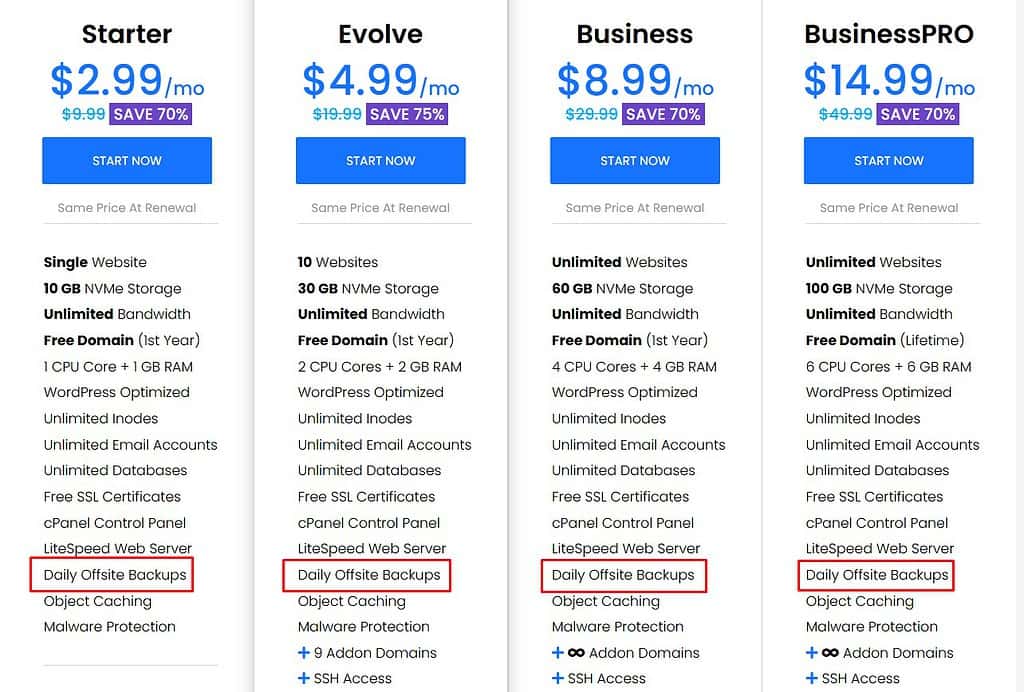
Setra Host offers daily offsite backups on all their plans.
Check Compatibility
Before installing a plugin, ensure it is compatible with your WordPress version and theme.
Incompatible plugins can cause errors, slow down your site, or even make it inaccessible.
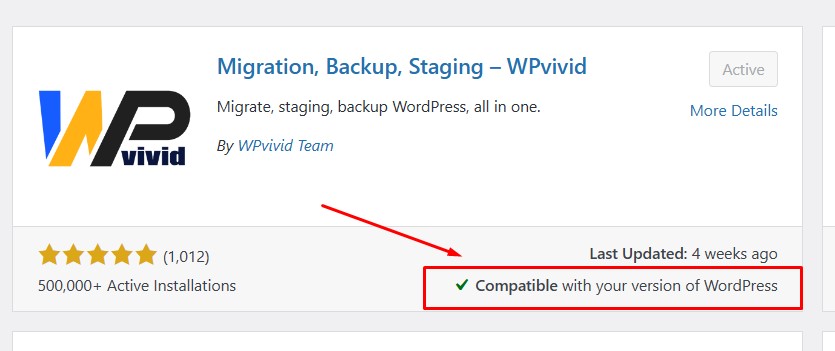
WordPress Version
Check the plugin details page in the WordPress Plugin Repository.
It lists the WordPress versions that the plugin is compatible with.
Theme Compatibility
Some plugins might not work well with some themes.
It is a good idea to check the plugin’s documentation for any known conflicts with popular themes.
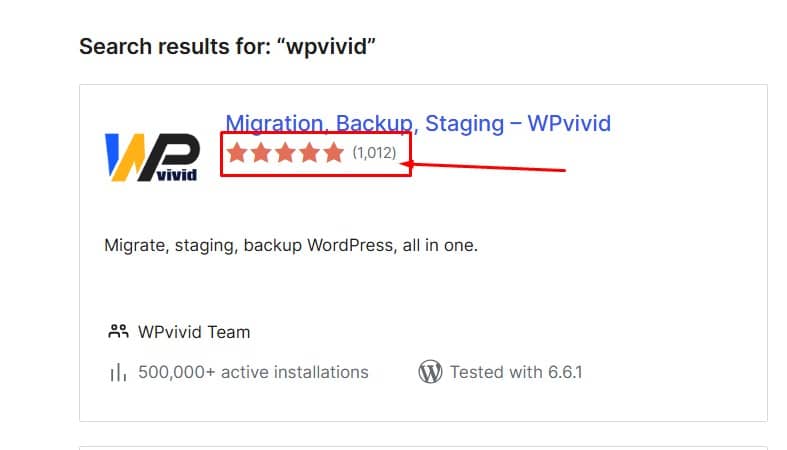
Review Plugin Ratings and Reviews
Evaluating the quality and reliability of a plugin is essential to ensure it is safe to use and meets your needs.
Here is how to assess a plugin effectively:
Ratings
Look for plugins with high ratings (typically 4 stars and above). High ratings generally indicate that users are satisfied with the plugin’s performance and features.
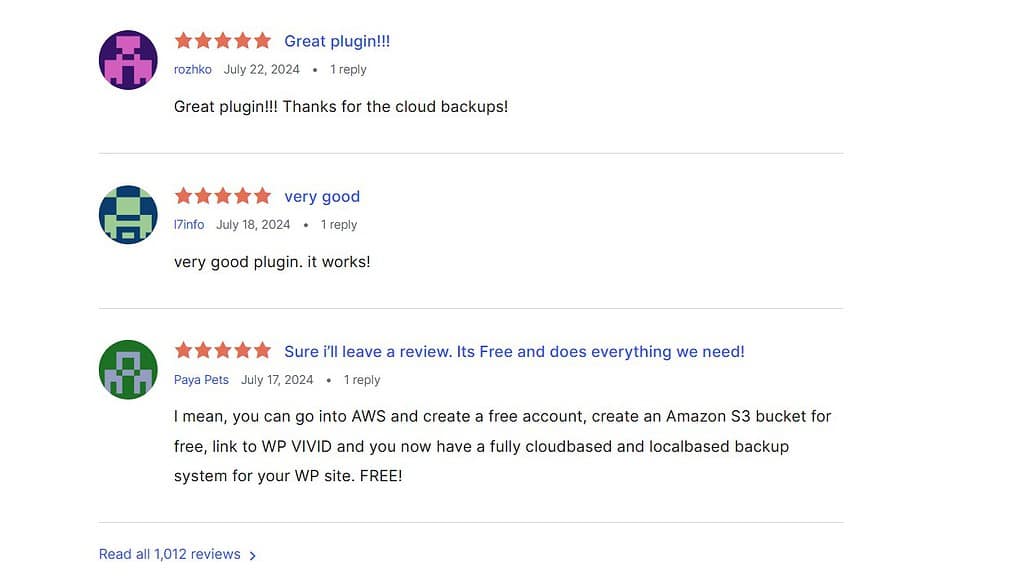
Reviews
Read through user reviews to get insights into the plugin’s functionality, ease of use, and potential issues. Pay attention to both positive and negative feedback.
Active Installations
Plugins with many active installations are usually more reliable and well-maintained.
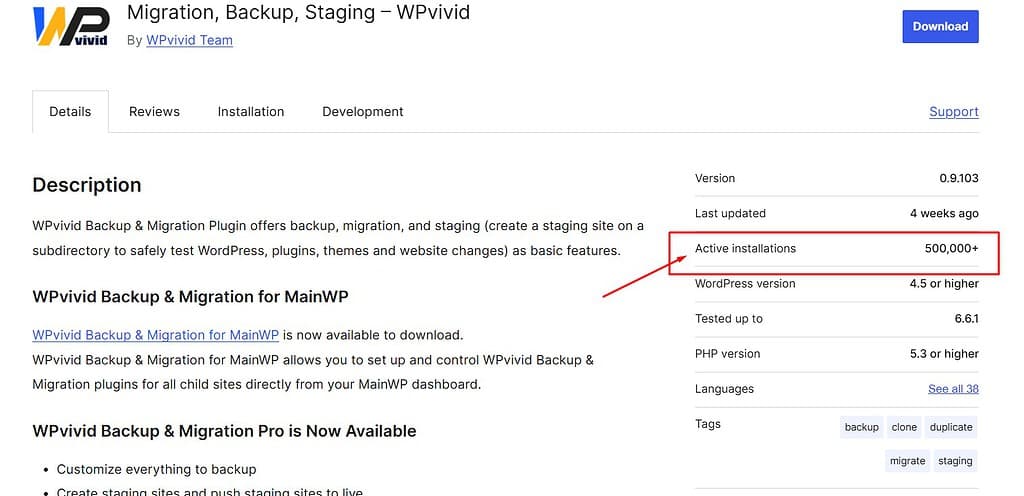
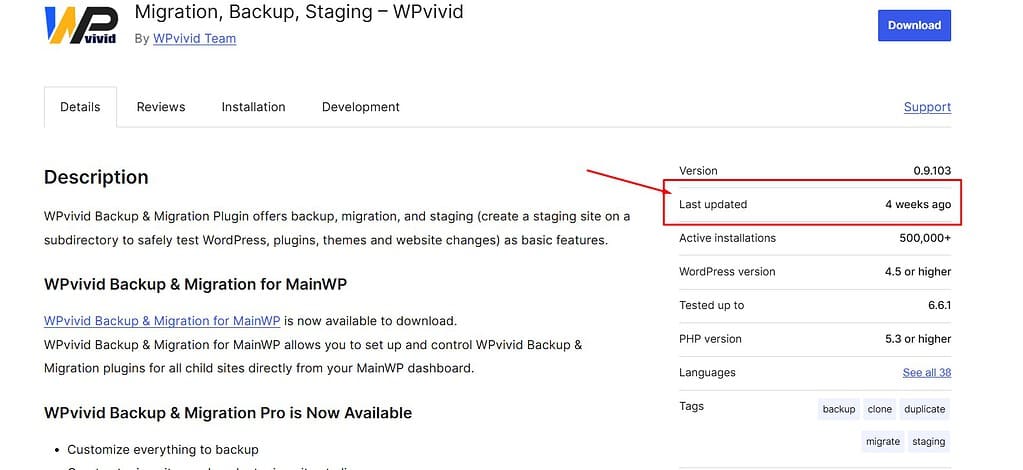
Update Frequency
Check if the plugin is regularly updated. Regular updates indicate that the developer is maintaining the plugin and fixing bugs or security issues.
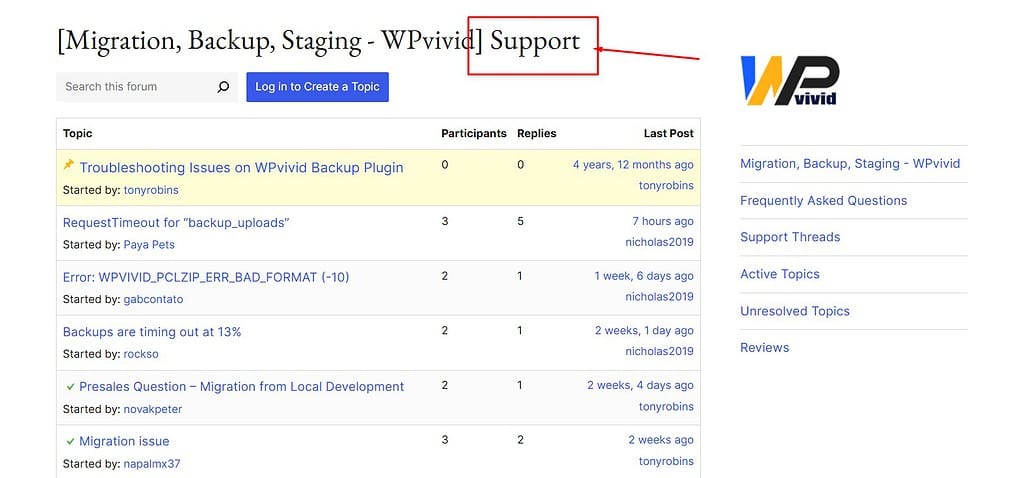
Support
Review the support section to see how responsive the developer is to user queries and issues.
Following this pre-installation checklist helps ensure you choose the right plugins for your WordPress site, maintaining its performance and security while enhancing its functionality.
Method 1: Installing Plugins from the WordPress Dashboard
Step 1: Log into WordPress Admin
The first step to installing plugins from the WordPress dashboard is to log into your WordPress admin area.
- Open your web browser and go to your WordPress login page.
- Enter your username and password, then click the Login button.
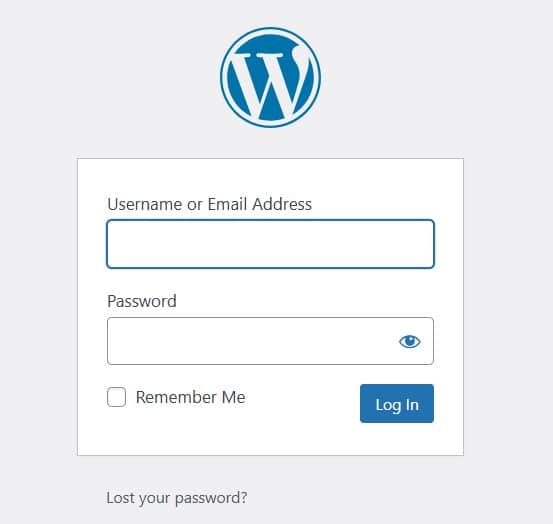
Once logged in, you go to the WordPress admin dashboard.
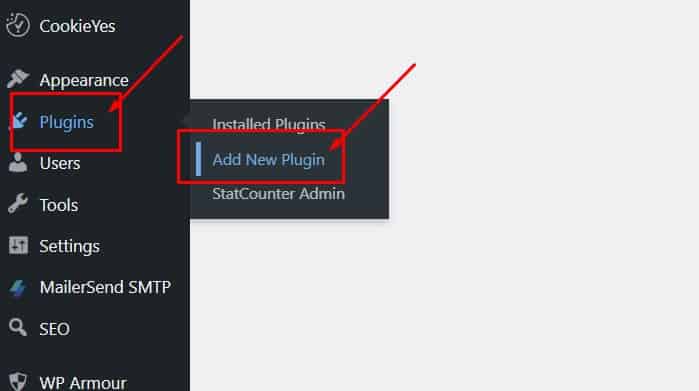
Step 2: Go to Plugins > Add New
Next, navigate to the plugin repository to find and add new plugins to your site.
- In the left sidebar of your WordPress dashboard, hover over Plugins.
- Click on Add New from the expanded menu.
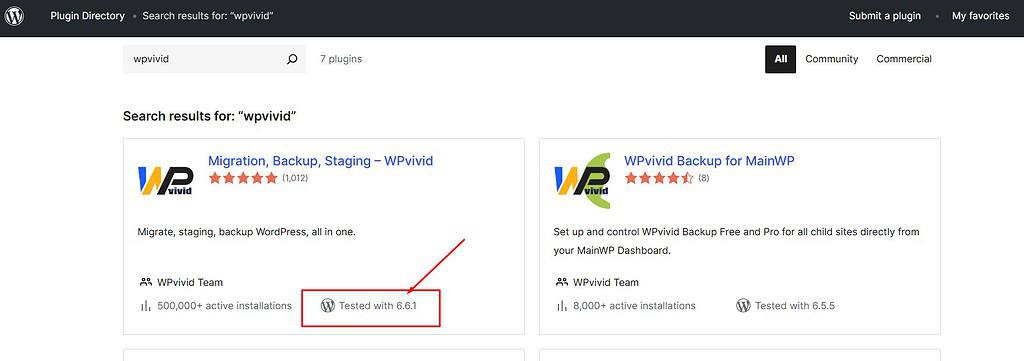
Step 3: Search for the Plugin
Now, you need to find the specific plugin you want to install.
- You’ll see a search bar at the top right corner of the page.
- Type in the name or keyword of the plugin you’re looking for. For example, if you’re looking for a contact form plugin, you might type “WPVivid”.
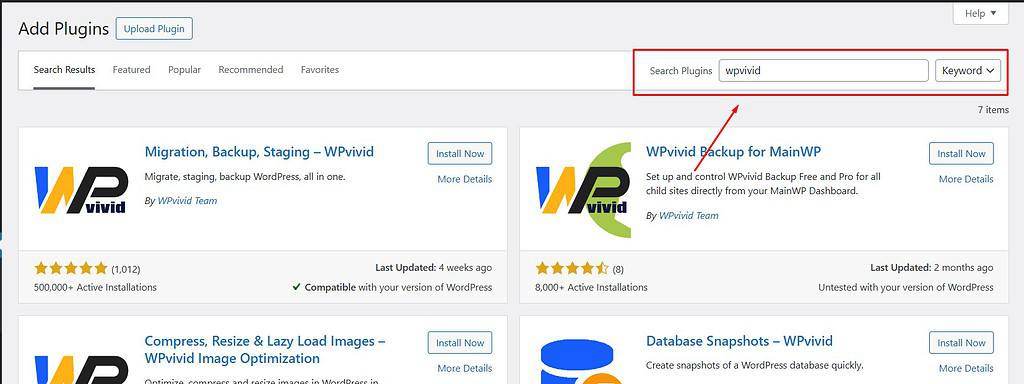
WordPress will display a list of plugins that match your search criteria.
Step 4: Click Install Now
After you’ve found the plugin you want to install, you can proceed with the installation.
- Locate the plugin in the search results.
- Click the Install Now button next to the plugin’s name.
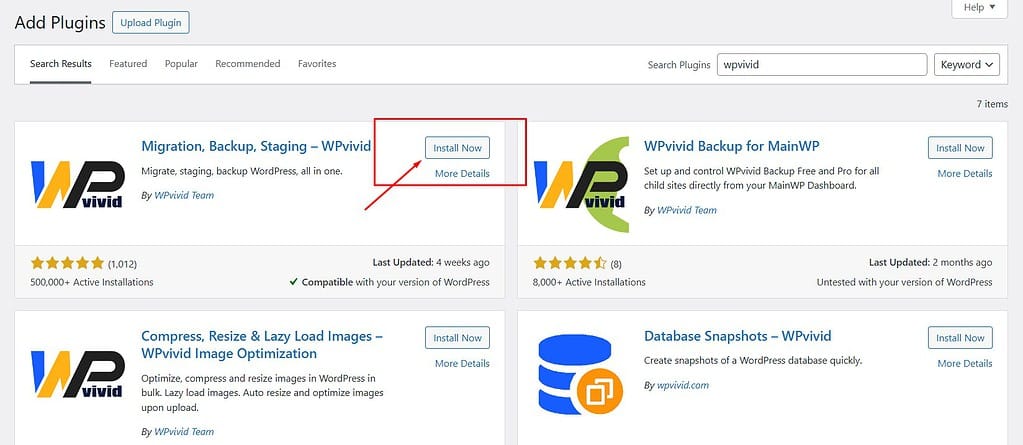
WordPress will now download and install the plugin files.
Step 5: Activate the Plugin
Finally, you need to activate the plugin to start using its features.
- Once installed, the Install Now button will change to Activate.
- Click the Activate button.
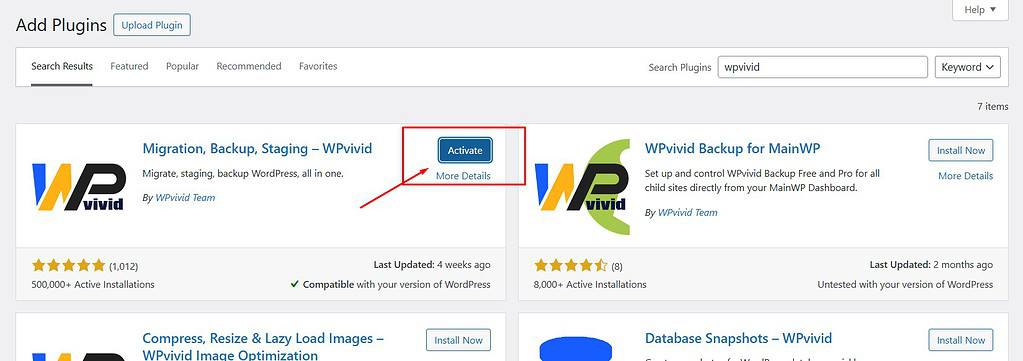
The plugin is now active and ready to use on your WordPress site.
You could go to the plugin’s settings page or a welcome screen to configure the plugin according to your needs.
Video Tutorial
With these simple steps, you can easily install and activate plugins directly from your WordPress dashboard, enhancing your site’s functionality without any technical hassle.
Method 2: Uploading a Plugin
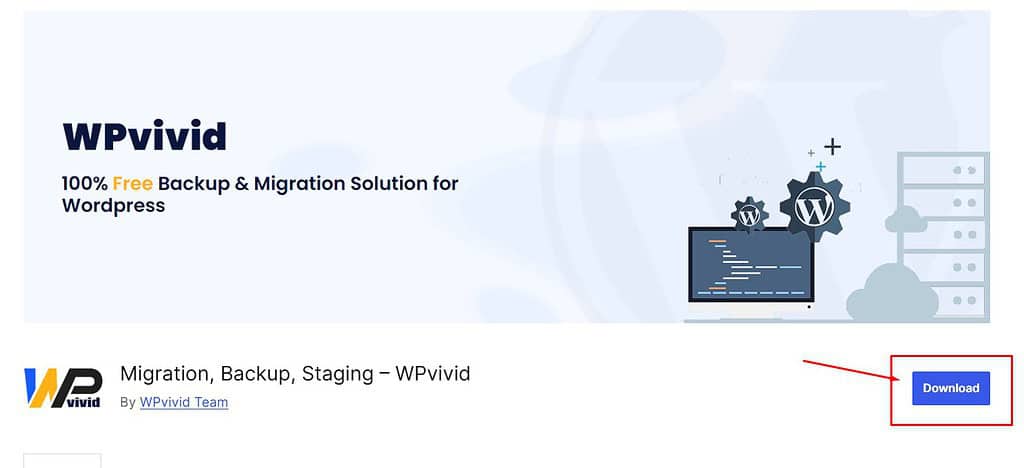
Step 1: Download the Plugin Zip File
The first step in manually uploading a plugin is to download the plugin file from the provider’s website.
This method is for premium plugins or plugins not available in the WordPress repository.
- Go to the website where the plugin is available.
- Locate the plugin and download the file. The file will be in a .zip format.
- Save the .zip file to your computer in an easily accessible location.
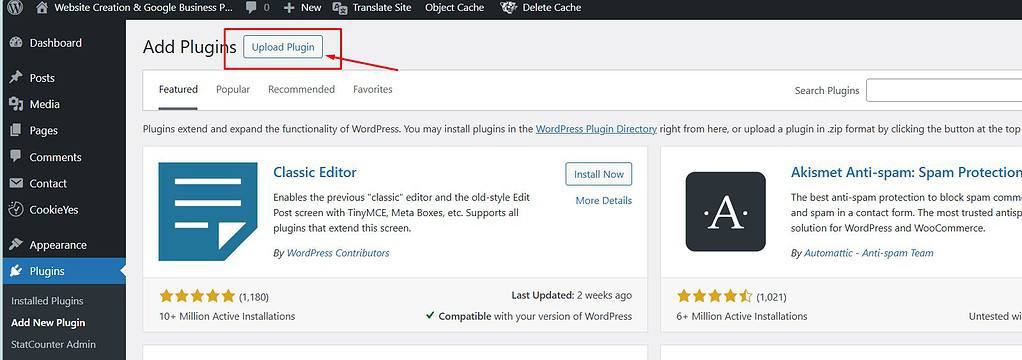
Step 2: Go to Plugins > Add New > Upload Plugin
Next, navigate to the area in your WordPress dashboard where you can upload the plugin file.
- Log into your WordPress admin area.
- In the left sidebar, hover over Plugins.
- Click on Add New.
- At the top of the page, click the Upload Plugin button.
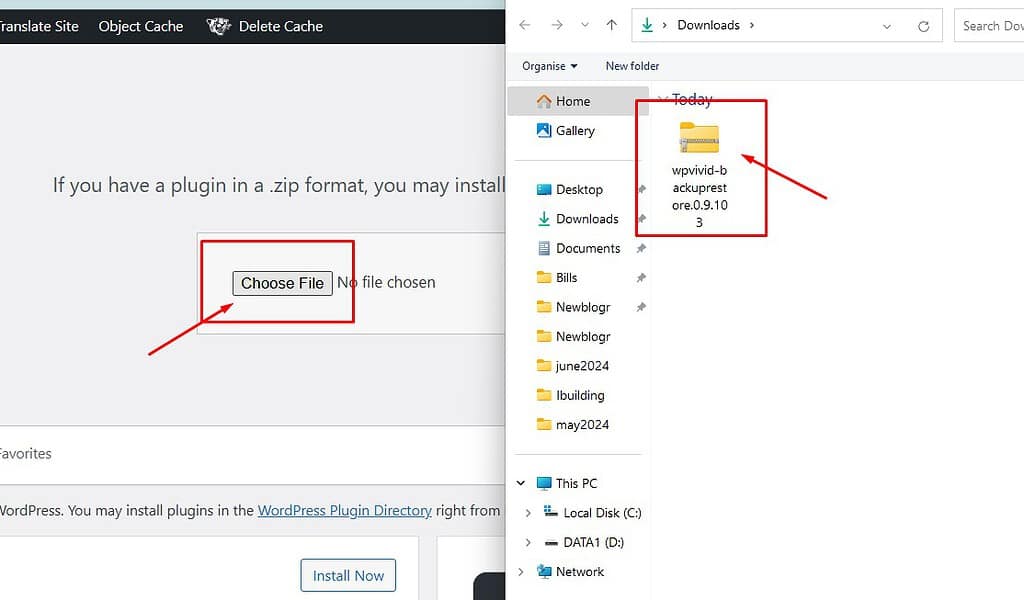
Step 3: Choose File and Install Now
Now it’s time to upload and install the plugin file you downloaded.
- Click the Choose File button.
- Go to the location on your computer where you saved the .zip file, select it, and click Open.
- Click the Install Now button to begin the installation process.
WordPress will upload the plugin file and automatically start the installation.
Step 4: Activate the Plugin
After installing the plugin, you must activate it to use its features.
- Once the installation is complete, you will see an Activate Plugin button.
- Click the Activate Plugin button.
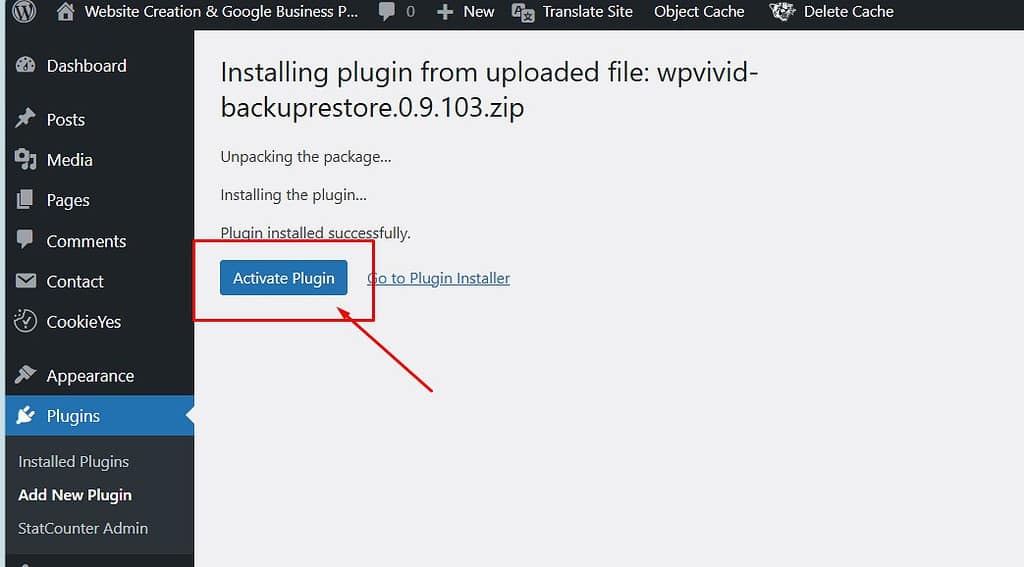
The plugin is now active and ready to use on your WordPress site.
You go to the plugin’s settings page or a welcome screen to configure the plugin according to your needs.
Video Tutorial
With these steps, you can manually upload and install plugins unavailable in the WordPress repository, ensuring you can leverage premium or custom plugins to enhance your website’s functionality.
What to Do After Installing a Plugin
After installing and activating a plugin, the next step is configuring its settings to ensure it works optimally for your site.
Each plugin has its own set of options and settings, so it’s essential to familiarize yourself with these to get the most out of the plugin.
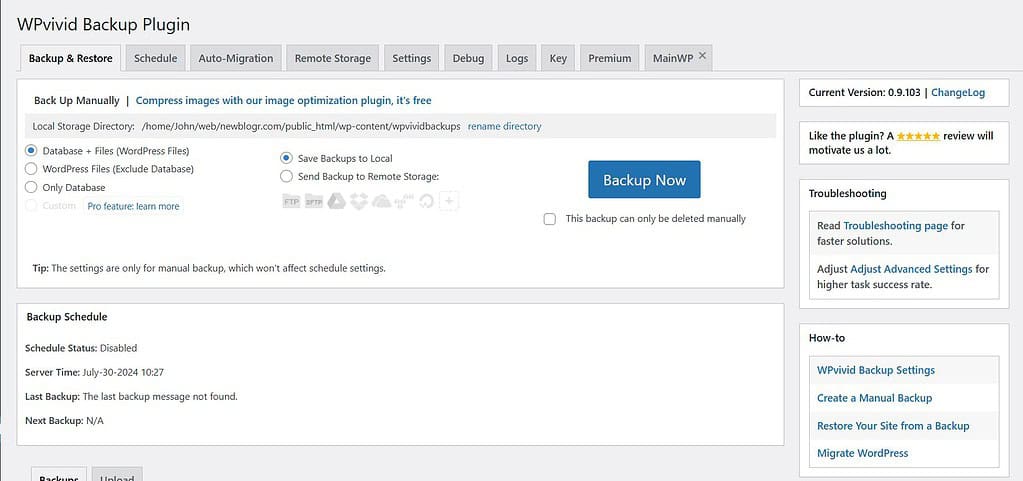
Access the Plugin Settings
Navigate to the Plugins section in your WordPress dashboard.
Find the newly installed plugin in the list.
Click on the Settings link (if available) under the plugin name.
Configure the Settings
Adjust the settings based on your preferences and the requirements of your website.
Refer to the plugin’s documentation or help resources if unsure about any settings.
Save your changes to apply the new settings.
Test the Plugin
After configuring the settings, test the plugin’s functionality on your site.
Ensure it’s working as expected and not causing issues with your site’s layout or performance.
Check for Updates
Keeping your plugins updated is crucial for maintaining the security, performance, and compatibility of your WordPress site.
Plugin developers frequently release updates to fix bugs, patch security vulnerabilities, and add new features.
Why Updates are Important
Security: Updates often include patches for security vulnerabilities, protecting your site from potential threats.
Performance: Updated plugins can improve the performance and speed of your site.
Compatibility: Regular updates ensure that plugins remain compatible with the latest version of WordPress and other plugins.
How to Check for Updates
Log into your WordPress admin area.
Go to Dashboard > Updates or Plugins section.
If there are updates available for your plugins, you see a notification.
Updating Plugins
Select the plugins you want to update.
Click the Update Plugins button.
Wait for the update process to complete.
Check your site to ensure everything is functioning correctly after the update.
Automatic Updates
Some plugins offer an option to enable automatic updates.
This feature can be convenient, but you must monitor your site regularly to ensure updates don’t cause issues.
By configuring your plugin settings and keeping them updated, your WordPress site remains secure, efficient, and fully functional.
This proactive approach helps you make the most of installed plugins, enhancing your site’s overall performance and user experience.
Troubleshooting Common Plugin Issues
Conflict Resolution
Sometimes, installing a new plugin can lead to conflicts with existing plugins or your WordPress theme.
Here are some steps to help you identify and resolve these conflicts:
Identify the Conflict
Deactivate Plugins: Deactivate all your plugins and then reactivate them one by one, checking your site each time to see when the issue reappears.
This helps identify the problematic plugin.
Switch Themes: Temporarily switch to a default WordPress theme (e.g., Twenty Twenty-One) to see if the issue is theme-related.
Resolve the Conflict
Update Plugins and Themes: Ensure all your plugins and themes are up to date. Developers often release updates that fix compatibility issues.
Find Alternatives: If a plugin is causing conflicts and no updates are available, consider finding an alternative plugin that provides similar functionality.
Contact Developers: Reach out to the developers of the conflicting plugin or theme for support. They might offer a solution or be able to provide a fix in a future update.
Support and Documentation
When you encounter issues with a plugin, accessing support and documentation can be incredibly helpful.
Here are some resources to consider:
Plugin Documentation
Most plugins come with documentation that explains how to install, configure, and troubleshoot common issues.
Look for a “Documentation” or “Help” link on the plugin’s page in the WordPress repository or the developer’s website.
Support Forums
The WordPress.org support forums are a great place to ask for help.
Many plugin developers monitor these forums and provide assistance.
Search for the plugin’s name and browse existing topics or start a new thread with your question.
Example: WordPress Plugin Support
Developer Support
For premium plugins, direct support from the developer is often included.
Visit the developer’s website and look for a “Support” or “Contact Us” section.
Submit a support ticket with details about your issue.
Community Help
Engage with the broader WordPress community on platforms like Reddit, Stack Exchange, or dedicated WordPress Facebook groups.
Experienced users and developers often share solutions to common problems.
By understanding how to troubleshoot plugin issues and where to seek support, you can quickly resolve conflicts and ensure your WordPress site runs smoothly.
This proactive approach minimizes downtime and keeps your site functioning optimally.
Summary
To summarize, installing plugins in WordPress can be done in two straightforward ways:
From the WordPress Dashboard
Log in to your WordPress admin area.
Navigate to Plugins > Add New.
Search for the desired plugin, click Install Now, and then Activate.
Uploading a Plugin
Download the plugin’s zip file from the provider’s website.
Go to Plugins > Add New > Upload Plugin in your WordPress dashboard.
Choose the downloaded file, click Install Now, and then Activate.
Plugins are powerful tools that can significantly enhance the functionality and appearance of your WordPress site.
Don’t be afraid to explore and experiment with different plugins to find what works best for you.
Remember to regularly check for updates and read reviews to ensure the plugins you use are reliable and secure.
Conclusion
Your journey with WordPress does not end here.
There are countless plugins and customization options available that can help you create a website that truly reflects your brand and meets your goals.
Explore additional tutorials and resources on our website to continue learning and growing your WordPress skills.
If you found this guide on installing plugins helpful, you might also be interested in optimizing your site’s URLs for better SEO and user experience.
Check out our detailed post on How to Change Permalink Structure in WordPress in 2024.
Starting a website or blog can be overwhelming, especially with the many decisions and technical details involved.
That’s where I come in—let me handle the setup, optimization, and ongoing support to ensure your online success.
About NewBlogr
At NewBlogr, I am passionate about helping individuals and small businesses launch and grow their online presence.
I specialize in creating custom WordPress websites, offering domain and hosting setup, essential SEO, and continuous support to help you achieve your goals.
My dedication to excellence comes from a desire to see my clients succeed.
I focus exclusively on website creation and support, providing you with a seamless and stress-free experience from start to finish.
Let me help you build and maintain a professional online presence that attracts and engages your audience.
Want to See How a Professional Website Can Help You?
Key Benefits of Our Service
Effortless Setup
I take care of everything from domain registration to website launch, ensuring a smooth and hassle-free process.
Custom Design
My tailored designs ensure your website stands out and reflects your unique brand identity.
Continuous Support
I offer ongoing assistance and updates, ensuring your website remains optimized and effective.
Getting Started with NewBlogr
1. Contact Us
Reach out through my contact page to discuss your needs and goals. I’ll provide a free initial consultation to understand how I can help.
2. Website Planning and Proposal
I’ll review your requirements and present a tailored plan to create and optimize your website.
3. Implementation and Support
Once you approve the plan, I will develop your website and provide ongoing support to ensure sustained growth and engagement.
What We Offer to Elevate Your Online Presence
- Custom WordPress Website Creation
Develop a high-converting, user-friendly website tailored to your needs. - Domain & Hosting Setup
Assist with selecting and setting up your domain and hosting services. - SEO Optimization
Enhance your site’s visibility and drive organic traffic. - Performance Monitoring
Regularly review and optimize your website’s performance.
- Ongoing Updates
Keep your website up-to-date and functioning optimally. - Resources
Provide tutorials and support to help you manage and grow your website. - Customer Support
Offer continuous support to address any issues or updates. - Tailored Strategies
Customize our services to meet your specific goals and needs.
Leave a Reply