

Buttons play a crucial role in web design by guiding users to take action, sign up for a newsletter, make a purchase, or navigate to another page.
A well-designed button can significantly improve user experience, making your website more interactive and engaging.
With the introduction of Full Site Editing (FSE) in WordPress, customizing buttons has become more accessible and flexible than ever.
FSE allows you to design and edit every aspect of your website, including buttons, without needing a single line of code.
This guide will walk you through creating and editing buttons using FSE, helping you make the most of this powerful tool.
Prerequisites
Before you dive into creating and customizing buttons in WordPress, ensure you meet the following prerequisites:
WordPress Version 5.9 or Later
Full Site Editing is available from WordPress version 5.9 onwards.
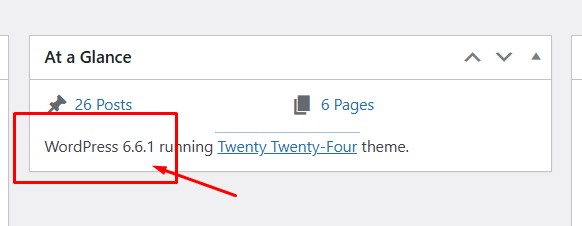
Make sure your WordPress installation is up to date.
Active Block Theme
Your website must be running a block theme to use FSE.
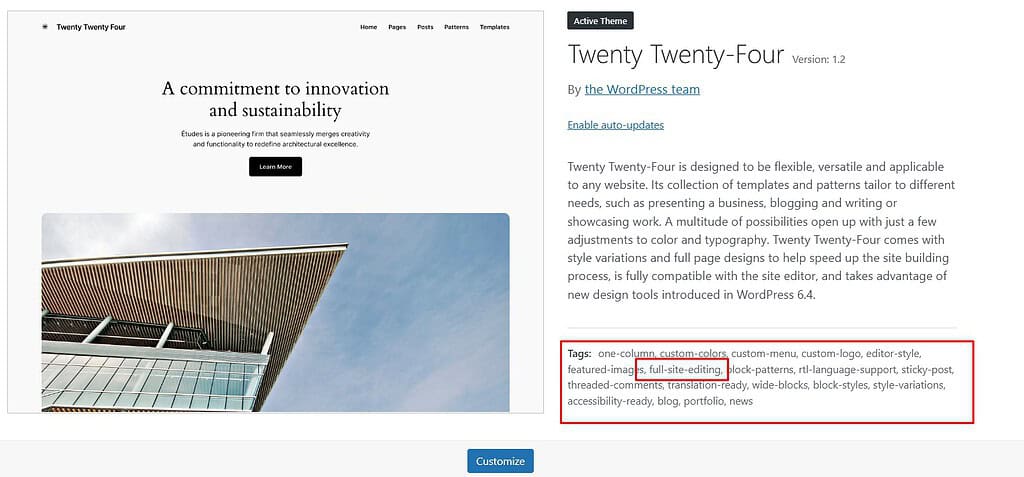
Block themes are designed to work with the Full Site Editing feature, allowing you to customize all parts of your site, including buttons, headers, and footers.
Accessing the Site Editor
To start customizing buttons using Full Site Editing, follow these steps:
Log Into WordPress Admin
Open your web browser and navigate to your WordPress login page (usually found at yourdomain.com/wp-admin).
Enter your username and password, then click the “Log In” button.
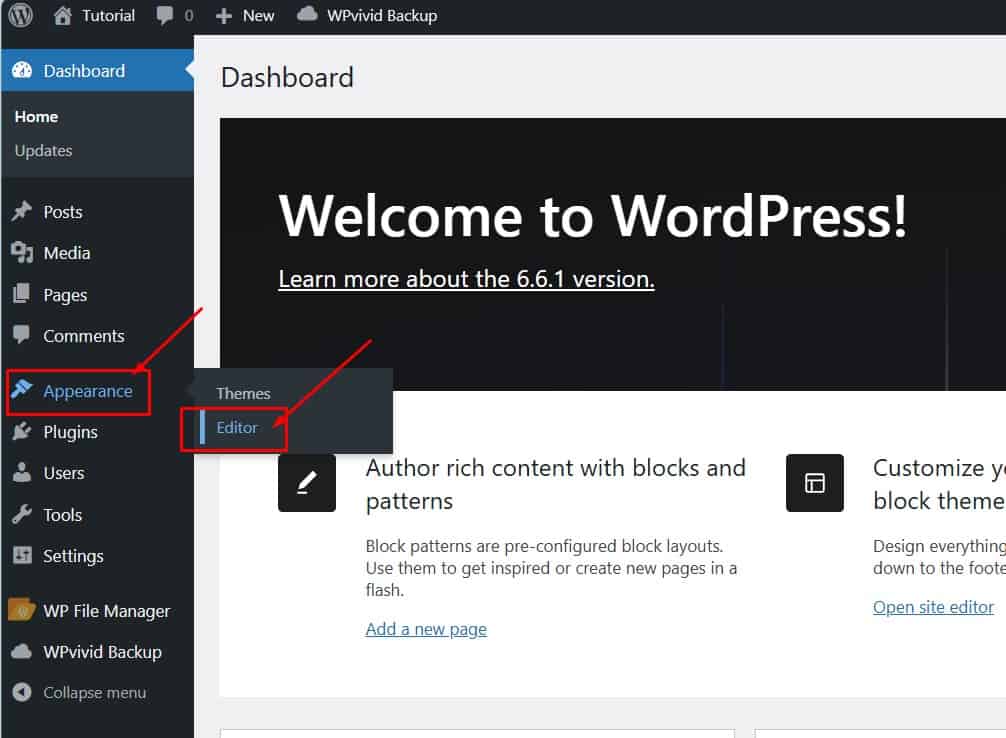
Select the Post or Page to Edit
Once logged in, navigate to the “Appearance” menu on the left-hand side of the dashboard.
Click on “Editor” (this is where you’ll access the Full Site Editing features).
If you want to edit a specific post or page, go to “Posts” or “Pages” from the dashboard, select the desired item, and then click on “Edit”.
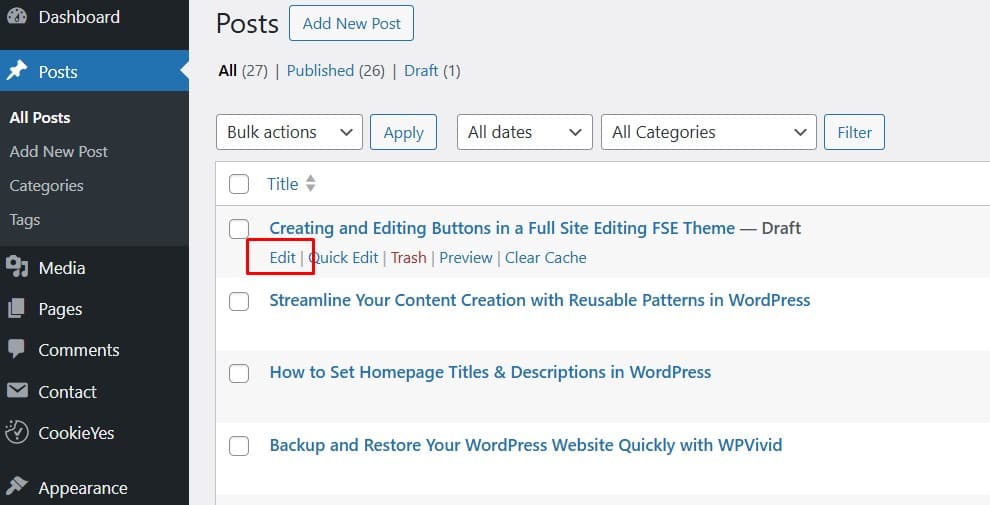
This will open the content editor, where you can add and customize buttons using FSE.
With these steps, you can start creating and editing buttons in your WordPress site using Full Site Editing.
Creating Your First Button
Now you are in the WordPress Site Editor, let us create your first button.
Buttons are essential elements that help guide your visitors to take specific actions on your website, such as contacting you, making a purchase, or signing up for a newsletter.
Here is how you can create one:
Select the Area for the Button
Decide where you want to place your button.
It could be in the header, footer, or content area of your page.
For this example, let us add a button to the content area.
Navigate to the part of the page where you want the button to appear.
Use the Block Inserter to Add a Button
Click on the + Block Inserter icon, at the top left of the editor or directly within the content area.
A panel will open, displaying various blocks you can add to your page.
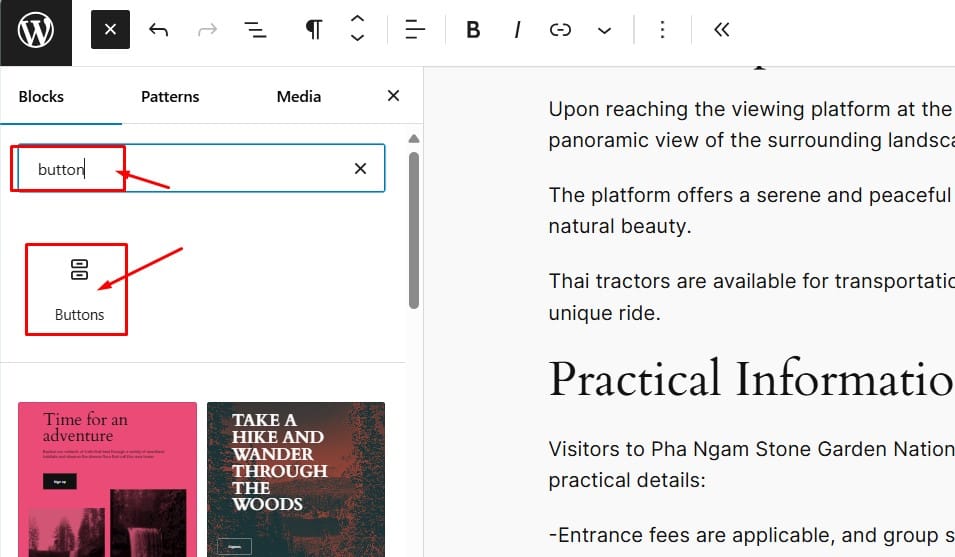
Search for the Button Block
In the Block Inserter panel, type “Button” in the search bar.
Click on the Button block to add it to your selected area.
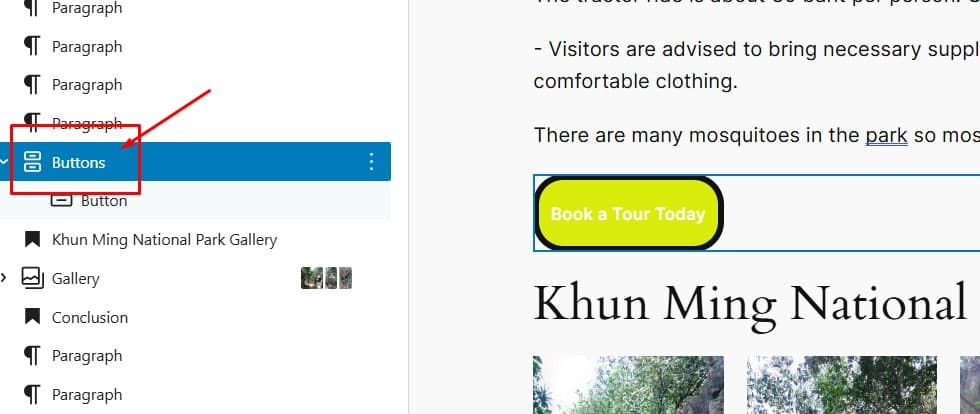
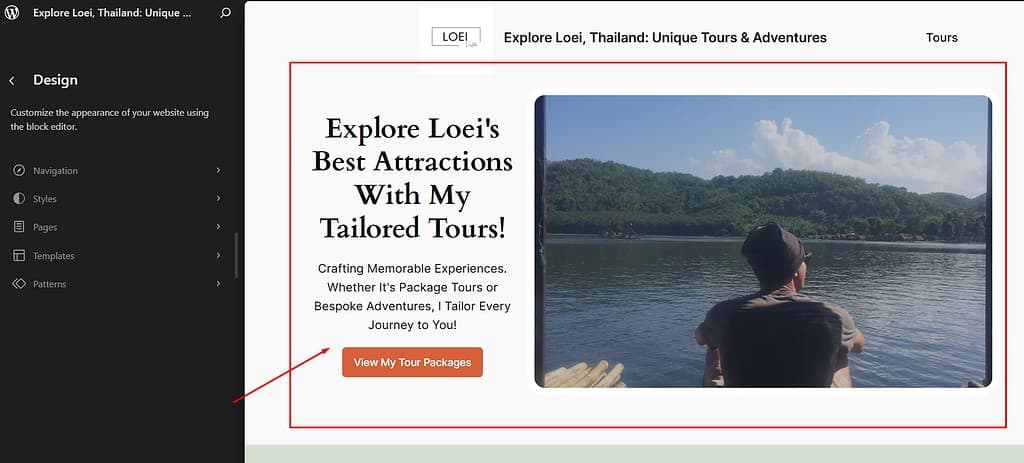
Example: Creating a Button Labeled “Book a Tour Today”
Once the button block is added, you will see a placeholder for the button text.
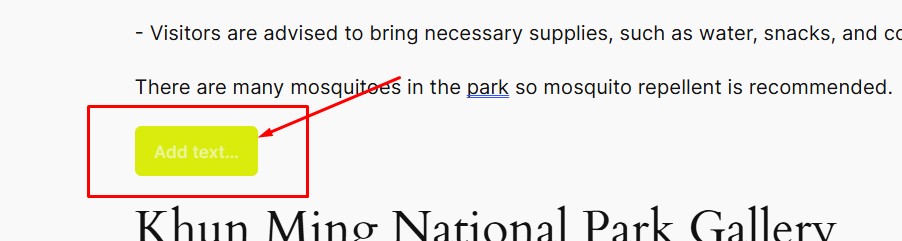
Click on the placeholder and type “Book a Tour Today”.
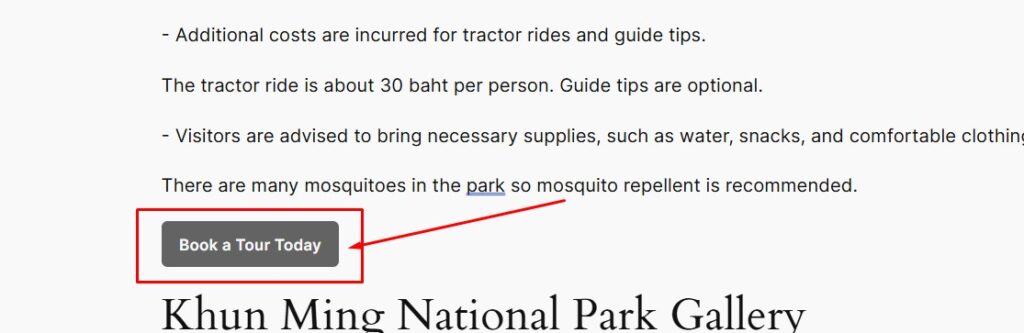
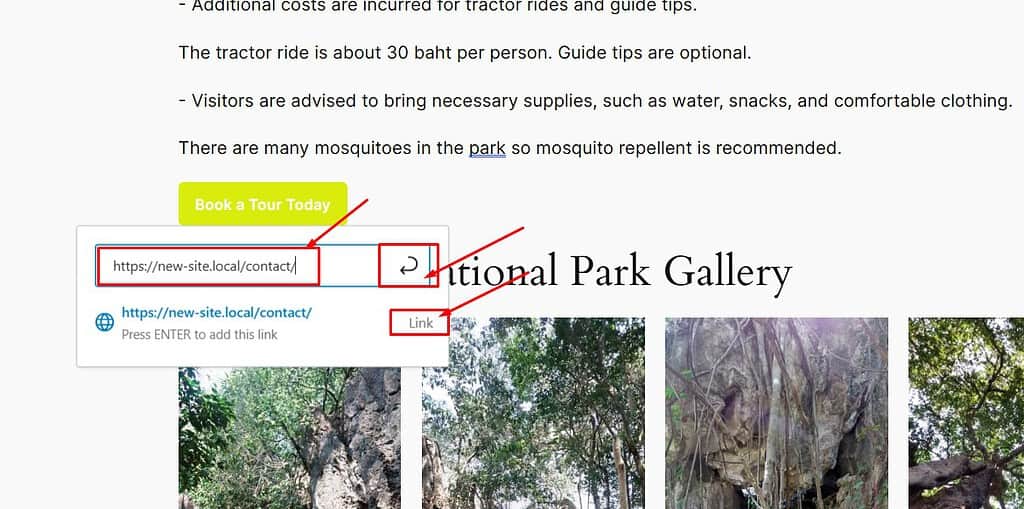
To link this button to your contact page, click the link icon in the block toolbar that appears above the button.
Enter the URL of your contact page and hit Enter. Your button is now linked and ready to guide visitors to your contact page.
Customizing Button Styles
Customizing the appearance of your button can make it more attractive and aligned with your website’s design.
Here’s how you can do it:
Styling Options in the Sidebar
With the button block selected, look to the right-hand sidebar where you’ll find the block settings.
This panel allows you to customize various aspects of the button, including its color, typography, and layout.
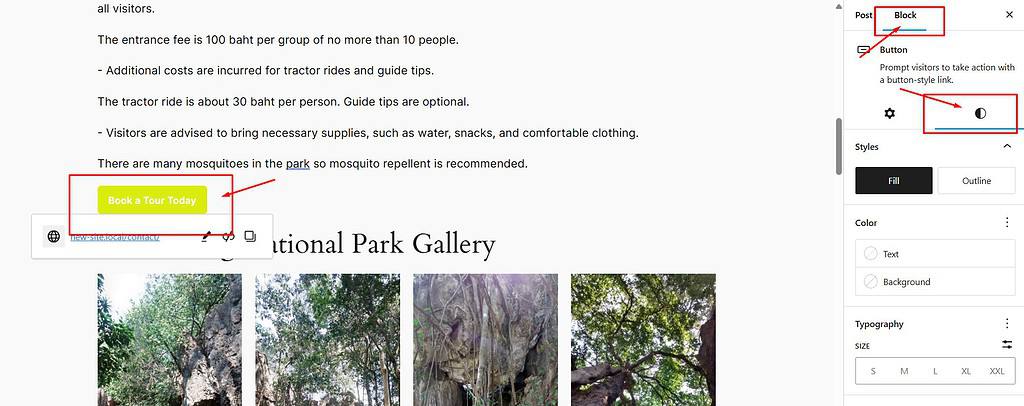
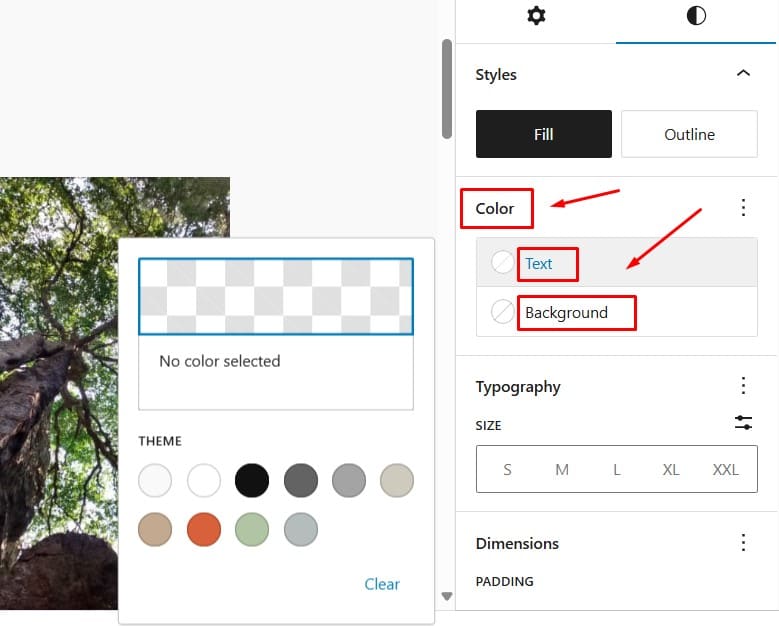
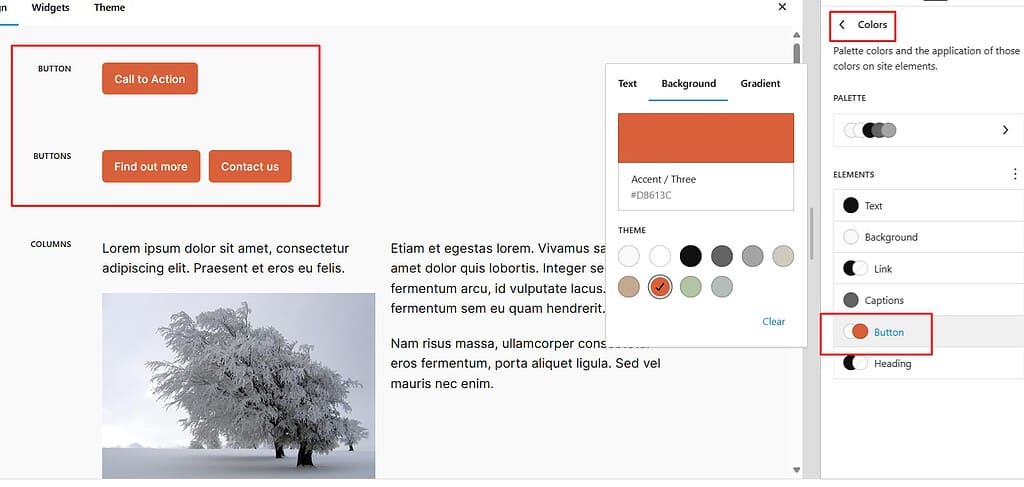
Changing Button Text and Background Color
In the Color section, you can change the text color and background color of your button.
Select colors that stand out against the surrounding content to ensure the button is noticeable.
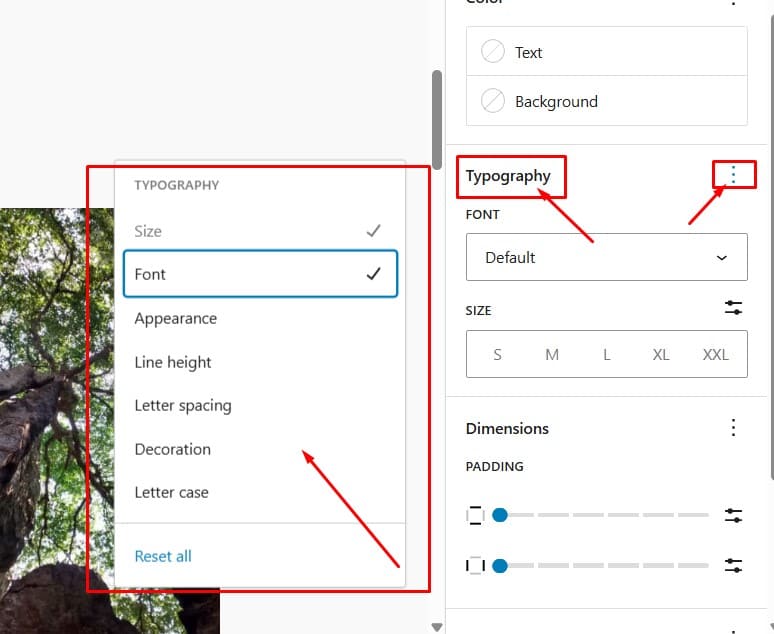
Adjusting Typography Settings
Under the Typography section, you can adjust the font size, weight, and line height of the button text.
Choose a font size and weight that makes the button text readable and visually appealing.
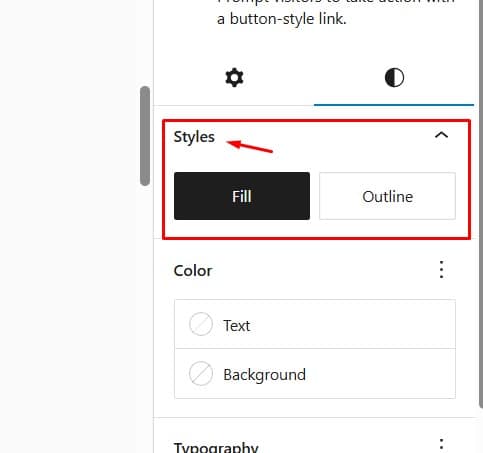
Button Styles (Filled vs. Outlined)
You can choose between a filled button (where the background is solid) or an outlined button (where only the border is visible, and the background is transparent).
Both styles have their use cases, so select the one that best fits your design.
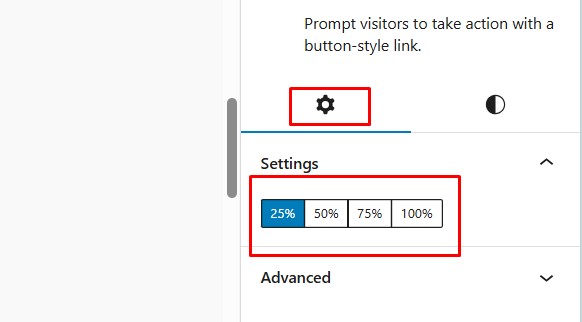
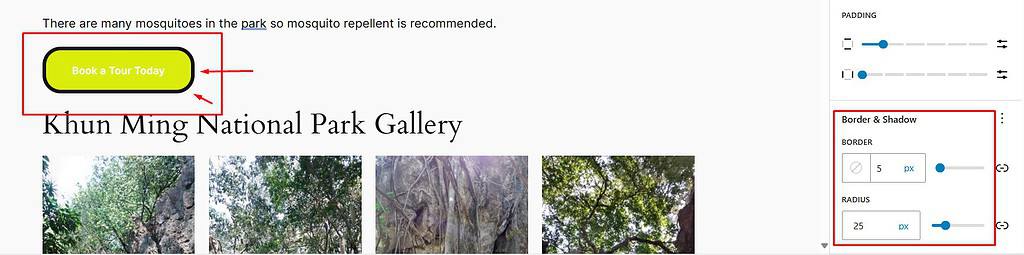
Setting Button Width and Border Radius
You can set the button’s width to a specific percentage.
Use Padding to increase the space between the text and the edge of the button.
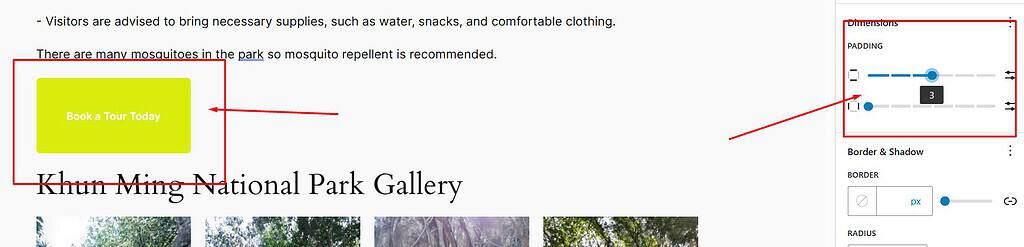
The Border Radius option lets you round the button’s corners, making it more visually appealing.
A small radius will give you subtle rounded corners, while a larger radius will create more of a pill-shaped button.
The Parent Block
In Full Site Editing, the parent block is crucial for organizing and customizing your button.
Role of the Parent Block
A Parent Block is the container that holds your button block along with other blocks, such as columns, groups, or rows.
This container helps organize your content and apply styles uniformly.
For example, if your button is inside a Group block, the parent block (Group) will manage the alignment, background, and spacing of all blocks within it.
Moving the Button Block and Changing the Justification
To move your button, click and drag it to the desired location.
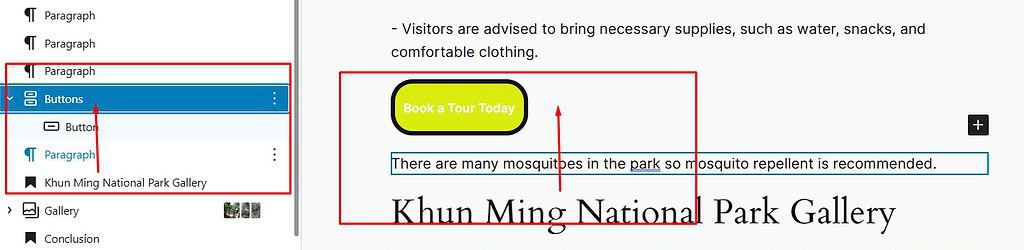
To change the justification (left, center, right), select the alignment option from the block toolbar.
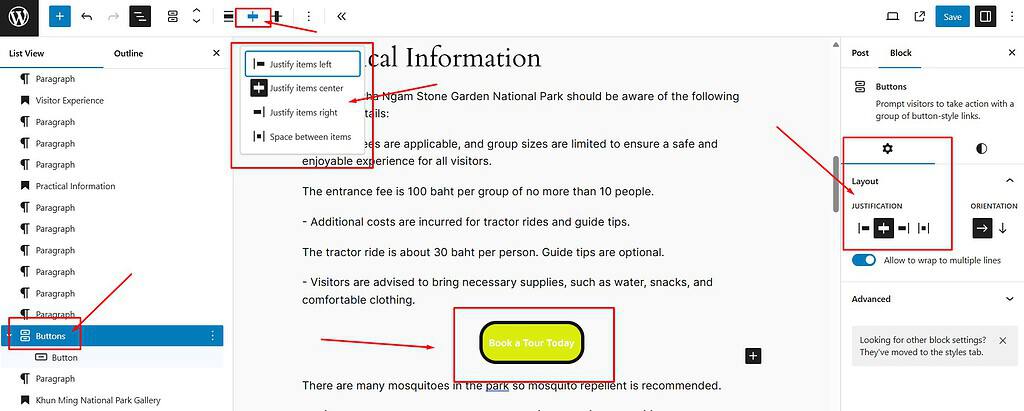
This allows you to position the button as needed, ensuring it aligns well with the overall layout of your site.
These steps and customization options will help you create attractive, functional buttons that enhance your site’s user experience.
Applying Global Styles
To ensure consistency across your website, apply global styles to your buttons.
This way, every button you create will adhere to the same design guidelines, making your site look more cohesive and professional.
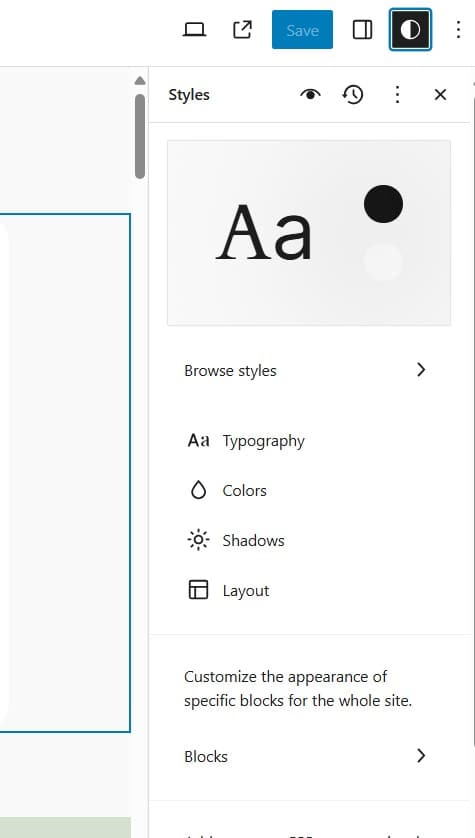
Accessing the Global Styles Settings
Enter the Site Editor from your WordPress dashboard and click on the template preview window.
On the top right corner of the Site Editor, click on the Global Styles icon.
This will open the Global Styles panel, where you can manage the default styles for various elements, including buttons.
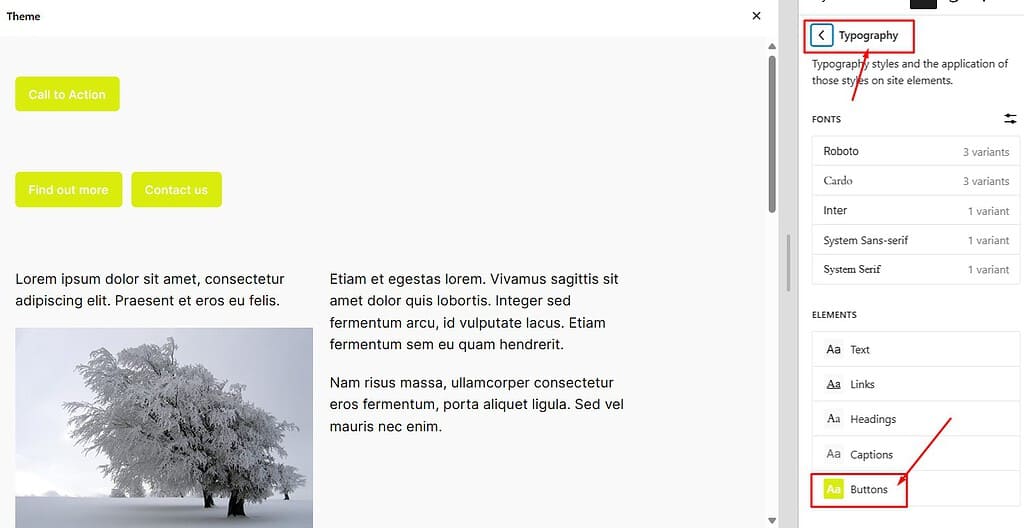
Setting Default Styles for Buttons
Within the Global Styles panel, navigate to the Buttons section.
Here, you can customize the default appearance of all buttons across your site.
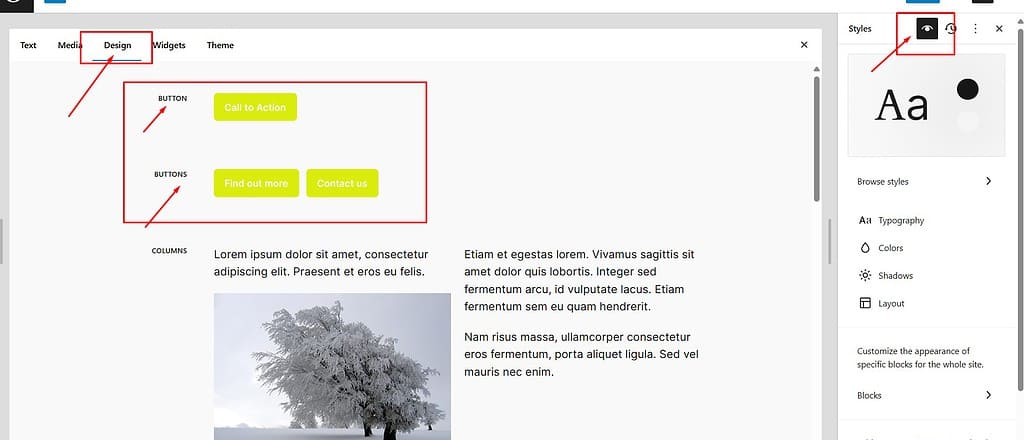
This includes options to adjust text color, background color, typography (font size, weight, etc.), and button shape (border-radius).
By setting these styles globally, any button you add to your site will automatically adapt these settings, ensuring uniformity without needing to customize each button individually.
Saving Your Global Styles
Once you’ve set the desired styles for your buttons, click the Save button to apply these changes across your site.
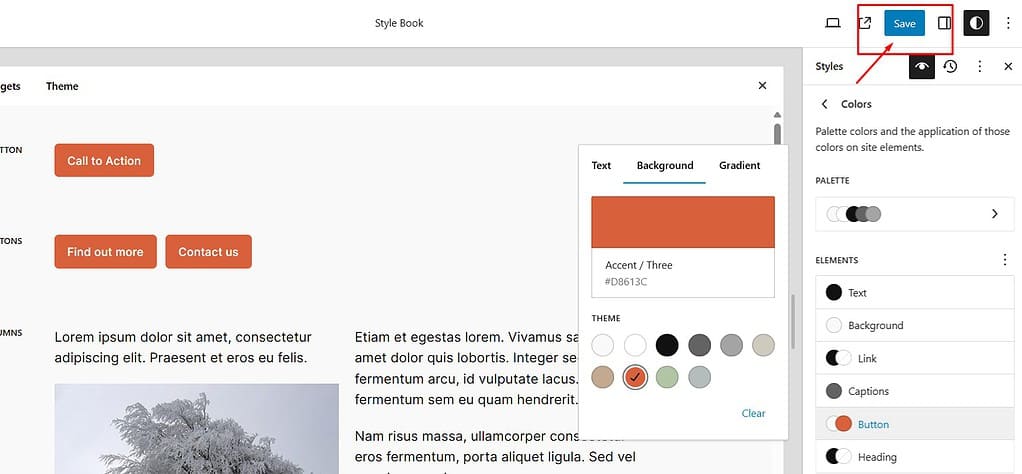
These global styles will now be the default for all buttons, streamlining your design process and maintaining consistency.
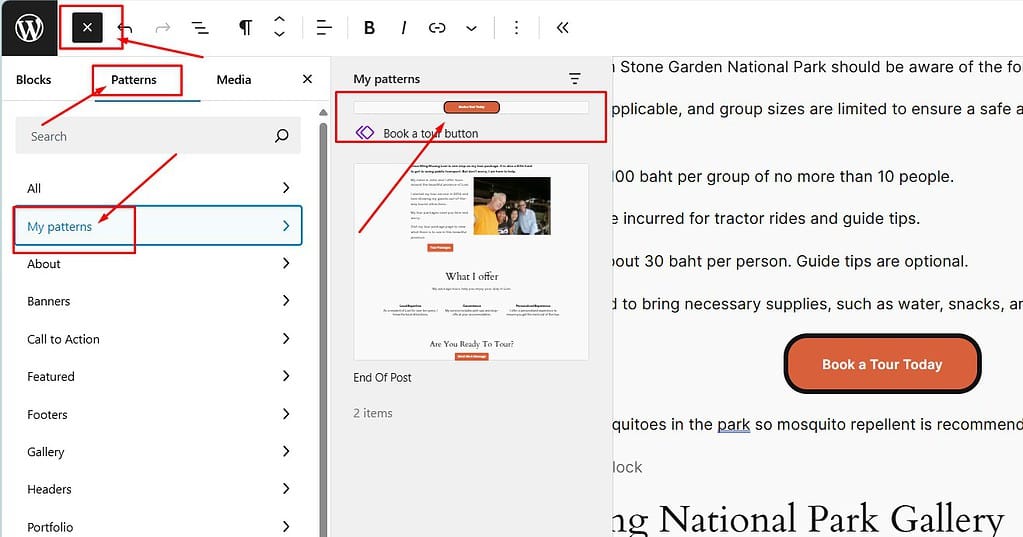
Creating Reusable Patterns
Reusable patterns are a powerful feature in WordPress that can save you time and effort when creating repetitive content like buttons.
Benefits of Reusable Patterns for Buttons
Reusable patterns allow you to create a button design once and reuse it across multiple pages or posts.
This ensures consistency and efficiency, especially when dealing with call-to-action buttons.
For example, if you have a button style for promotions, save it as a reusable pattern and insert it when needed without redesigning it each time.
Steps to Create a Reusable Call-to-Action Button Pattern
After creating and customizing your button, click on the button block to select it.
Open the Block Options menu (three vertical dots) and select Create Pattern.
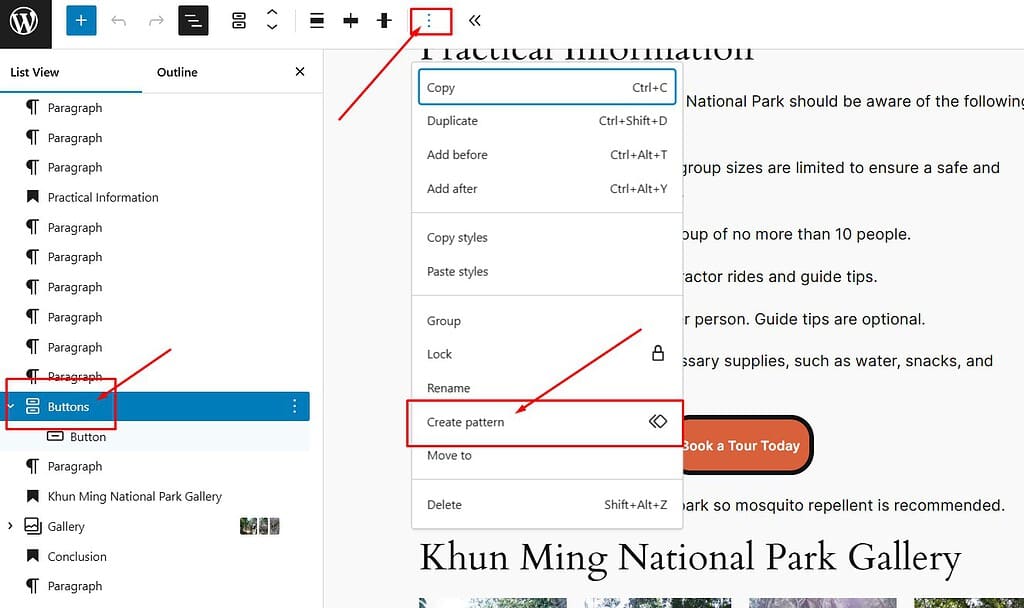
Give your pattern a descriptive name, such as “Promo Button” or “Contact Us Button,” so you can identify it later.
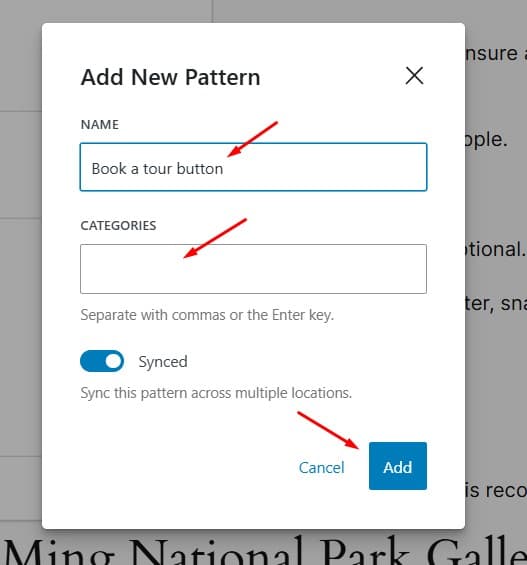
Save the pattern, and it will be available under the My Patterns section in the block inserter for future use.
Video Tutorial
Conclusion
Buttons are crucial in guiding user interaction and improving the overall user experience on your website.
By leveraging the capabilities of Full Site Editing (FSE) in WordPress, you can create, customize, and manage buttons easily, ensuring they align perfectly with your site’s design.
Experimenting with different styles, placements, and global settings can lead to a more cohesive and visually appealing website.
Remember, the more consistent and user-friendly your design, the more likely visitors will engage with your content.
If you found this tutorial helpful, consider leaving a comment. I appreciate your feedback.
Starting a website or blog can be overwhelming, especially with the many decisions and technical details involved.
That’s where I come in—let me handle the setup, optimization, and ongoing support to ensure your online success.
About NewBlogr
At NewBlogr, I am passionate about helping individuals and small businesses launch and grow their online presence.
I specialize in creating custom WordPress websites, offering domain and hosting setup, essential SEO, and continuous support to help you achieve your goals.
My dedication to excellence comes from a desire to see my clients succeed.
I focus exclusively on website creation and support, providing you with a seamless and stress-free experience from start to finish.
Let me help you build and maintain a professional online presence that attracts and engages your audience.
Want to See How a Professional Website Can Help You?
Key Benefits of Our Service
Effortless Setup
I take care of everything from domain registration to website launch, ensuring a smooth and hassle-free process.
Custom Design
My tailored designs ensure your website stands out and reflects your unique brand identity.
Continuous Support
I offer ongoing assistance and updates, ensuring your website remains optimized and effective.
Getting Started with NewBlogr
1. Contact Us
Reach out through my contact page to discuss your needs and goals. I’ll provide a free initial consultation to understand how I can help.
2. Website Planning and Proposal
I’ll review your requirements and present a tailored plan to create and optimize your website.
3. Implementation and Support
Once you approve the plan, I will develop your website and provide ongoing support to ensure sustained growth and engagement.
What We Offer to Elevate Your Online Presence
- Custom WordPress Website Creation
Develop a high-converting, user-friendly website tailored to your needs. - Domain & Hosting Setup
Assist with selecting and setting up your domain and hosting services. - SEO Optimization
Enhance your site’s visibility and drive organic traffic. - Performance Monitoring
Regularly review and optimize your website’s performance.
- Ongoing Updates
Keep your website up-to-date and functioning optimally. - Resources
Provide tutorials and support to help you manage and grow your website. - Customer Support
Offer continuous support to address any issues or updates. - Tailored Strategies
Customize our services to meet your specific goals and needs.
Leave a Reply