
Backing up your WordPress website is essential for safeguarding your hard work and ensuring your online presence remains intact.
Imagine spending countless hours creating content, customizing your site, and building your audience, only to lose everything due to a technical glitch, hacking attempt, or accidental deletion.
Regular backups act as your safety net, allowing you to restore your site quickly and efficiently when disaster strikes.
One of the most user-friendly tools for this purpose is the WPVivid Plugin.
This powerful plugin simplifies the backup and restoration process, making it accessible even for those who may not be tech-savvy.
With WPVivid, you can create backups in just a few clicks, schedule automatic backups, and restore your site whenever needed.
Let’s dive deeper into what WPVivid offers and how you can get started.
What is the WPVivid Plugin?
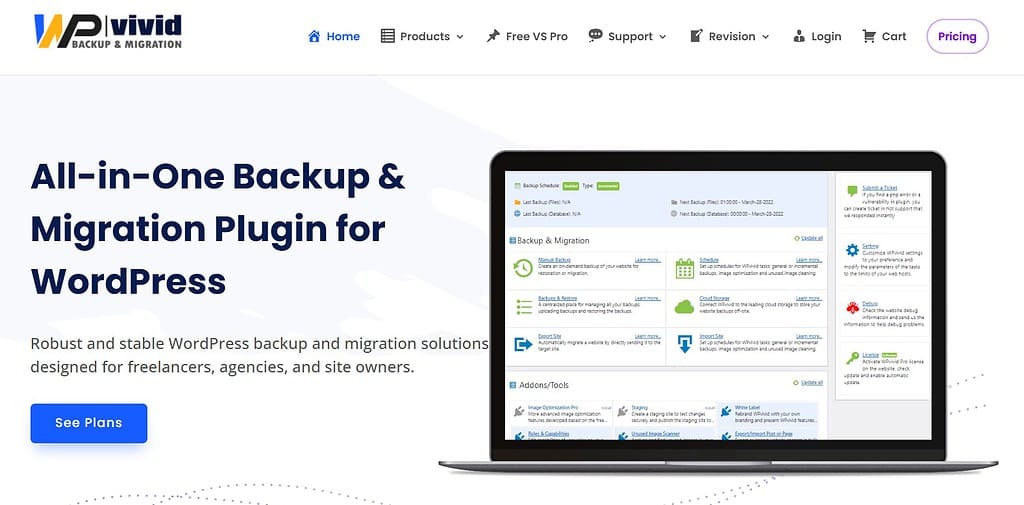
The WPVivid Plugin is an all-in-one solution designed specifically for WordPress users who want to manage their website backups and migrations effortlessly.
This plugin provides a robust backup engine to create, schedule, and manage backups.
Primary Functions of WPVivid
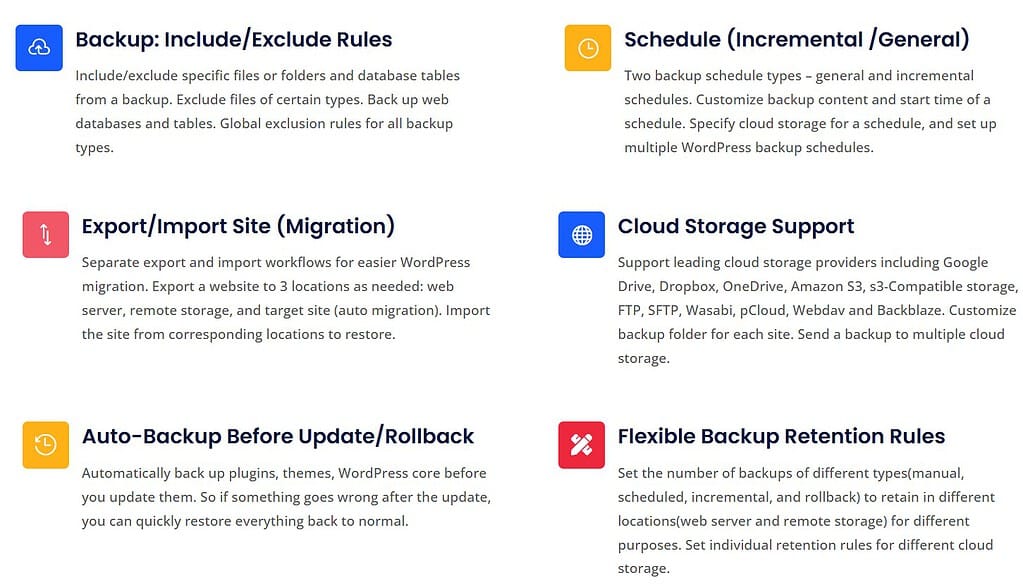
- Backup Creation: Quickly create backups of your entire website, including files, themes, plugins, and databases.
- Scheduled Backups: Set up automatic backups to ensure your site is regularly saved without any manual effort.
- Easy Restoration: Restore your website to a previous state with just a few clicks, minimizing downtime and hassle.
- Migration Capabilities: Seamlessly migrate your site to a new host or domain without the technical headaches often associated with such tasks.
Using a backup plugin like WPVivid is crucial for any WordPress website owner.
It protects your data and gives you peace of mind knowing that your site can be restored quickly in case of mishaps.
Whether you’re a blogger, a business owner, or a developer, having a reliable backup solution is a must.
Installing the WPVivid Plugin
Getting started with WPVivid is straightforward.
Follow this step-by-step guide to install the plugin on your WordPress site:
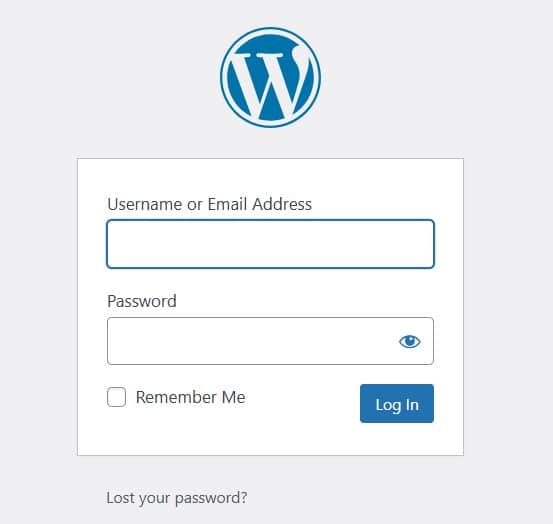
Navigate to the WordPress Dashboard: Log in to your WordPress admin area.
Go to Plugins > Add New: On the left sidebar, hover over “Plugins” and click on “Add New.”
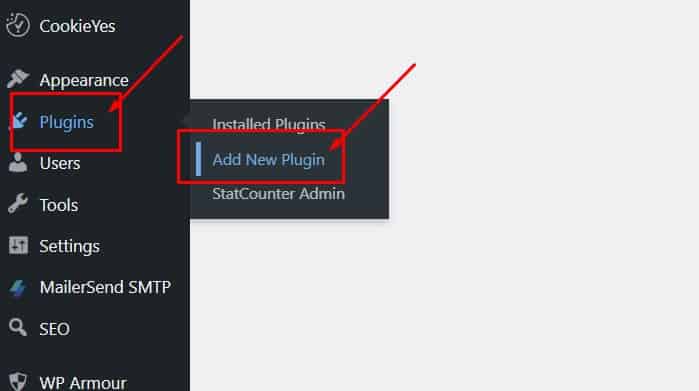
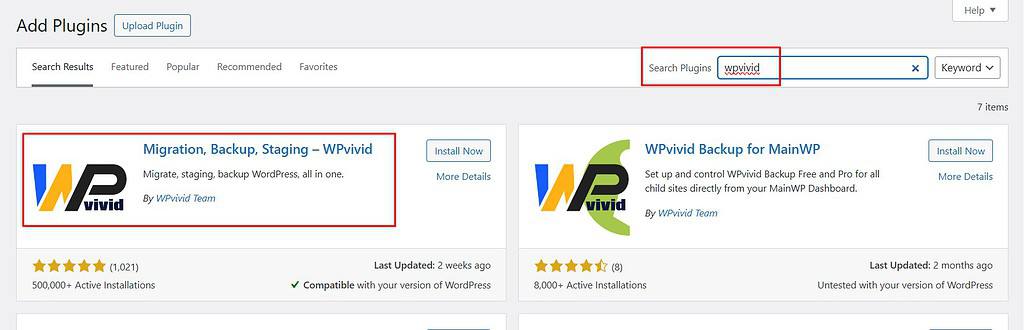
Search for “WPVivid”: In the search bar, type “WPVivid”.
You’ll see the WPVivid Backup Plugin in the search results.
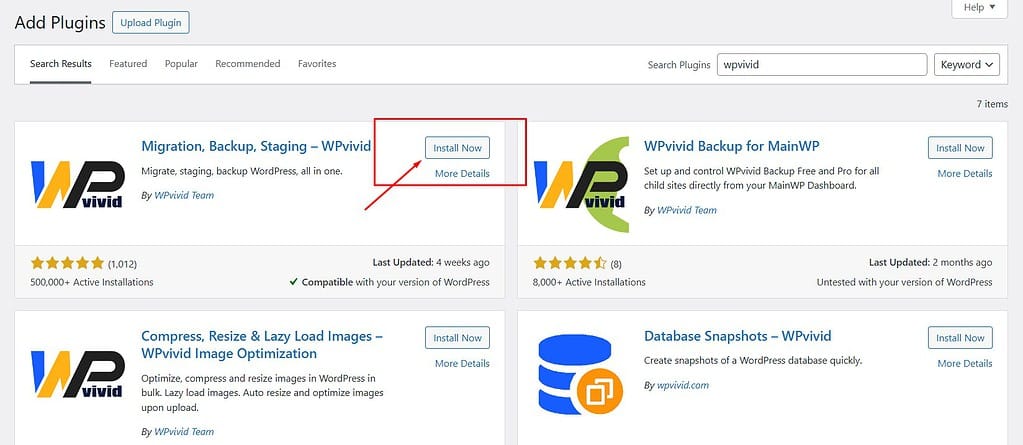
Click “Install Now”: Once you find the WPVivid plugin, click the “Install Now” button.
Activate the Plugin: After the installation is complete, click the “Activate” button to enable the plugin on your site.
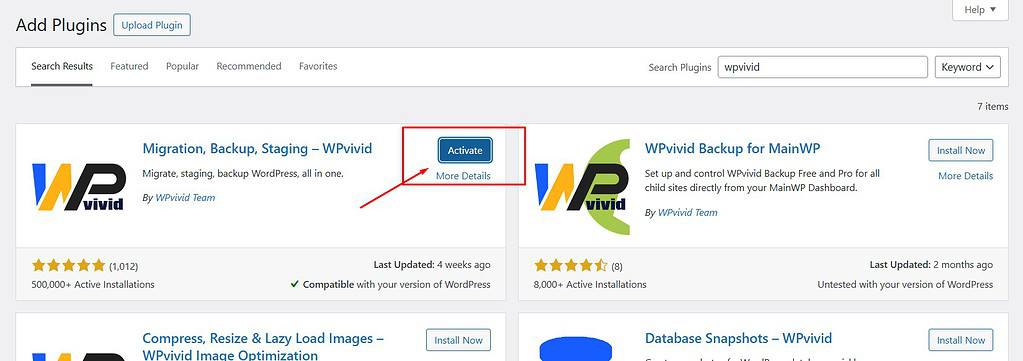
Once activated, you’ll have access to the WPVivid menu in your dashboard, where you can start creating backups and exploring its features.
With just a few clicks, you can secure your WordPress website against potential data loss!
Creating a Backup
Creating a backup of your WordPress website using the WPVivid Plugin is a straightforward process that can be completed in just a few clicks.
Here’s how to do it:
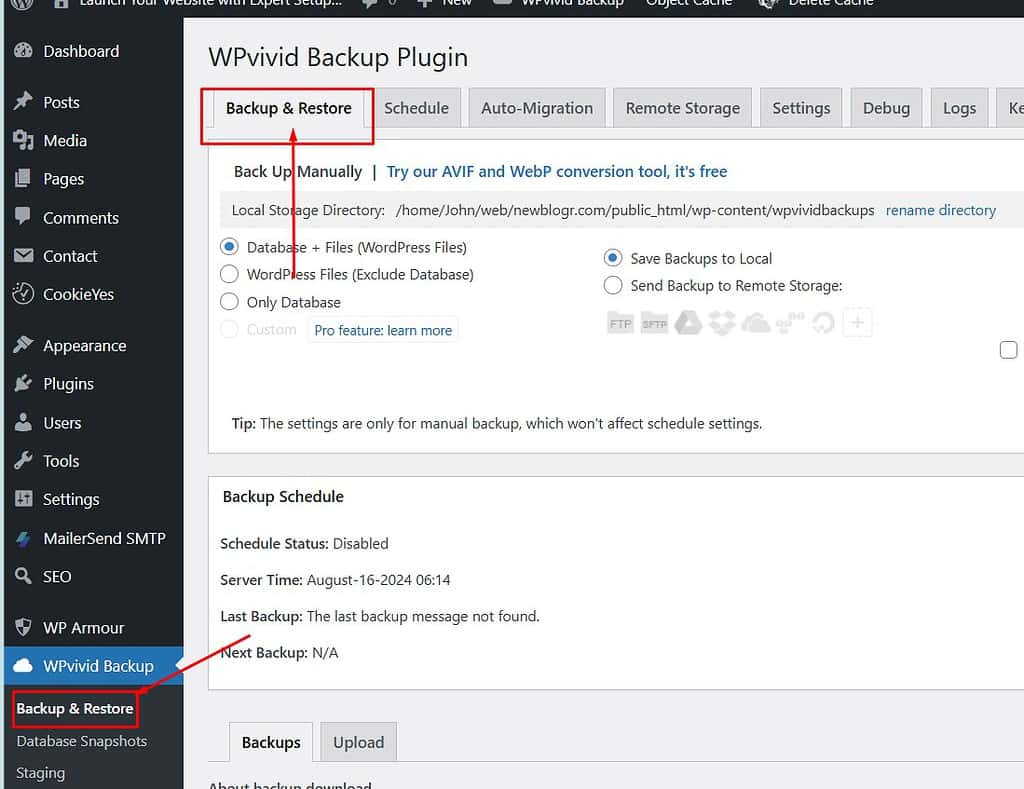
Access the WPVivid Menu: In your WordPress dashboard, locate the WPVivid menu on the left sidebar.
Click on it to open the plugin’s interface.
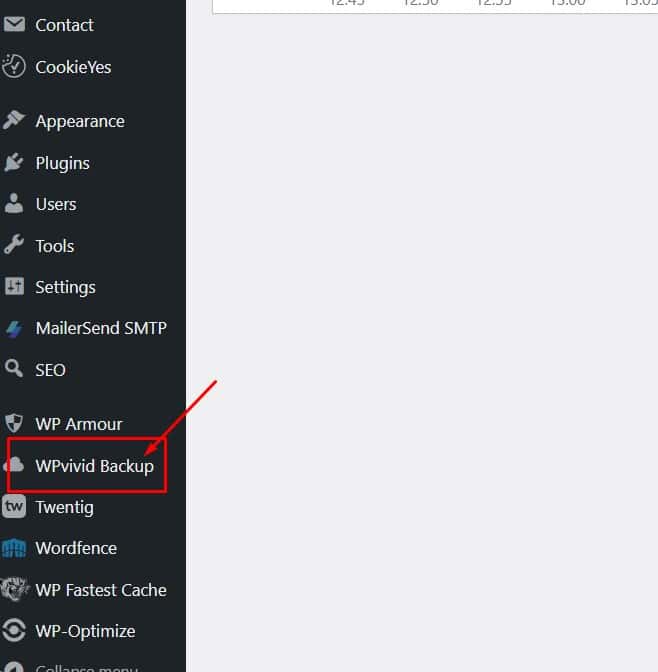
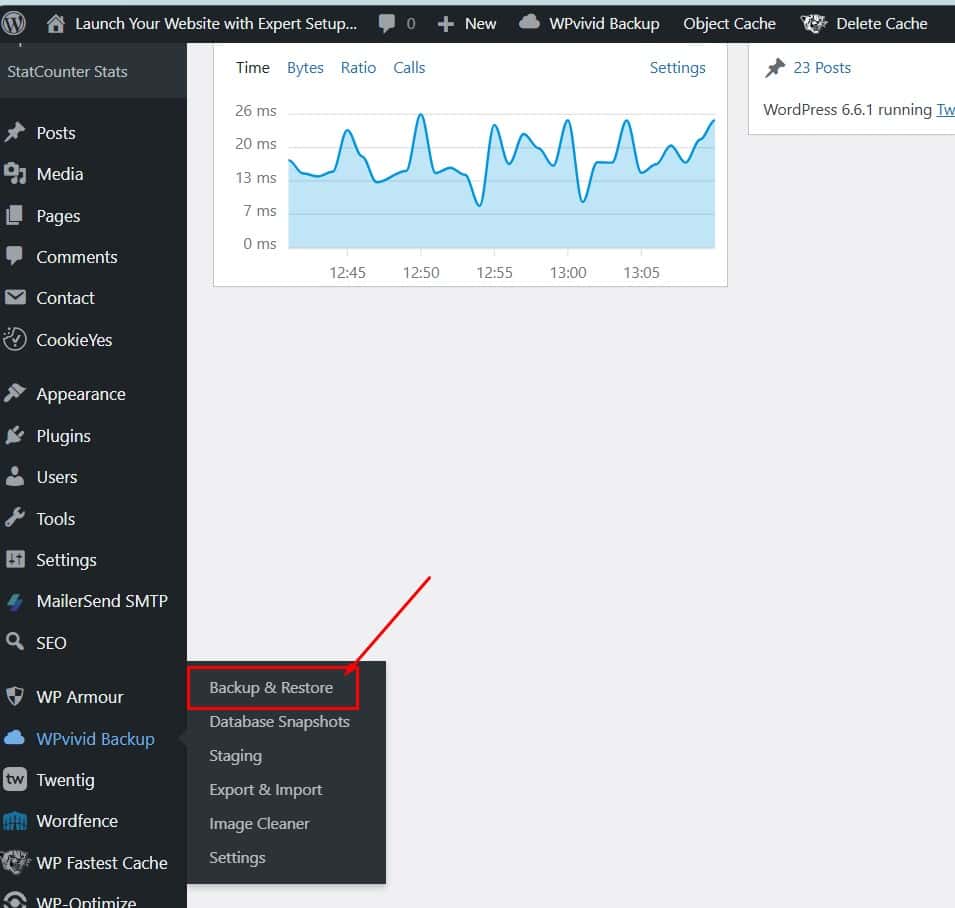
Click on “Backup and Restore”: Once in the WPVivid menu, select the “Backup and Restore” option.
This will take you to the section where you can manage your backups.
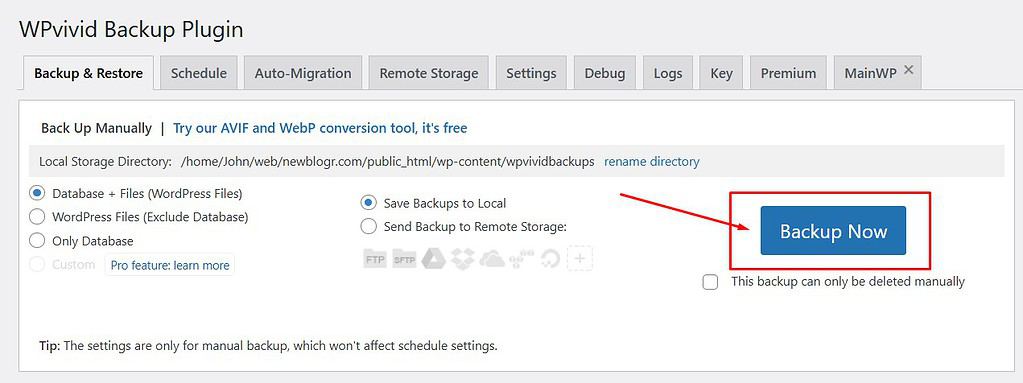
Click the “Backup Now” Button: You will see a prominent blue button labeled “Backup Now.”
Click this button to start the backup process.
Backup Process Duration
The time it takes to create a backup will vary depending on the size of your website and the amount of content it contains.
For smaller sites, the backup may only take a few minutes, while larger sites with extensive media libraries or complex configurations may take longer.
During this time, be patient and allow WPVivid to complete the backup without interruption.
Importance of External Storage for Backup Files
Once the backup is complete, I recommend storing the backup files externally.
Use a USB drive or cloud storage services like Google Drive or Dropbox.
Keeping your backups in a separate location ensures they are safe even if something happens to your website or hosting server.
Managing Backup Files
Proper management of your backup files is crucial for maintaining and securing a WordPress site.
Here are some best practices to follow:
Downloading the Backup File to Your Computer
After creating a backup, download the backup file to your local computer.
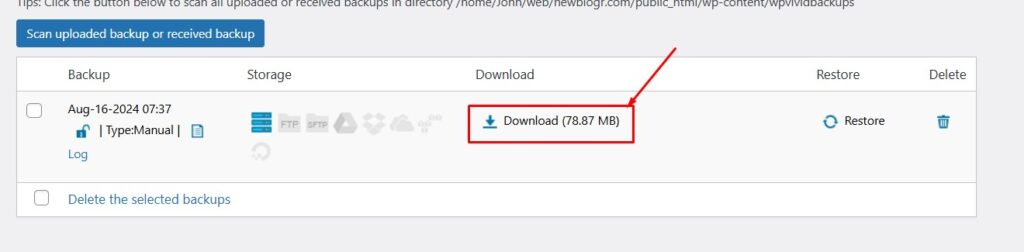
This provides an additional layer of security and ensures you have access to your backup even if your website experiences issues.
Keeping the Original File Name
When saving your backup file, keep the original file name intact.
Changing the file name can lead to complications during restoration, potentially causing errors or confusion.
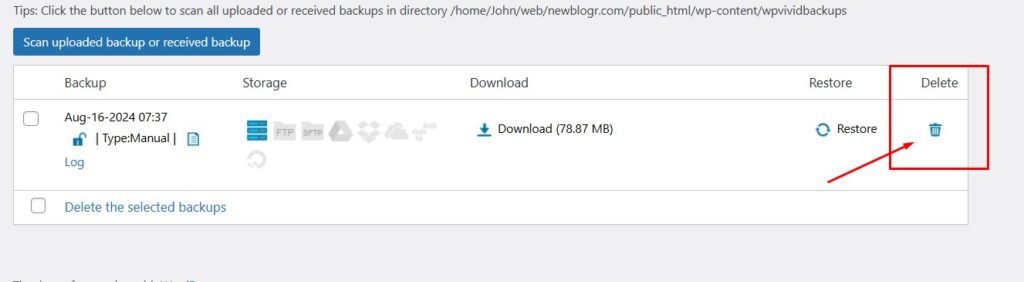
Removing Backup Files from the Server
To save resources, especially if you are using shared hosting with limited storage, remove backup files from your server after downloading them.
You can delete the backup file from the WPVivid interface by clicking the “Delete” button next to the file you downloaded.
Checking Storage Allocation via the Hosting Provider’s cPanel
Regularly check your storage allocation through your hosting provider’s cPanel.
This will help you monitor your available space and ensure your website runs smoothly without any storage-related issues.
Restoring Your Website
If you ever need to restore your WordPress website, WPVivid makes the process simple and efficient.
Follow these steps to restore your site:
Go to the “Backup and Restore” Tab
Navigate back to the WPVivid menu in your WordPress dashboard and select the “Backup and Restore” tab.
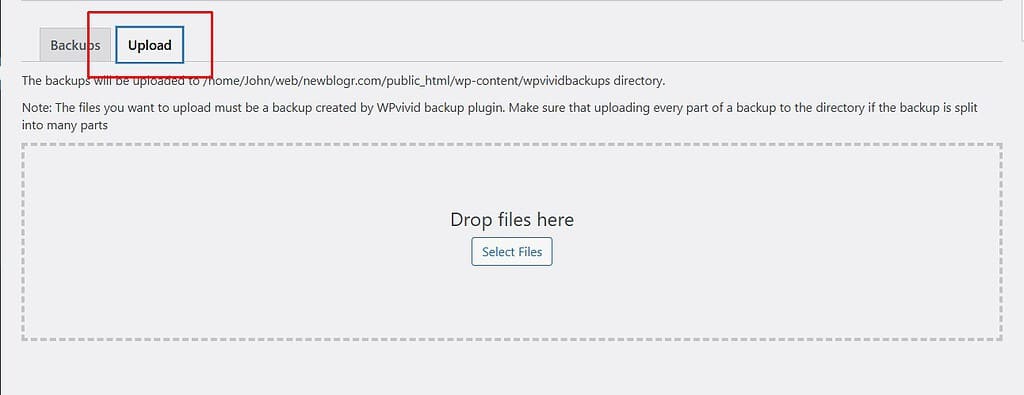
Click on the “Upload” Tab
In this section, you’ll find an “Upload” tab.
Click on it to begin the restoration process.
Select the Backup File
Choose the backup file you previously downloaded from your computer.
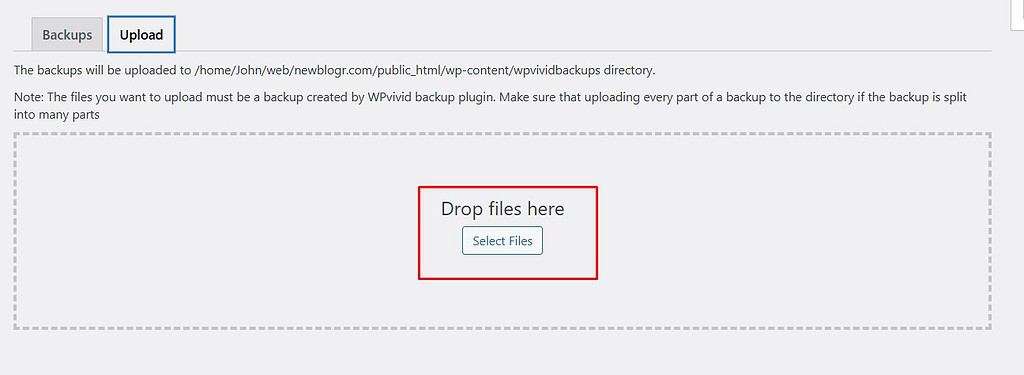
This is the file that contains the most recent version of your website.
Click “Restore”
After selecting the backup file, click the “Restore” button to initiate the restoration process.
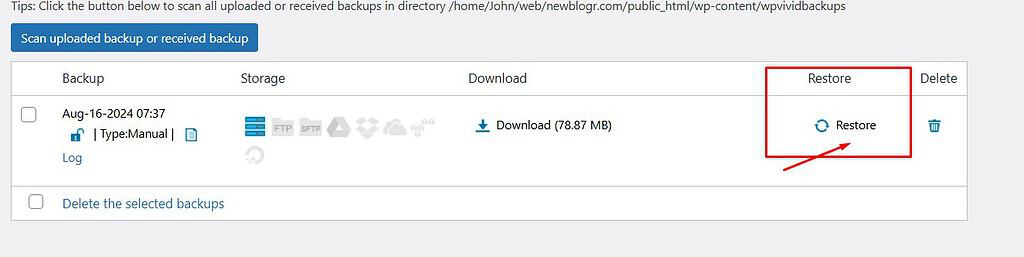
WPVivid will work its magic, and your website will be restored to the state it was in when the backup was created.
Logging Back into the WordPress Dashboard
Once the restoration is complete, you’ll need to log back into your WordPress dashboard using your usual credentials.
You’ll find that your website has been successfully restored, allowing you to continue managing your content without any hiccups.
Video Tutorial
Conclusion
In summary, backing up and restoring your WordPress website using the WPVivid Plugin is a simple yet vital task that every website owner should prioritize.
With the steps outlined above, you can easily create backups, manage your files, and restore your site whenever necessary.
Regular backups are your best defense against data loss, so make it a habit to back up your website frequently.
If you want to improve your WordPress website further, check out my new post on How to Set Homepage Titles & Descriptions in WordPress.
This guide will help you optimize your site for search engines and improve visibility.
Properly setting titles and descriptions is crucial for attracting visitors and ensuring they find the content they need.
Don’t miss these essential tips to elevate your website’s performance!
Starting a website or blog can be overwhelming, especially with the many decisions and technical details involved.
That’s where I come in—let me handle the setup, optimization, and ongoing support to ensure your online success.
About NewBlogr
At NewBlogr, I am passionate about helping individuals and small businesses launch and grow their online presence.
I specialize in creating custom WordPress websites, offering domain and hosting setup, essential SEO, and continuous support to help you achieve your goals.
My dedication to excellence comes from a desire to see my clients succeed.
I focus exclusively on website creation and support, providing you with a seamless and stress-free experience from start to finish.
Let me help you build and maintain a professional online presence that attracts and engages your audience.
Want to See How a Professional Website Can Help You?
Key Benefits of Our Service
Effortless Setup
I take care of everything from domain registration to website launch, ensuring a smooth and hassle-free process.
Custom Design
My tailored designs ensure your website stands out and reflects your unique brand identity.
Continuous Support
I offer ongoing assistance and updates, ensuring your website remains optimized and effective.
Getting Started with NewBlogr
1. Contact Us
Reach out through my contact page to discuss your needs and goals. I’ll provide a free initial consultation to understand how I can help.
2. Website Planning and Proposal
I’ll review your requirements and present a tailored plan to create and optimize your website.
3. Implementation and Support
Once you approve the plan, I will develop your website and provide ongoing support to ensure sustained growth and engagement.
What We Offer to Elevate Your Online Presence
- Custom WordPress Website Creation
Develop a high-converting, user-friendly website tailored to your needs. - Domain & Hosting Setup
Assist with selecting and setting up your domain and hosting services. - SEO Optimization
Enhance your site’s visibility and drive organic traffic. - Performance Monitoring
Regularly review and optimize your website’s performance.
- Ongoing Updates
Keep your website up-to-date and functioning optimally. - Resources
Provide tutorials and support to help you manage and grow your website. - Customer Support
Offer continuous support to address any issues or updates. - Tailored Strategies
Customize our services to meet your specific goals and needs.
Leave a Reply